


أداة ساعة رقمية
كيفية إضافة ساعة رقمية إلى شاشة اللافتات الرقمية
اعرض الوقت الحالي مع أنماط وتنسيقات ساعة قابلة للتخصيص.
المقدمة
سواء كنت تدير مكتبًا مؤسسيًا بعدة مناطق زمنية، أو ردهة فندق تستقبل زوارًا دوليين، أو لوحة عرض في المطار، أو متجرًا للبيع بالتجزئة، فإن إضافة أداة الساعة الرقمية إلى شاشة اللافتات الرقمية الخاصة بك يجعل عرضك أذكى وأكثر احترافية ومفيدًا فورًا لجمهورك.
يتضمن برنامج Wilyer لللافتات الرقمية ميزة تُسمى “أداة الساعة” تتيح للمستخدمين عرض ساعة واحدة أو أكثر، بما في ذلك ساعة العالم التي تعرض المناطق الزمنية الدولية، على شاشة اللافتات الرقمية نفسها. في هذا المستند، ستتعلم بالضبط كيفية استخدام هذه الميزة في بضع دقائق فقط.
لماذا تستخدم أداة الساعة على شاشة العرض الخاصة بك
إضافة أداة الساعة إلى شاشة اللافتات الرقمية الخاصة بك لها عدة مزايا:
الوعي بالوقت الفعلي: يمكن لزوارك وموظفيك و/أو عملائك معرفة الوقت الحالي فورًا دون الحاجة إلى استخدام هواتفهم.
عرض ساعات المكاتب العالمية: اعرض عدة ساعات لعدة مناطق زمنية في الوقت نفسه. هذه الميزة مفيدة بشكل خاص للشركات التي لديها فرق عمل دولية.
عرض احترافي: تُظهر أداة الساعة على شاشة اللافتات الرقمية لجمهورك أن العرض نشط ويتمتّع بصيانة جيدة.
أداة عرض ساعة متعددة المناطق الزمنية: نسّق جداول الأعمال عبر عدة فرق دولية في الوقت نفسه.
أداة عرض الساعة الدولية: مثالية للاستخدام في المطار أو الفندق أو قاعة التداول أو بهو الشركة و/أو أي نشاط تجاري يخدم عملاء دوليين.
قبل أن تبدأ
يرجى التأكد من توفر ما يلي:
حساب Wilyer نشط (سجّل عبر wilyer.com )
شاشة لافتات رقمية مسجلة في لوحة تحكم Wilyer الخاصة بك
إلمام أساسي بواجهة Wilyer - لا يلزم وجود خبرة تقنية.
خطوة بخطوة: إضافة أداة ساعة رقمية
اتبع هذه الخطوات لإعداد ونشر أداة الساعة الرقمية على شاشات اللافتات الرقمية الخاصة بك:
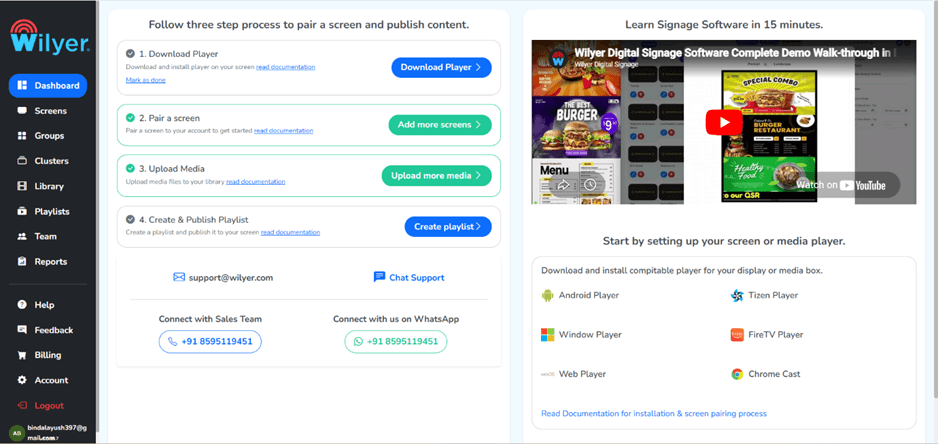
الخطوة 1: انتقل إلى لوحة تحكم Wilyer
أولًا، ستحتاج إلى تسجيل الدخول إلى حساب Wilyer الخاص بك والوصول إلى لوحة التحكم الرئيسية. هذه هي المنطقة المركزية في واجهة Wilyer حيث يمكنك التحكم في كل ما يتعلق بشاشات اللافتات الرقمية الخاصة بك والوصول إليه. قد ترغب للحظة في التعرف على قائمة التنقل الموجودة على اليسار، لأنك ستحتاج إليها طوال عملية الإعداد.
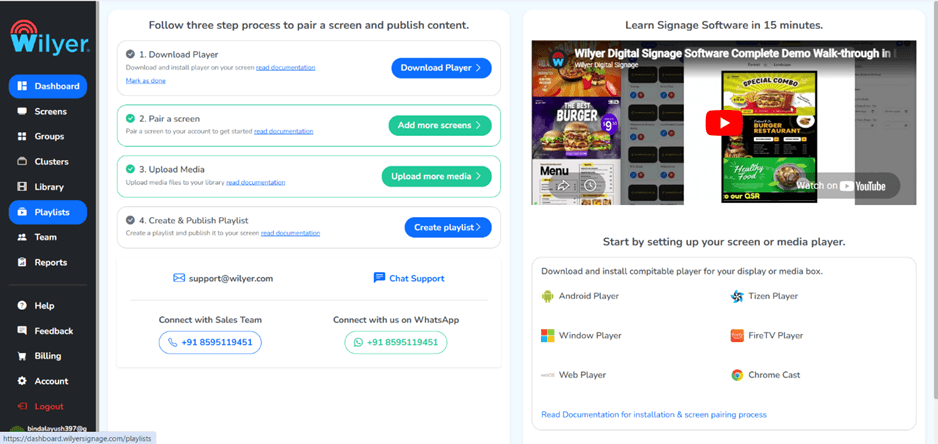
الخطوة 2: انتقل إلى قسم قائمة التشغيل
من قائمة التنقل الموجودة على اليسار، ستحتاج إلى النقر على قسم “قائمة التشغيل”. هذا القسم هو جوهر Wilyer، لأنه يتيح لك تجميع الأدوات في قوائم تشغيل لعرضها بسلاسة على شاشاتك الرقمية. ستظهر جميع قوائم التشغيل التي أنشأتها في هذا القسم.
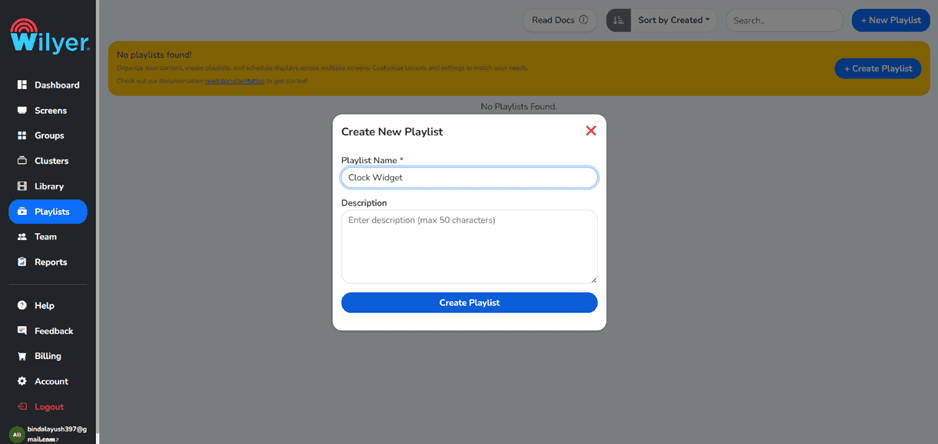
الخطوة 3: انقر على زر “+ إنشاء قائمة تشغيل”
من داخل قسم قائمة التشغيل، انقر على زر “+ إنشاء قائمة تشغيل” لبدء إنشاء قائمة التشغيل الخاصة بك. ستحتوي هذه القائمة على أداة الساعة وأي محتوى آخر ترغب في عرضه على شاشات اللافتات الرقمية الخاصة بك.

الخطوة 4: املأ بياناتك وأنشئ قوائم التشغيل الخاصة بك
ستظهر لك نافذة نموذج تطلب معلومات قائمة التشغيل الخاصة بك. أدخل اسمًا وصفيًا وسهل الفهم لقائمة التشغيل، مثل “عرض ساعة المكتب” أو “شاشة عرض ساعة العالم”، واملأ بقية الحقول.
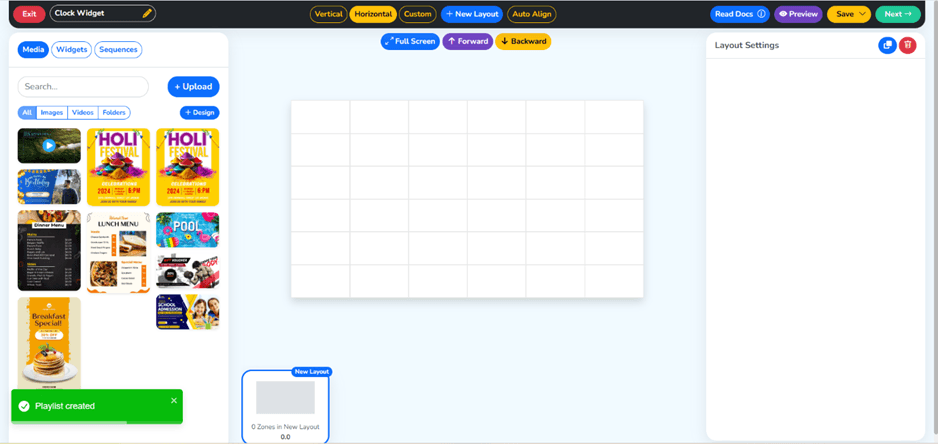
الخطوة 5: تم إنشاء قائمة التشغيل الخاصة بك
بمجرد الانتهاء من ملء النموذج، سترى قائمة التشغيل الخاصة بك معروضة في قسم قائمة التشغيل، مما يؤكد أنك أنشأت قائمة تشغيل بنجاح.
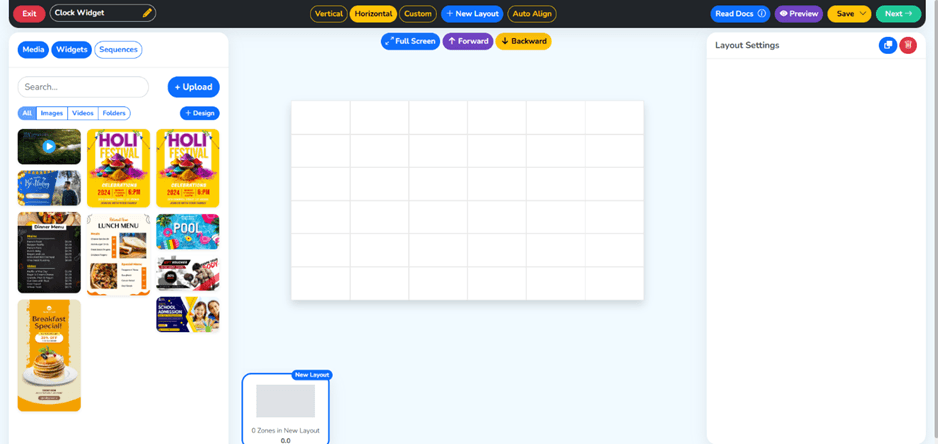
الخطوة 6: انتقل إلى قسم الأدوات
من قائمة التنقل اليسرى، انتقل إلى قسم الأدوات. يحتوي هذا القسم على جميع أدوات المحتوى التي تقدمها Wilyer، بما في ذلك أداة شريط الأخبار، وأدوات وسائل التواصل الاجتماعي، وأداة الطقس، وأداة الساعة. استكشف الأدوات المختلفة التي يمكنك عرضها على شاشاتك الرقمية بالإضافة إلى الساعة.
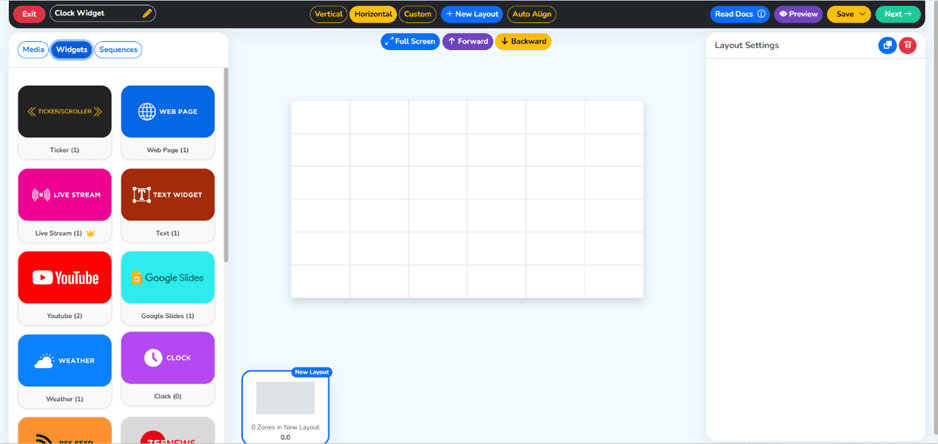
الخطوة 7: انقر على أداة الساعة
الخطوة التالية هي النقر على أداة الساعة ضمن قسم الأدوات. هذه أداة متعددة الاستخدامات لأنها يمكن أن تعرض تنسيقات مختلفة للساعة. لذلك يمكن استخدامها في سيناريوهات مختلفة، بدءًا من عرض ساعة محلية وحتى أداة عرض ساعة دولية للافتات الرقمية تعرض مناطق زمنية متعددة في الوقت نفسه على شاشة واحدة للجمهور العالمي.
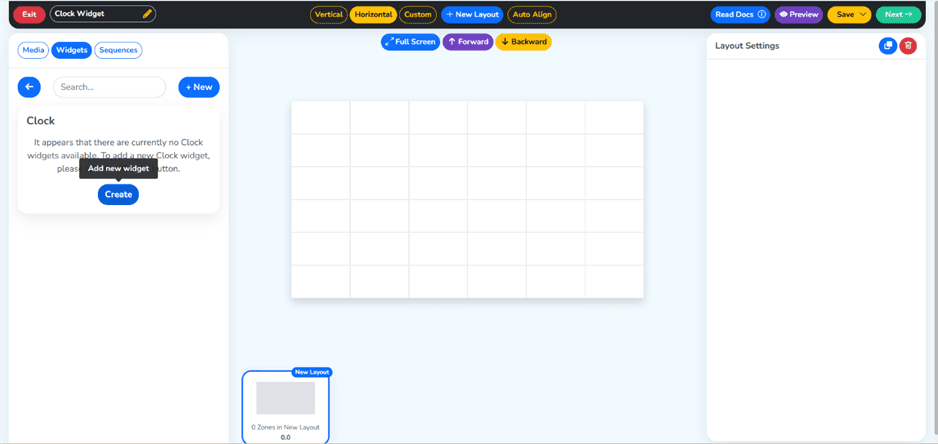
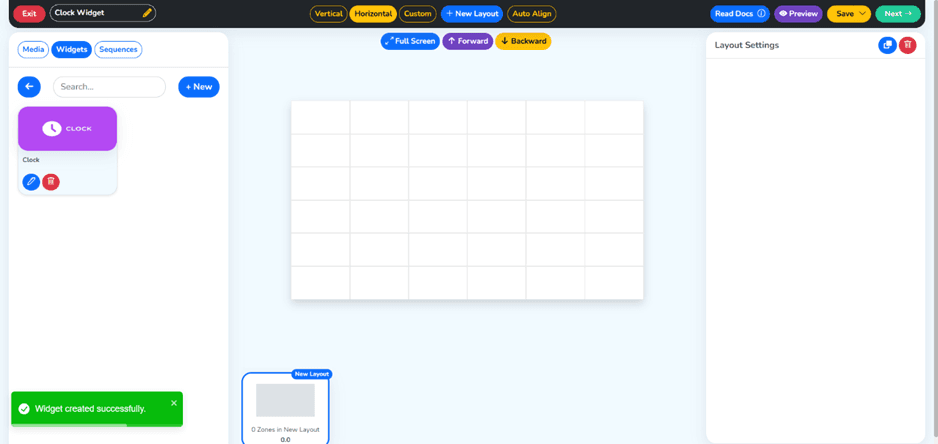
الخطوة 8: أنشئ أداة جديدة
بعد اختيار أداة الساعة، ستنقر بعد ذلك على خيار إنشاء أداة جديدة. سيمنحك ذلك الوصول إلى إعدادات الأداة، حيث يمكنك تخصيص أداة الساعة بالكامل وفقًا لمتطلباتك.
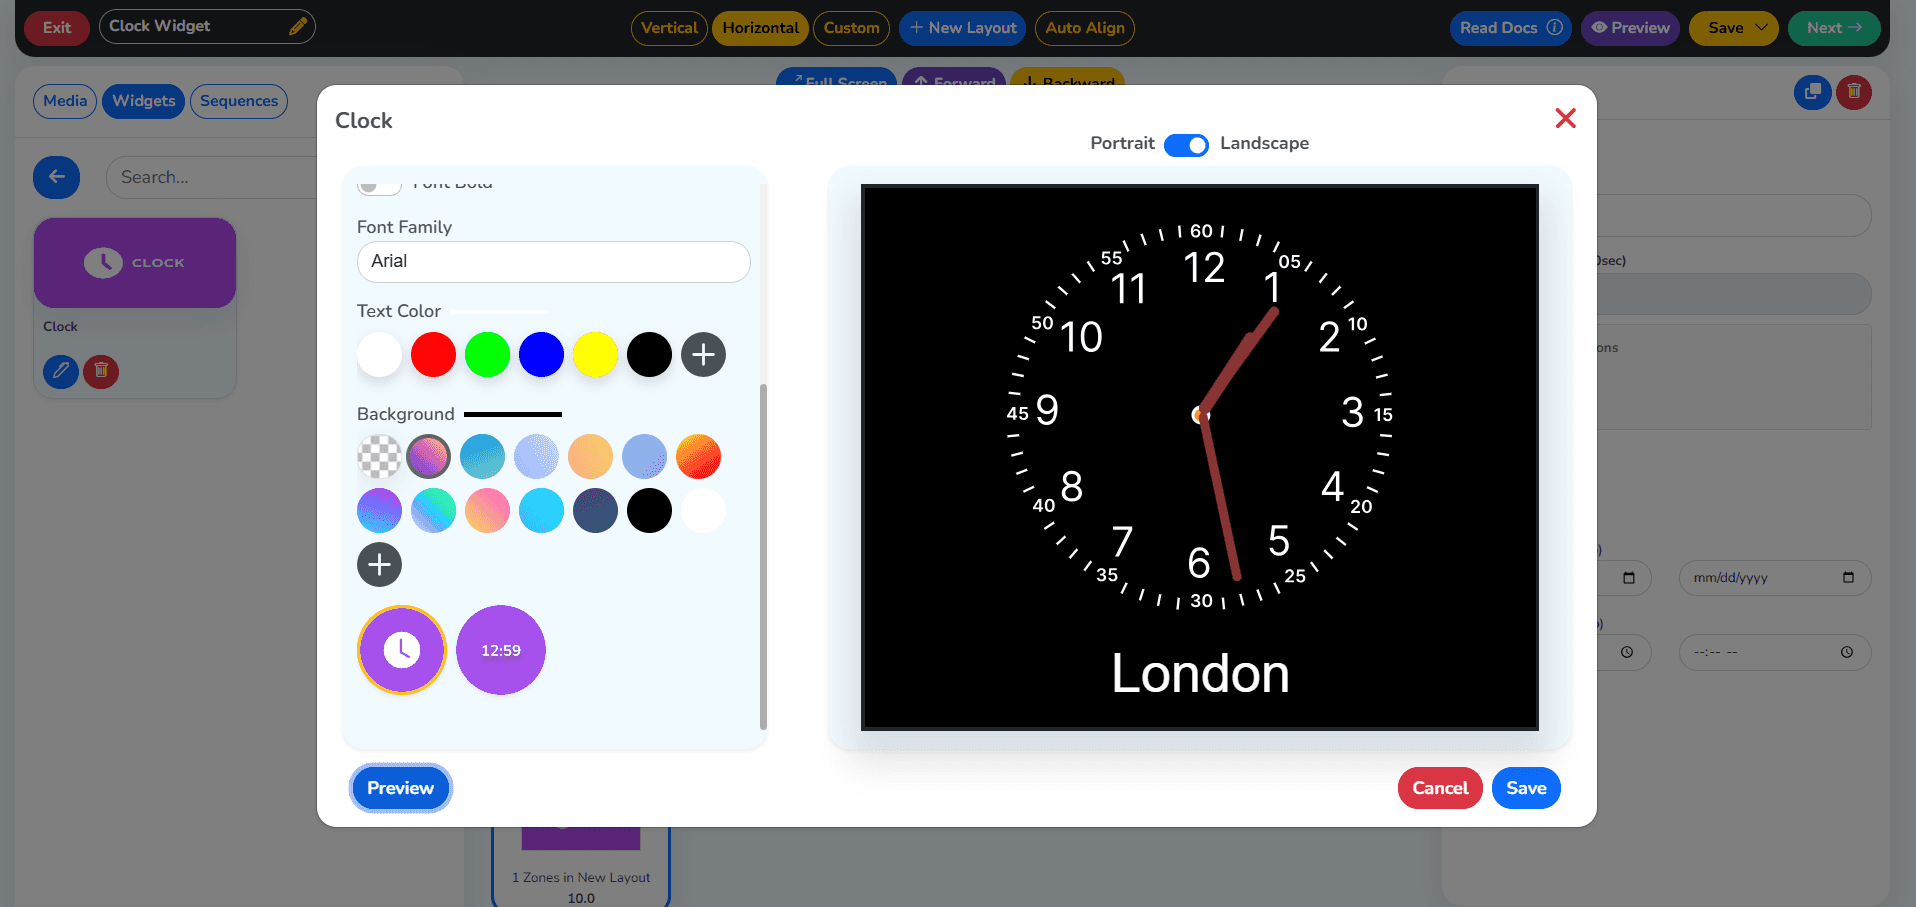
الخطوة 9: املأ بياناتك وانقر على زر الحفظ
الخطوة التالية هي إدخال متطلباتك في الحقول المخصصة لإنشاء أداة الساعة. على سبيل المثال، يمكنك اختيار المنطقة الزمنية المفضلة لديك لأداة ساعة رقمية لمنطقة زمنية واحدة، والاختيار بين تنسيق 12 ساعة و24 ساعة، وتخصيص نمط الساعة. بعد إكمال متطلباتك، ستنقر على زر الحفظ.
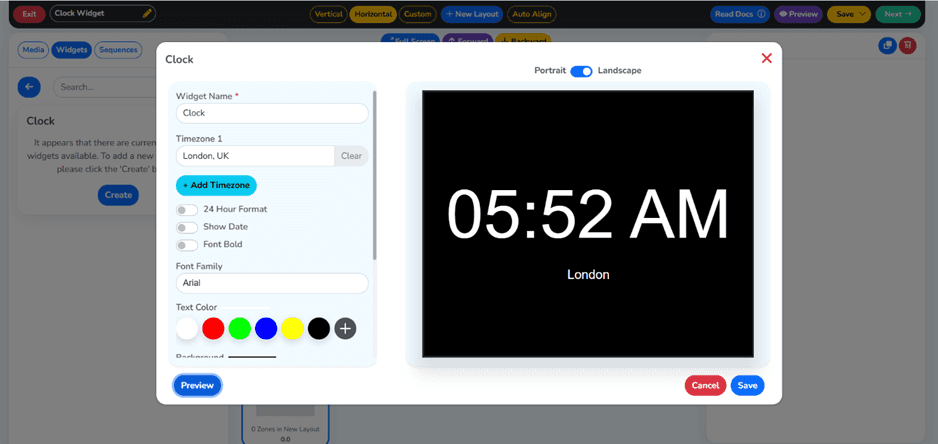
اختر نمط الساعة المفضل لديك بناءً على احتياجات العرض. استخدم ساعة تناظرية لمظهر كلاسيكي وجذاب بصريًا، أو ساعة رقمية لقراءة دقيقة للوقت. كلا الخيارين يعززان عرضك من خلال تقديم معلومات واضحة وفورية بتنسيق احترافي.
الخطوة 10: تم إنشاء أداتك بنجاح
بعد إدخال متطلباتك في الحقول المخصصة، سترى رسالة تشير إلى أنه تم إنشاء أداة الساعة بنجاح. يمكنك إنشاء أداة ساعة إضافية لمناطق زمنية مختلفة أو أنماط عرض مختلفة وإضافتها إلى قائمة التشغيل نفسها أو إلى قوائم تشغيل مختلفة.
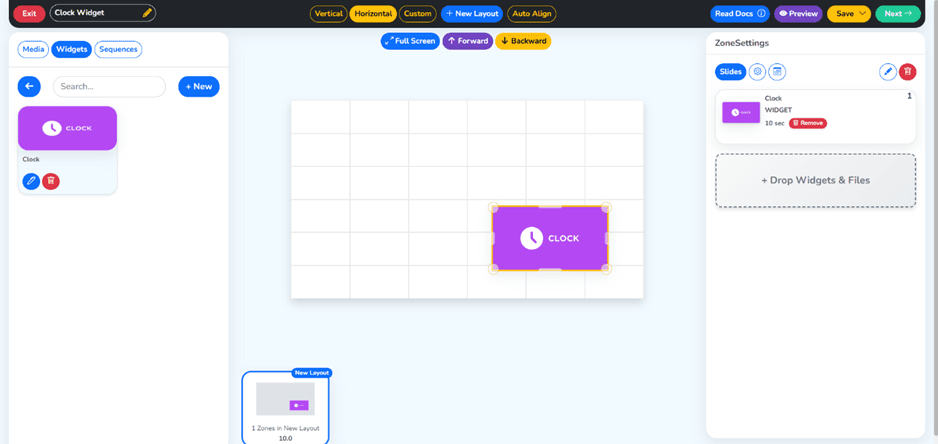
الخطوة 11: اسحب أداة الساعة وأفلتها في قائمة التشغيل
بعد ذلك، ارجع إلى قائمة التشغيل الخاصة بك وأضف أداة الساعة عن طريق سحبها من مكتبة الأدوات وإفلاتها داخل قائمة التشغيل. يمكنك نقل الأداة داخل قائمة التشغيل ووضعها بجانب عناصر محتوى أخرى لإنشاء شاشة اللافتات الرقمية الكاملة الخاصة بك.
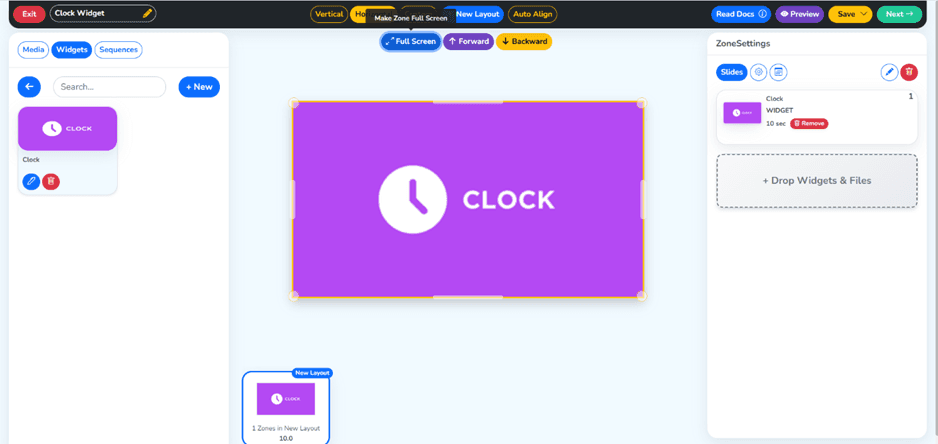
الخطوة 12: انقر على ملء الشاشة وزر التالي الأخضر في أعلى اليمين
بعد إنشاء قائمة التشغيل الخاصة بك، انقر على زر المعاينة بملء الشاشة لترى بالضبط كيف ستظهر أداة الساعة على شاشة اللافتات الرقمية الخاصة بك. احرص على مراجعة عرض أداة الساعة من حيث حجم واجهة الساعة، وعرض الوقت، وتسميات المناطق الزمنية، والمظهر العام للعرض. بعد ذلك، انقر على زر التالي الموجود في الزاوية العلوية اليمنى من العرض.
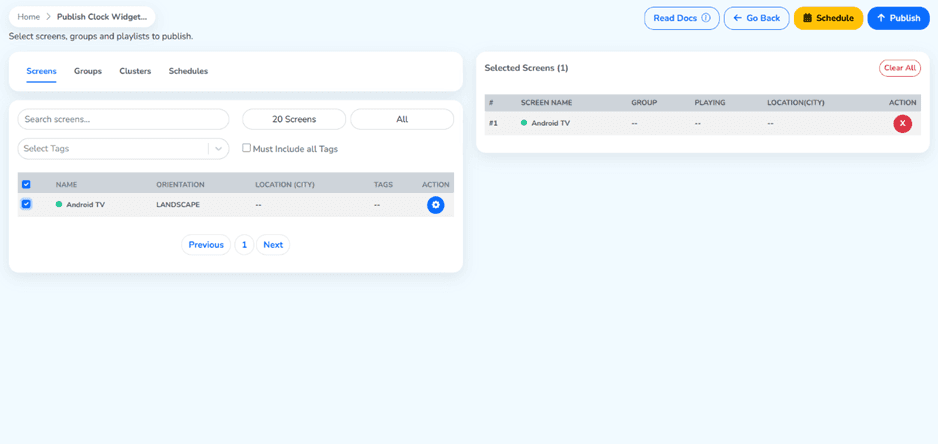
الخطوة 13: حدّد شاشتك وانقر على زر النشر
في هذه المرحلة، سيُطلب منك اختيار شاشة اللافتات الرقمية التي تريد نشر قائمة تشغيل الساعة عليها. يتم ذلك باختيار شاشة اللافتات الرقمية المطلوبة من قائمة شاشات اللافتات الرقمية المسجلة في حساب Wilyer الخاص بك. بعد التأكد من أن شاشة اللافتات الرقمية المختارة هي الصحيحة، انقر على زر النشر لنشر قائمة التشغيل.
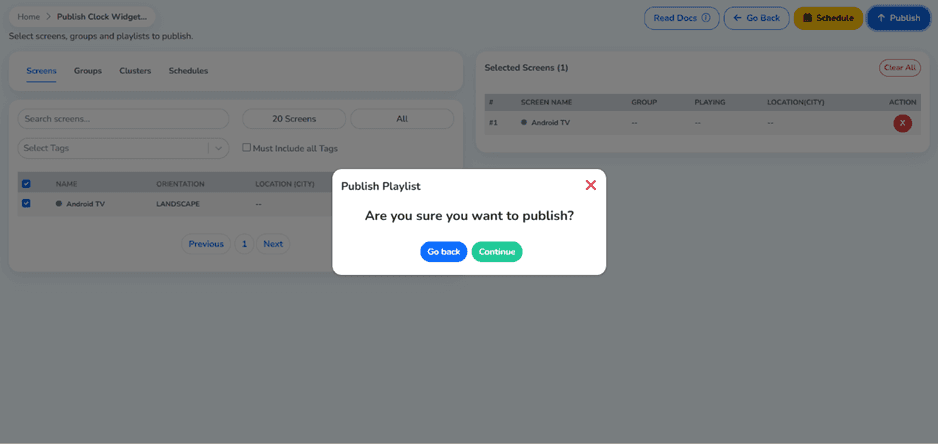
الخطوة 14: انقر على زر المتابعة، ثم انقر على زر النشر الأزرق
في هذه المرحلة، سيظهر تنبيه يؤكد قرار نشر قائمة التشغيل على شاشة اللافتات الرقمية المختارة. بعد تأكيد التفاصيل، انقر على زر المتابعة لنشر قائمة تشغيل الساعة الخاصة بك بنجاح على شاشة اللافتات الرقمية المختارة.
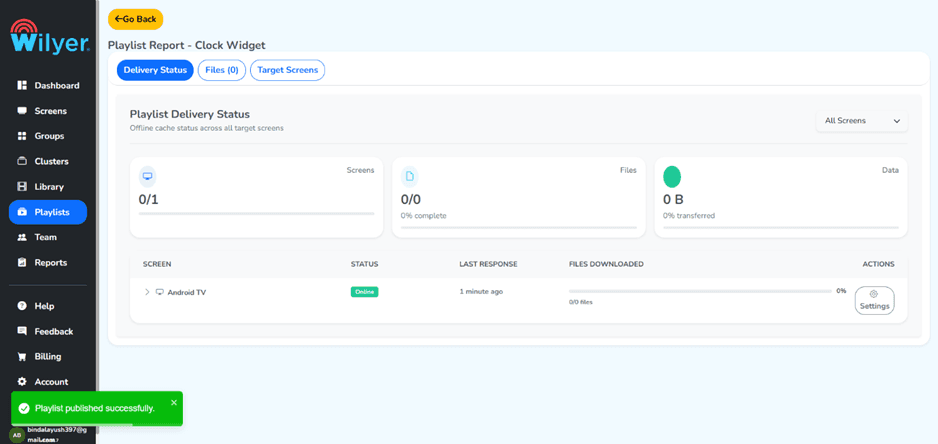
الخطوة 15: تم نشر قائمة التشغيل الخاصة بك بنجاح
تهانينا، تم نشر قائمة تشغيل الساعة الخاصة بك بنجاح على شاشة اللافتات الرقمية. أداة الساعة الخاصة بك أصبحت مباشرة على شاشة اللافتات الرقمية، وتُحدَّث باستمرار. يمكنك عرض ساعة بسيطة على شاشة اللافتات الرقمية الخاصة بك، أو عرض الوقت في مناطق مختلفة من العالم، أو إنشاء ساعة مكتبية تظهر على شاشة لافتات رقمية مختلفة.
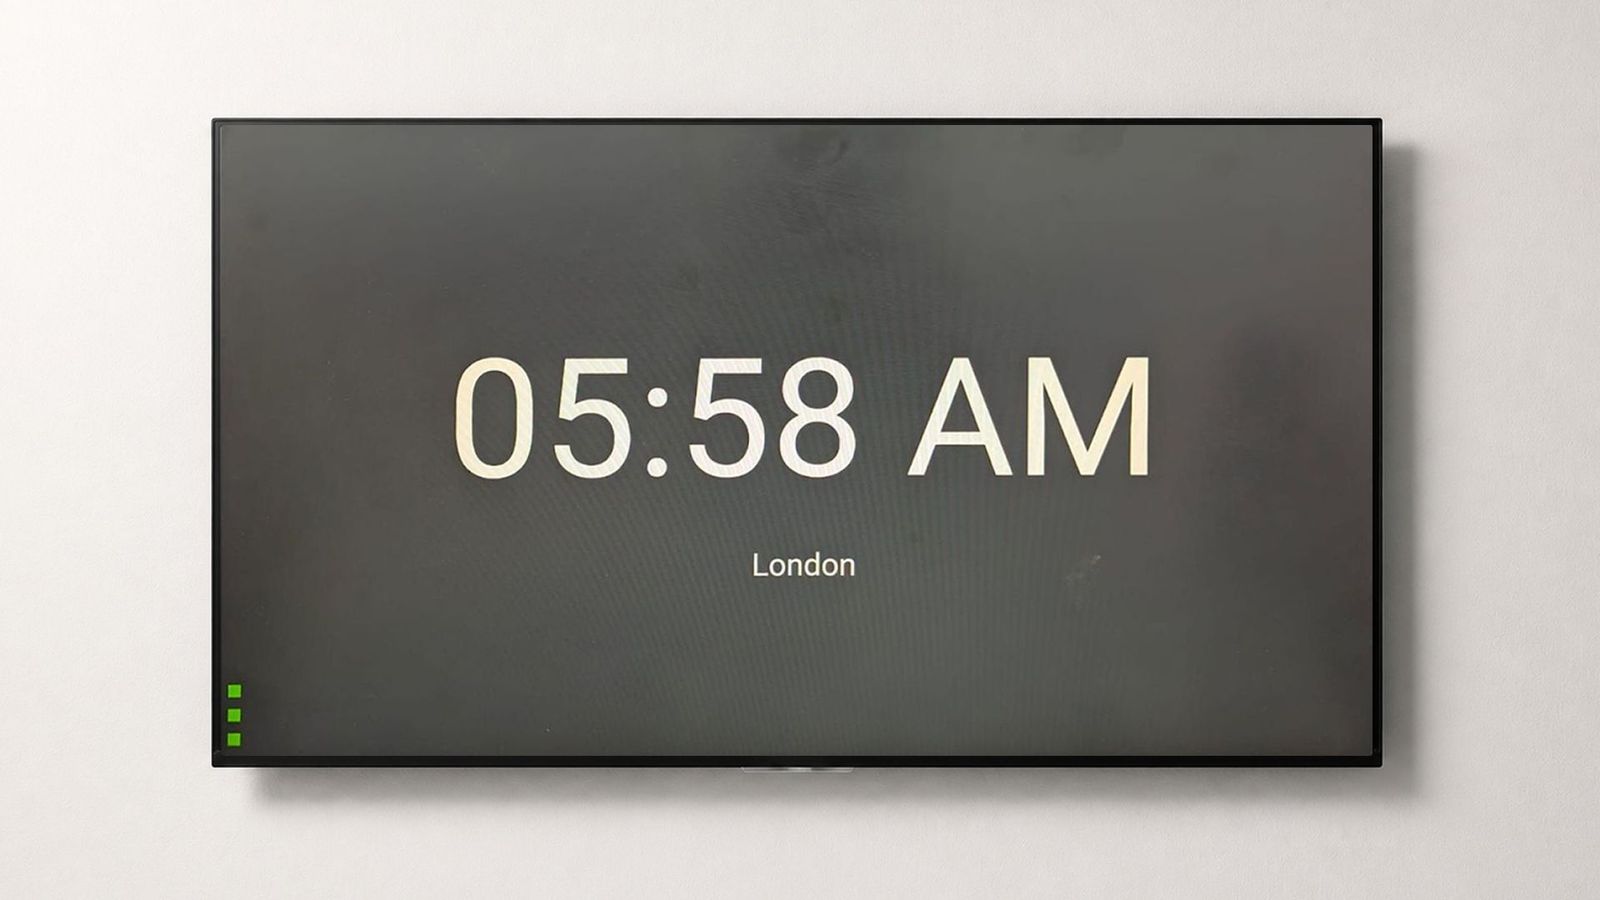
الخطوة الأخيرة: أداة الساعة الخاصة بك مباشرة على شاشتك
هنا ترى كيف سيبدو عرض اللافتات الرقمية الخاص بك مع أداة الساعة الخاصة بنا وهي مباشرة وتعمل. سواء اخترت ساعة واحدة لجمهور محلي أو ساعة عالمية لجمهور دولي، فسيعرض عرض اللافتات الرقمية الخاص بك الآن معلومات الساعة المباشرة بتنسيق نظيف واحترافي.
الخلاصة
أصبح إضافة ساعة رقمية إلى عرض اللافتات الرقمية أسهل من أي وقت مضى. مع أداة الساعة الخاصة بنا للافتات الرقمية، يمكنك إضافة ساعة إلى عرضك في دقائق فقط. لا حاجة إلى معرفة تقنية.
سواء كنت تريد عرض ساعة واحدة لجمهور محلي، أو ساعة عالمية لجمهور دولي، أو حتى أداة عرض ساعة متعددة المناطق الزمنية لجمهور عالمي، فإن Wilyer يوفر لك كل ما تحتاج إليه.

توافق منصة متعددة لكل شاشة عرض رقمية
قم بتشغيل برنامج الإشارات الرقمية الخاص بـ Wilyer على نظام التشغيل المفضل لديك دون أي عناء.
