
Digital Signage
How to Convert Any TV into Digital Signage
Turn any TV into digital signage
١٣ رجب ١٤٤٧ هـ
This guide will turn any intelligent TV into an effective digital signage display. Get to know how to make TV digital signage with the help of affordable digital signage solutions on TV, cloud-based digital signage and web-based digital signage applications that are compatible with any TV. This step-by-step tutorial includes installation, configuration, and pairing of the digital display solution, as well as the configuration of permissions and the professional development of the digital display solution.
Why convert a Television into Digital Signage?
The benefits of converting your current television into a digital signage TV are beyond imagination of the cost savings that would be encountered as opposed to acquiring high-priced commercial display software systems. It is a digital display product that uses the hardware that you may already have and turns it into a high-quality TV screen billboard. You may need a digital menu board that displays information in your restaurant, an office information display, or a promotional display in retail, but you have been wondering how you can make TV a digital signage, and with the new possibilities that come with this technique, you can do anything with your business communication.
The digital signage system methodology involving smart TVs offers equal professional features of the priced proprietary systems at a more reasonable fraction of the cost. Any television can be a potent content screen management platform with the appropriate digital signage software and a signage player device.
What You Need for Your Digital Signage Setup
The following are the basic elements you need to have before you start your digital signage system:
Any intelligent television (Google TV, Android TV, or Amazon Fire TV Stick that is attached to any TV)
Cloud-based digital signage functionality requires a stable WiFi connection.
Wilyer Digital Signage Player - the most suitable digital signage software to any TV.
TV remote control to configure first digital signage hardware.
Ready-made digital content to be included in your digital signage display (images, videos or slides).
Part 1: Wilyer Digital Signage Software.
You can use smart TV to perform digital signage using the wilyer platform, the leading digital signage software to any TV, with this detailed guide.
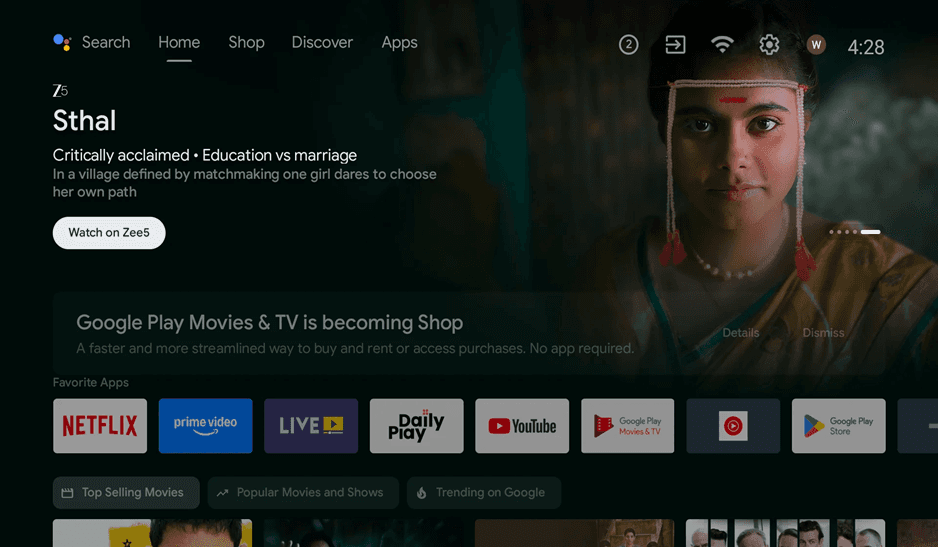
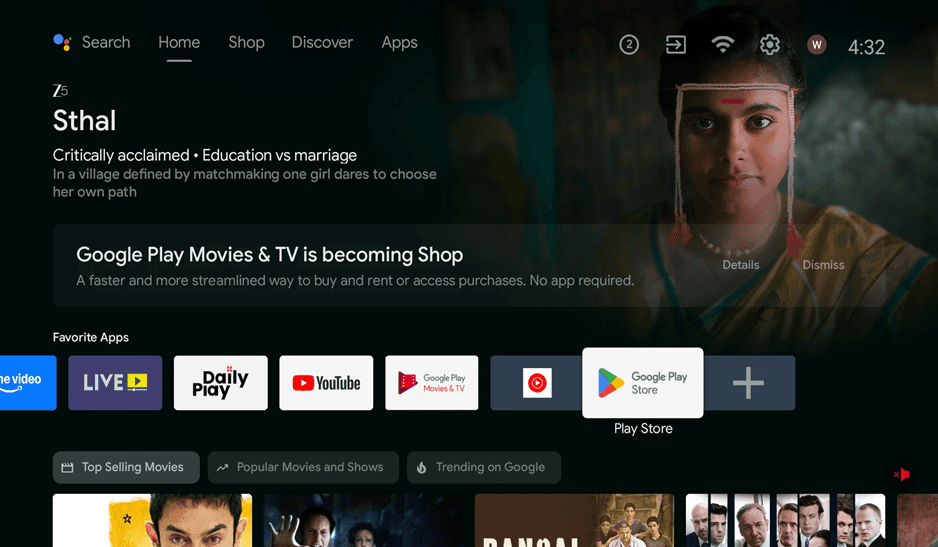
Step 1: Choose Your TV Home Screen.
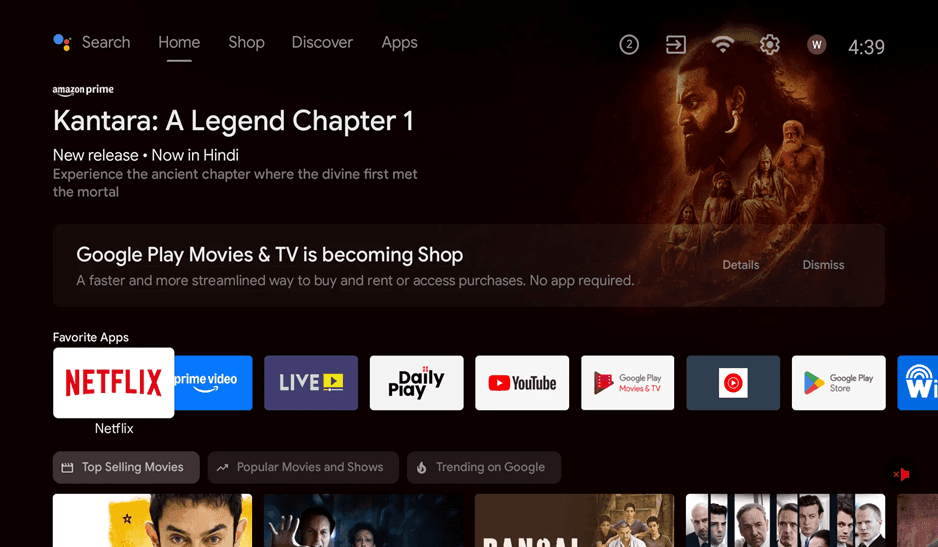
Switch on your smart TV and go to the home screen. This forms the beginning of digital signage transformation on the TV. It has Google TV, Android TV or Firestick TV and in all cases, we find the home screen full of all the digital signage apps you would need in your TV digital signage system.
Step 2: Go to the Apps Section.
The installed digital signage apps can be found in the Apps tab on the top of your television screen and new apps can be discovered. In this section all the applications available to your digital signage will be displayed. You will have a range of installed applications like streaming and other commercial display software alternatives.
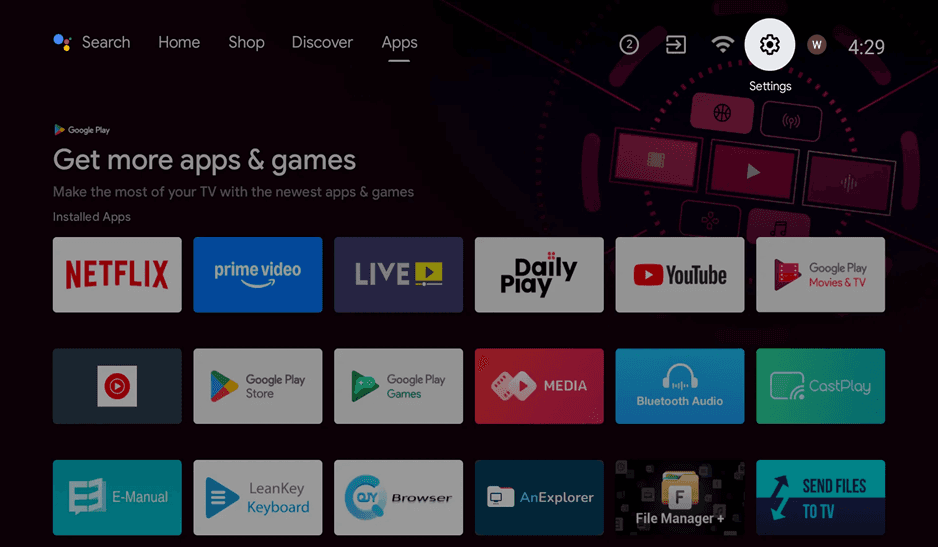
Step 3: Open Settings Menu
In the upper right corner of your screen, on the geared icon, click on the Settings icon (gear symbol). A settings panel will be presented that has several portions such as device name, network settings, and app management to your digital signage TV system. This is where you will set up the settings necessary to your cheap digital signage package over TV.
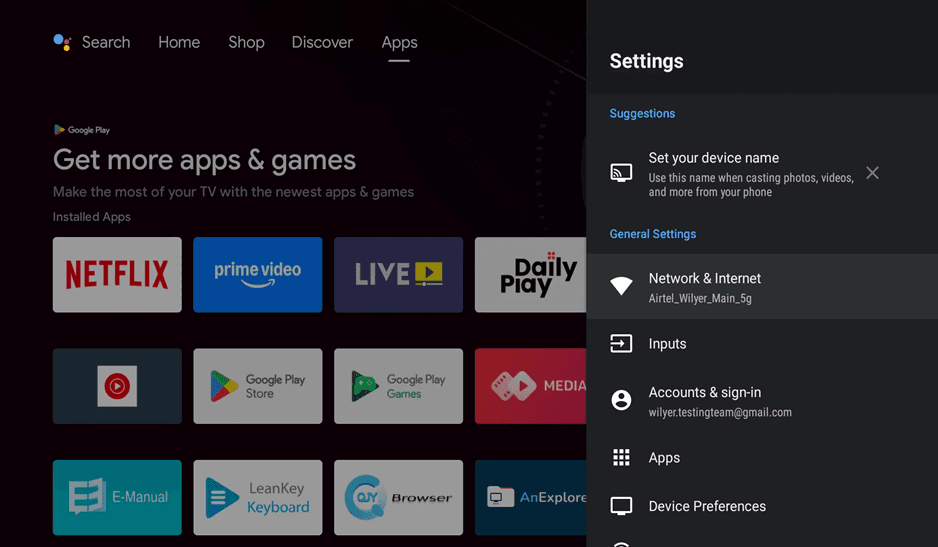
Step 4: Set-up Network and Internet.
You must turn to the settings menu, and when you see Network and Internet, you should be able to check the WiFi connection. Cloud based digital signage requires a stable internet connection. Your digital signage platform needs quality connectivity to be updated on content and serve as a corporate TV screen advertisement platform. Make sure your television displays under WiFi network name connected.

Step 5: Return to Home Screen
Once you have checked that you are connected to the network, get back to the home screen of your TV. At this point, you are now prepared to install the digital signage software that would transform a TV to digital signage. The home screen shows favorite apps and offers quick access to the app store which contains the signage player device software.
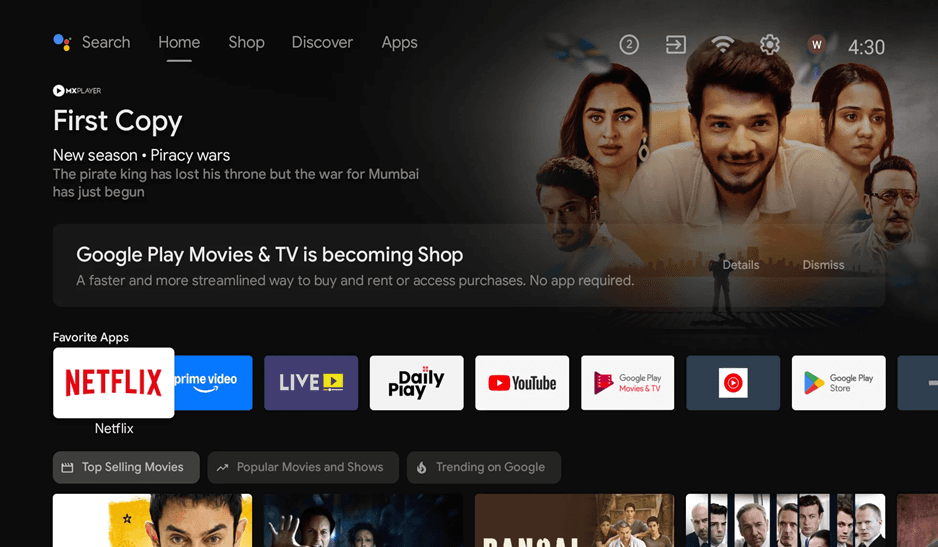
Step 6: Access Play Store
Tap on the play store icon of your favorite apps or browse through the apps list. The entry point to all things to do with digital signage and commercial display software is the Google Play Store. This is whereby you can get the digital signage software to any television to make it look like a professional digital display solution.
Step 7: Enter into the Apps Section.
Make sure that you are in the Play Store in the apps section (not Games). On the upper corner of the screen is the tab titled Apps, which takes you to the entire list of digital signage apps that can be used on your digital signage screen.
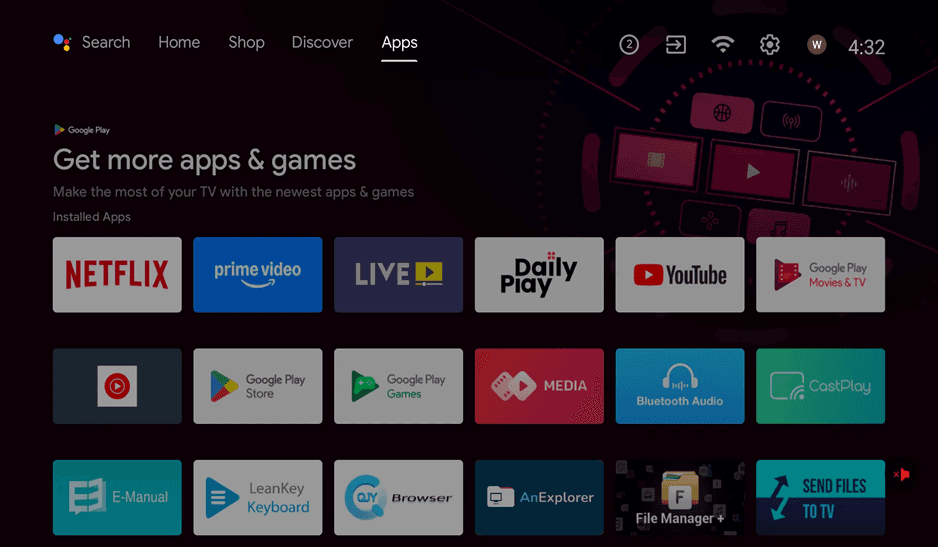
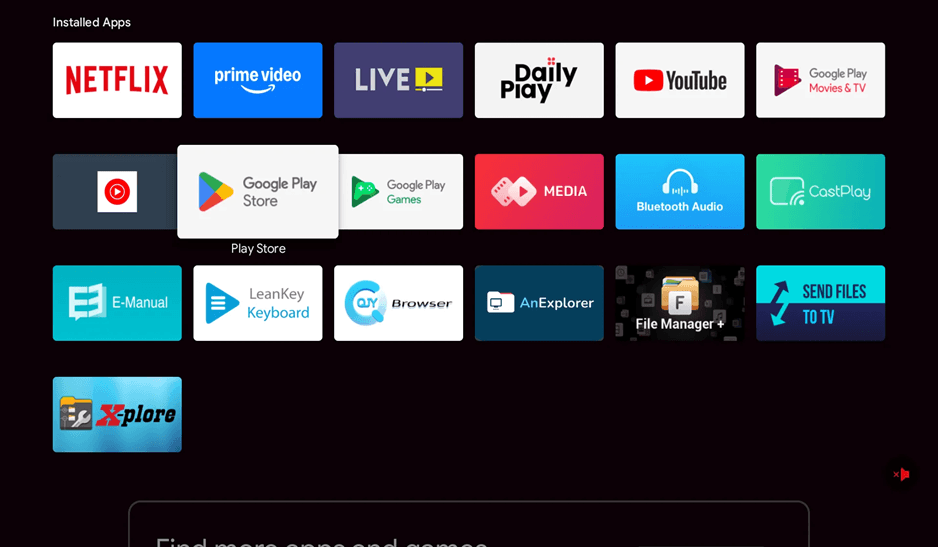
Step 8: View All Installed Apps
Browse through your applications to find out what you have already put in your digital signage TV. The picture displays all the digital signage existing hardware software such as Google Play Store app that you will use in downloading the screen content management platform. Get to know what is installed so that you can manage your digital signage system.
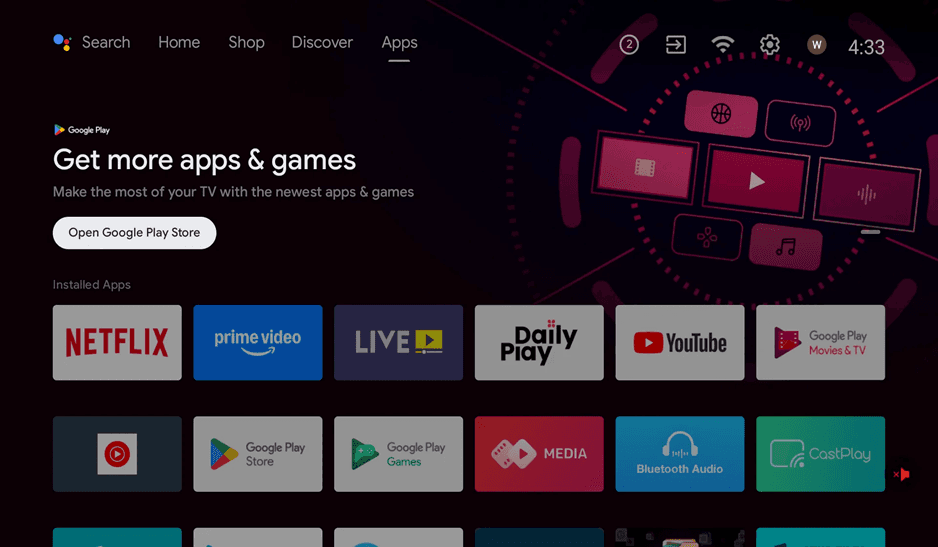
Step 9: Open Google Play Store
Click on the Google play store to proceed to the marketplace where you will find the digital signage software to any TV. Play Store offers thousands of applications, yet you are seeking a single application Wilyer Digital Signage Player, the best application of the smart TV to apply digital signage.
Step 10: Open Play Store Search
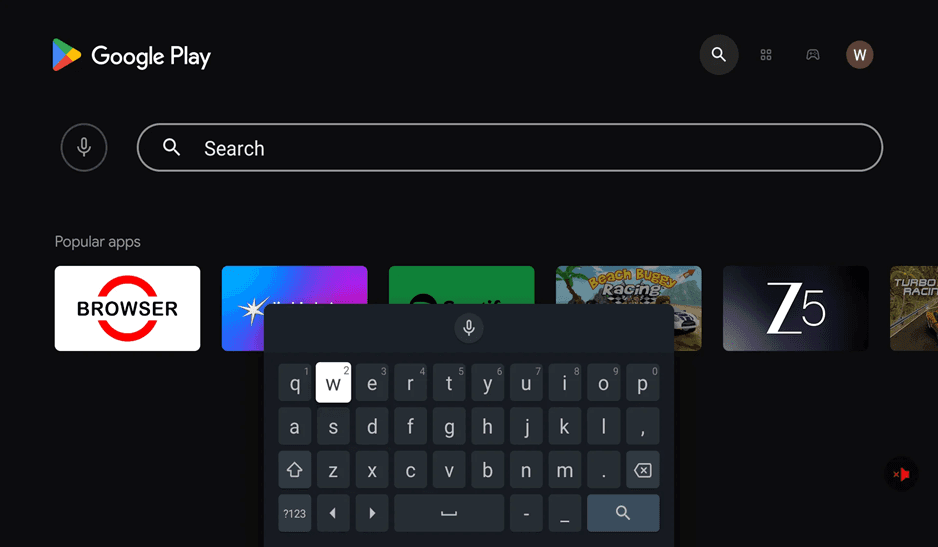
Google Play Store starts with a search engine at the top and a list of the popular applications below it. This is your point of connecting with commercial display software and digital signage applications. The search feature helps you to easily find the digital signage software that you require to convert TV to digital signage.

Step 11: Turn on Search Keyboard.
Tap on the search bar to bring on the on-screen keyboard. This enables you to type in your search query with the digital signage display software. The keyboard interface allows one to search specific digital signage apps such as Wilyer that will transform a TV to digital signage.
Step 12: Search for Wilyer
Type "Wilyer" in the search bar. Suggestions and autocomplete features will give you suggestions to type as you type, and also your email account is provided in the list of easy-to-find. The search in question will start displaying results as you type, and as such, it will be fast to locate the digital signage software that will work with any TV that you require.
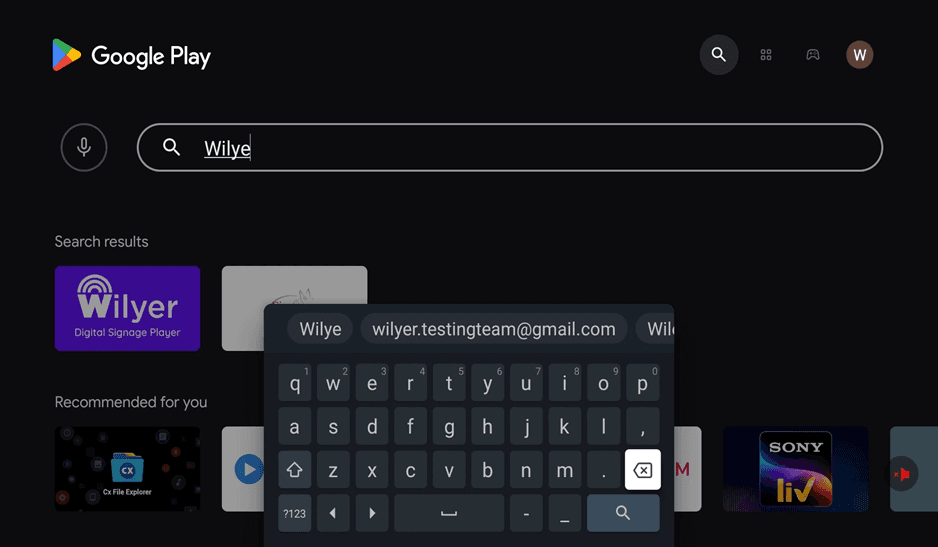
Step 13: Find Wilyer App on Search Results.
Just type in Wilyer and you will get the Wilyer Digital Signage Player in the search results with its unique purple icon. It is a 3.7-star digital signage solution based on the cloud and created by Wilyer Private Limited. It falls under Video Players and Editors but is an all-in system of digital signage in your TV signage digital requirements.
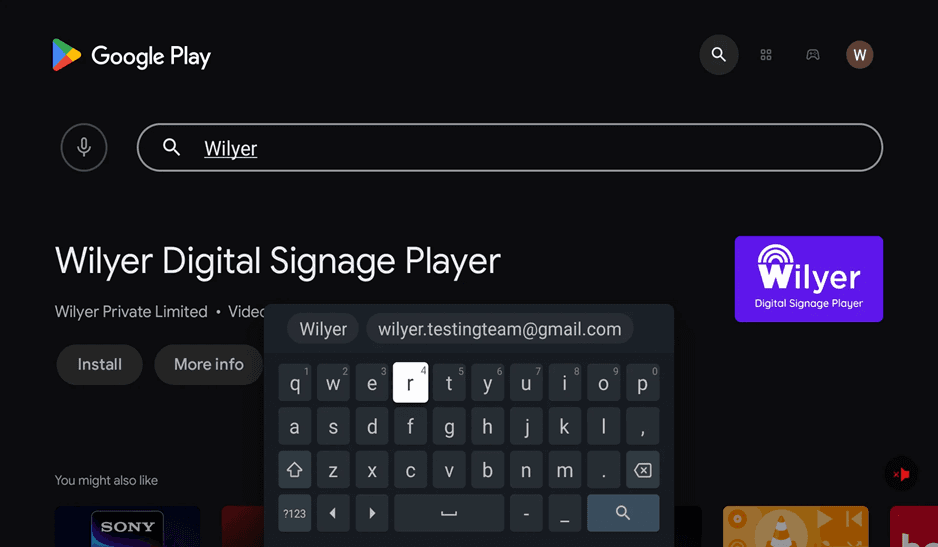
Step 14: Choose Wilyer digital signage player.
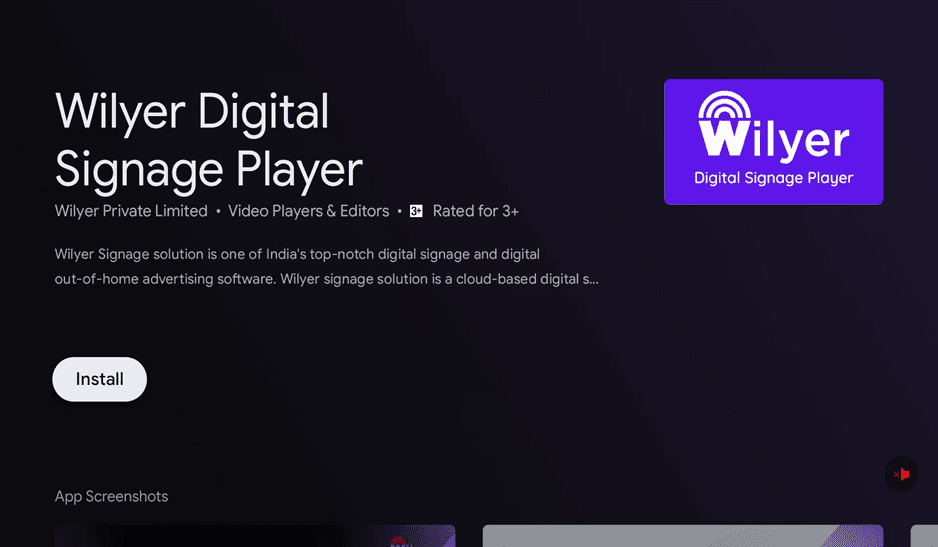
Select Wilyer Digital Signage Player by clicking on it among the search results. This will take you into the app details page where you can get to know more about this digital display solution and move on to implementation. The application is 3+ rated and is a full-fledged signage player application on any smart TV.
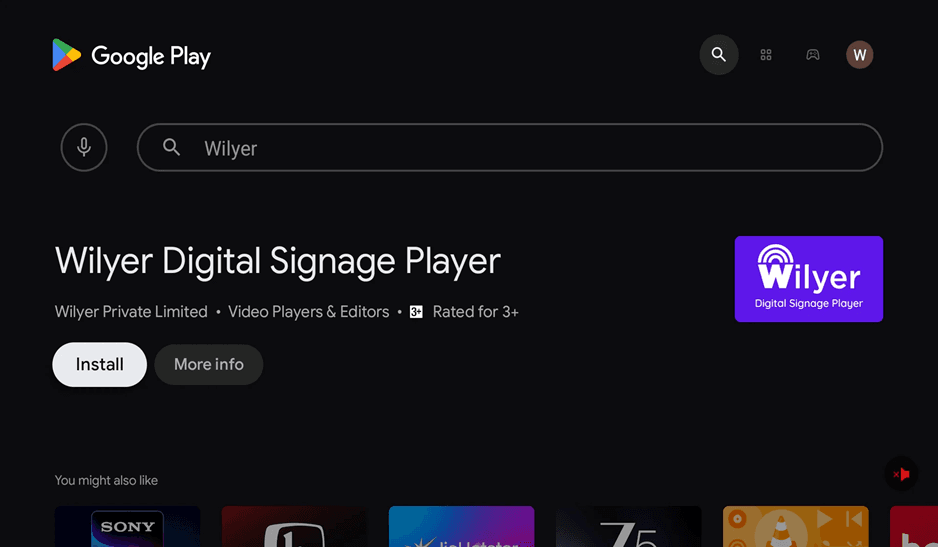
Step 15: Review App Details
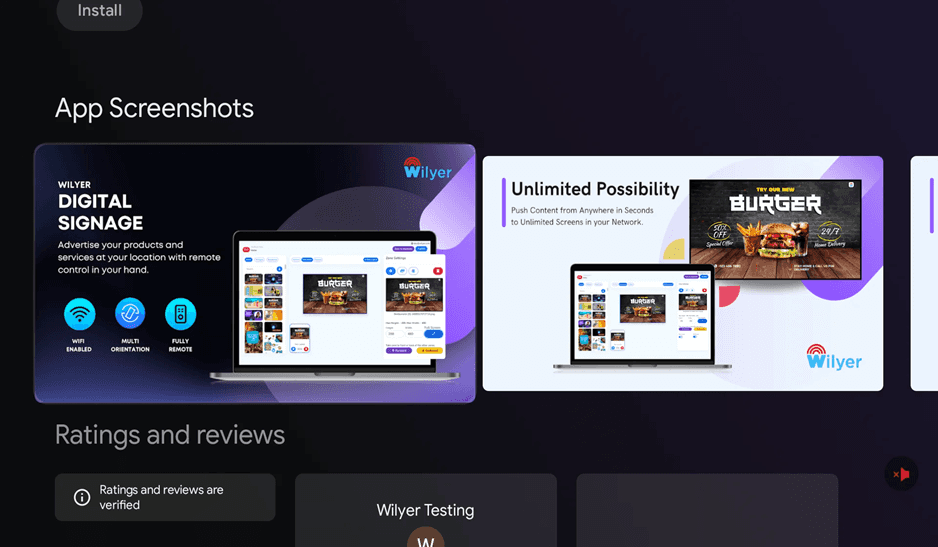
The Wilyer Digital Signage Player application site tells all about this low-priced digital signage system to use in television. The description of the app will show that Wilyer is one of the top-quality digital signage and digital out-of-home advertising software in India. The page also has an install button, screen shots of the app with the screen content management interface, and the ratings of the app by verified users. This commercial display software solution is a full digital signage hardware solution that allows full access to your smart TV.

Step 16: View App Screenshots
Go down to the App Screenshots section where you can see the real interface with the digital signage display that you will be working with. The screenshots reveal the digital signage features of Wilyer such as Wi-Fi connectivity, multi-orientation, remote control facilities, and the Unlimited Possibility to push content to an unlimited number of screens in your network. These pictures give a preview of the advertising platform on the TV screen that you are going to install.
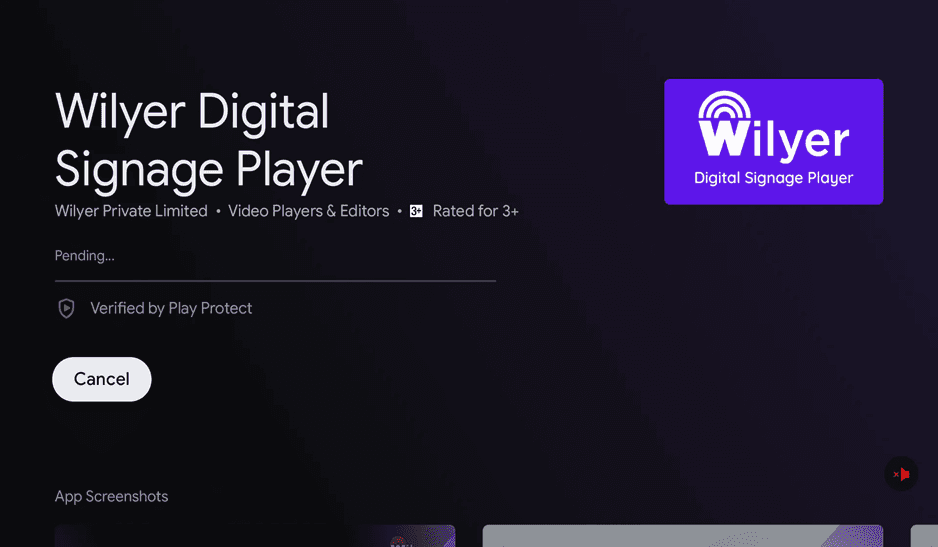
Step 17: Click Install
When you want to use any TV as digital signage, click on the white install button and start the download. The installation will begin instantly with a display of a pending. status with a progress bar. The Play Protect has verified the app and it is safe to install this cloud-based digital signage solution on your digital signage TV.
Step 18: Track Progress of Download.
Follow the progress of the download as the TV application is downloaded. The screen displays 11 percent with the status indicator and "Cancel" option when necessary. The software of this digital signage is fast to install on most connections. The progress bar gives real time updates when the signage player device app is being installed on your TV.
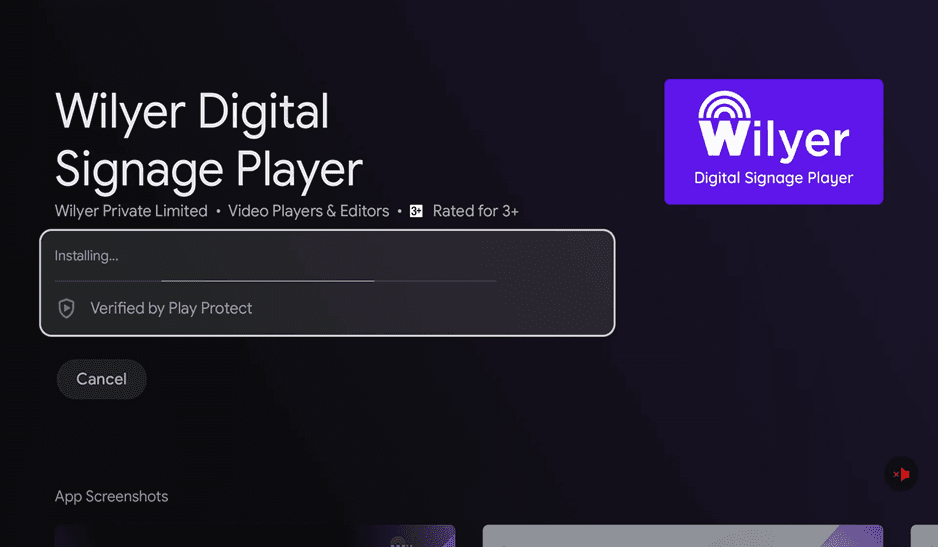
Step 19: Wait for Installation.
The status is changed to Installing... and the installation proceeds further. and a progress bar. Play Protect is the security checks that are being performed on the installation of the app. This is the last stage of the installation, which is to prepare the digital display solution on your television. After this is done, you will have successfully learned how to make TV into digital signage using commercial display software.

Step 20: Open the Installed App
Once it is installed, the button turns to open with an uninstall option. The first time you start the Wilyer Digital Signage Player, you should click on the Open button. This is your TV digital signage system signage player device which is now in place and is ready to be configured.
Step 21: Check Success of App Installation.
On opening the app, you will be on the home screen where you can find that the Wilyer Digital Signage app has now been installed in your list of programs. Installation of your digital signage software to any TV has been successful as evidenced by the unique blue and white Wilyer icon. This app is now available in your Apps section whenever you are required to use your screen content management system.
Step 22: View Installed Apps
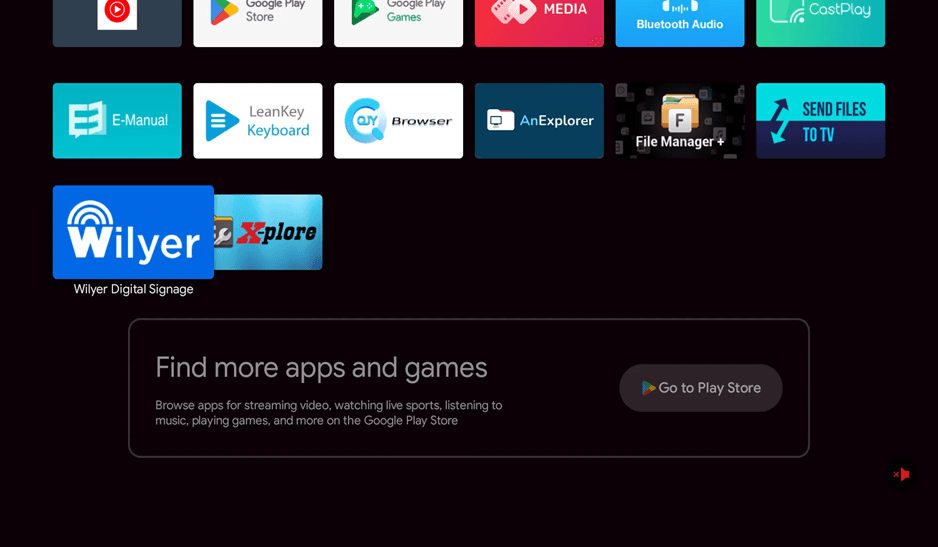
Go to the Apps section and it will be visible in the list of installed applications of Wilyar Digital Signage. This is an assurance that your digital signage TV installation is moving on. Whenever you open the app, it is prepared to turn your television into a professional digital display solution.

Step 23: Launch Wilyer from Apps
Go to the installed apps and scroll down to the Wilyer Digital Signage icon and then open the application. This online digital signage system will boot up and show the pairing screen on which you will hook your television screen advertising display with your Wilyer dashboard to control the content of the screen remotely.
Part 2: Digital Signage Display Pairing.
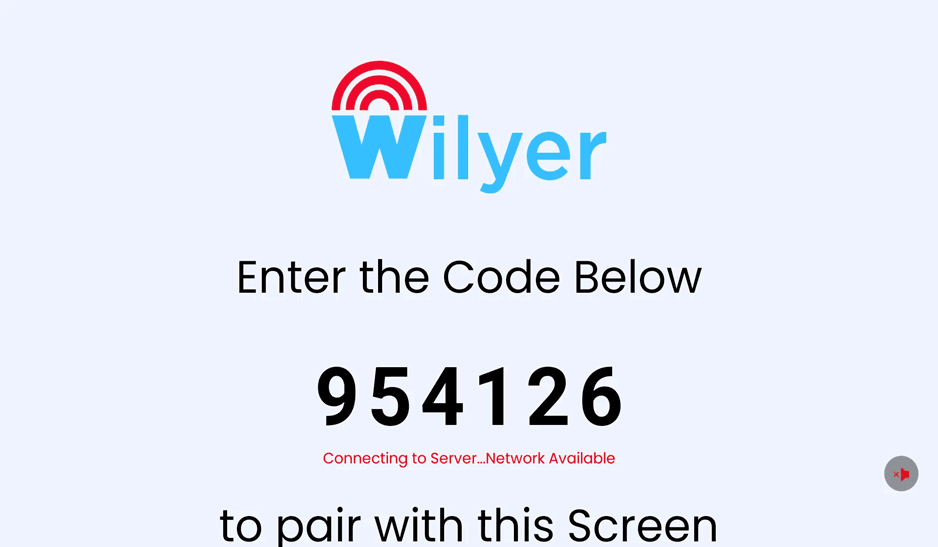
Step 24: View Your Pairing Code
The screen of the Wilyer app contains a large pairing code (in this case: 954126). This is a special code that helps in linking your digital signage television to your Wilyer dashboard. The state is Connected to Server...Network Available which means that the app is now ready to be paired. This code is necessary to transform a TV into a digital signage - you will input this code in your web-based dashboard to create the connection between your signage player device and the system of cloud-based digital signage management.
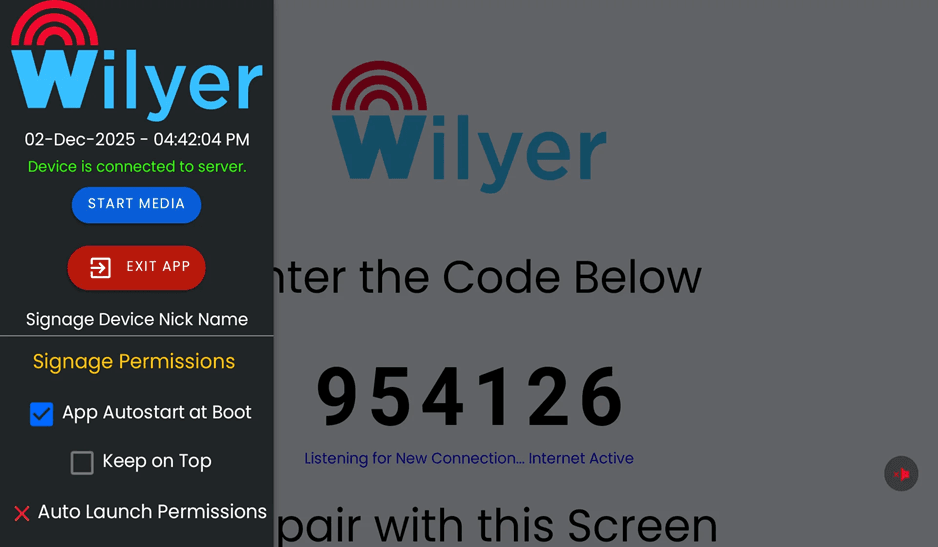
Step 25: Access App Settings
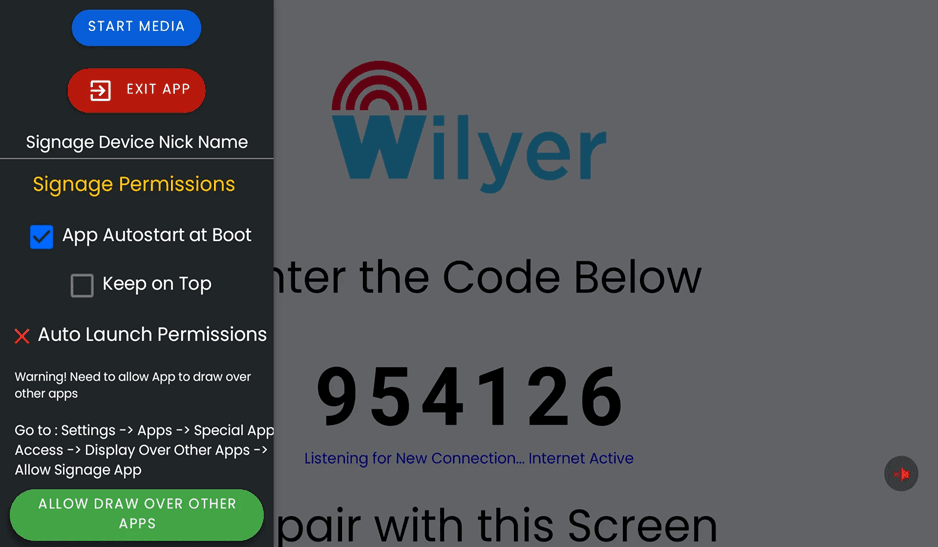
The hamburger menu (three lines) is located on the left side of the screen, click it in order to access the Wilyer app settings. There is the presence of a sidebar menu with the following options: START MEDIA, EXIT APP, Signage Device Nick Name, Signage Permissions. The green status message validates a device connected to server the digital signage display is connected to the cloud-based digital signage platform. It is in this menu that you access some of the key configuration options of your digital signage system.
Part 3: App Permissions Configuration.
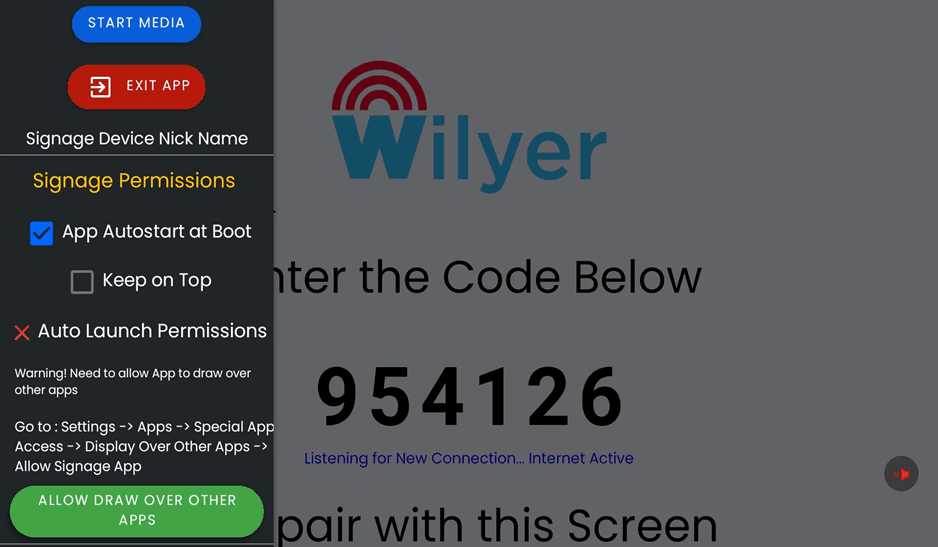
Step 26: Survey Signage Authorizations.
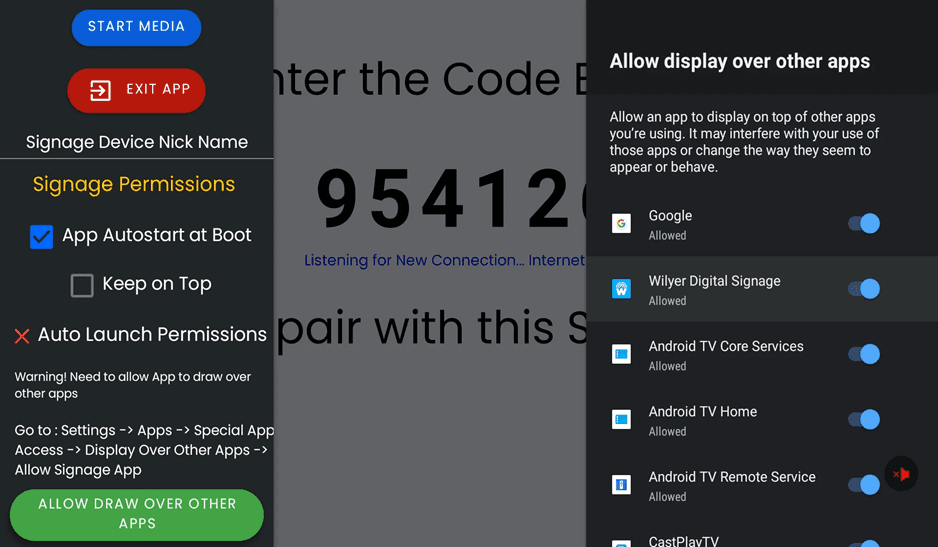
Under Signage Permissions, various permission options will appear such as: the “App Autostart at Boot (checked) and Auto Launch Permissions (with a red X). There is a warning shown in the app: "Caution” Should permit the drawing of over other applications with directions to enable this important permission. This authorization permits your digital signage software on any television to appear over the other applications, which means that your television screen advertisement is always visible. Go to the settings- app- Special App Access- display over other Apps- allow Signage App- Click the green button signage app- Allow Signage App and allow.
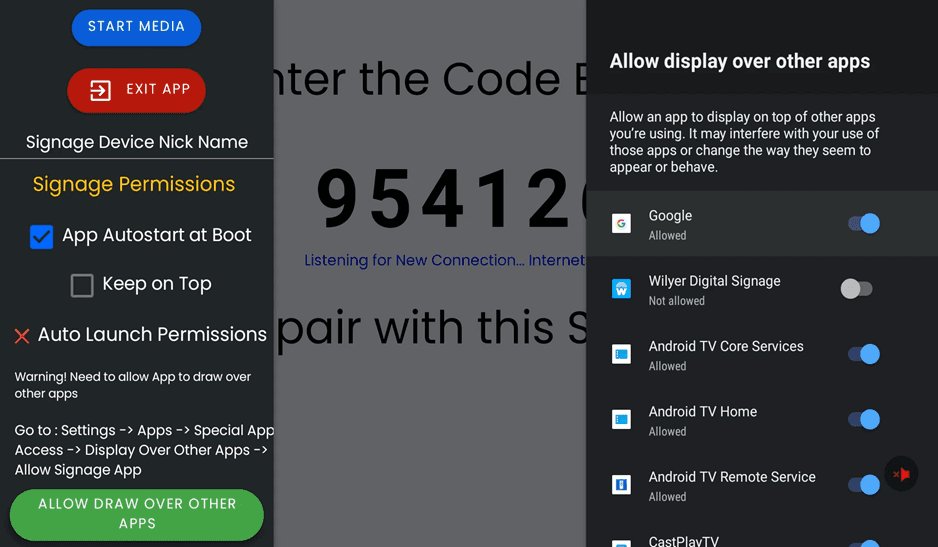
Step 27: Learn About Permission Requirements.
It is evident in the permissions screen that apps are granted the permission to display over other apps. You'll find Google (Allowed), Wilyer Digital Signage (Not allowed), Android TV Core Services (Allowed), Android TV Home (Allowed) and Android TV Remote Service (Allowed). This commercial display software needs this permission in order to work as a digital display solution. It is required without which your screen content control can be disrupted by other applications. This is a very important measure when utilizing smart TV in digital signatures.
Step 28: Consider Permission Dialog.
An authorization box is provided with the explanation of the ability to allow showing over other applications. The dialogue says: Enable an application to be shown over the applications you are using. It can disrupt your use of the apps in question or alter the functionality or the appearance of the apps in question. This authorization is important in your low cost digital signage system to TV having constant display. The list displays active apps with this permission, and in the example of Wilyer Digital Signage, the status is Not allowed, and it should be changed.
Step 29: Turn on Display Over Other Applications.
Switch the Wilyer Digital Signage to the ON (blue). This gives the digital signage hardware software the right to show the contents indefinitely on your TV digital signage software. After that, your digital signage display can now be used as it has changed the status to the Allowed status and you are sure now that your digital signage display will continue to work without having any interference with other applications. This is a much-needed approval to the professional digital signage TV.
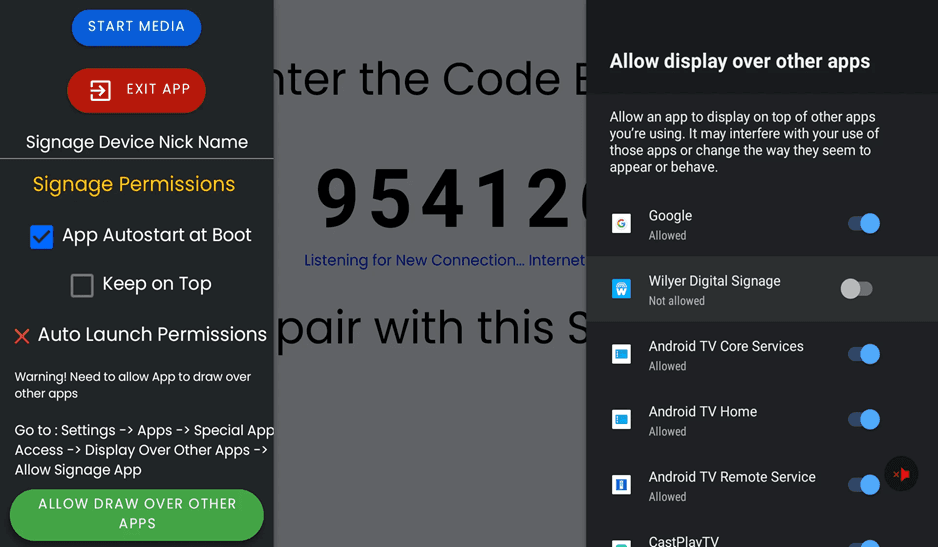
Step 30: Check Permission Granted.
Once the permission has been enabled, the toggle switch will turn blue (ON) when it comes to Wilyer Digital Signage, and that means it is allowed. The rest of the system apps are also displayed as Allowed. The digital signage software that you are using on any television now has the requisite authorization to become a professional screen content management system. Back to the Wilyer app to keep on configuring.
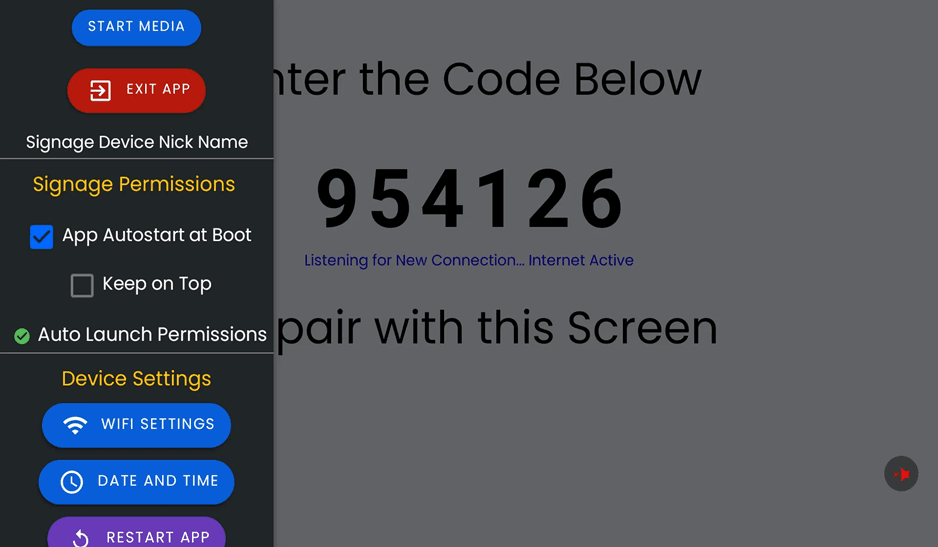
Step 31: Access Device Settings
Go back to the Wilyer app settings menu and now you will notice that the Auto Launch Permissions has a green check mark that all the permissions have been given. The menu has also been updated with some new options on the device settings, such as WIFI SETTINGS, DATE and time, and restarting APP buttons. These applications assist you to operate your digital signage installation on cloud. You can still see the pairing code (954126) to the right, and can add it to your Wilyer dashboard, the place where you can complete the connection.
Step 32: Close Settings Menu
You can click off the settings menu or press back to go to the main pairing screen. The Wilyer logo and pairing code is also clearly shown and time is displayed when the device was connected to the server. The message message of green ( Device is connected to server ) is an assurance that you are connected to your online player signage device. When paired via the web dashboard, the "START MEDIA" button will be turned on. The Listening to New Connections. “Internet Active" status implies that your digital signage system is in readiness to accept content.
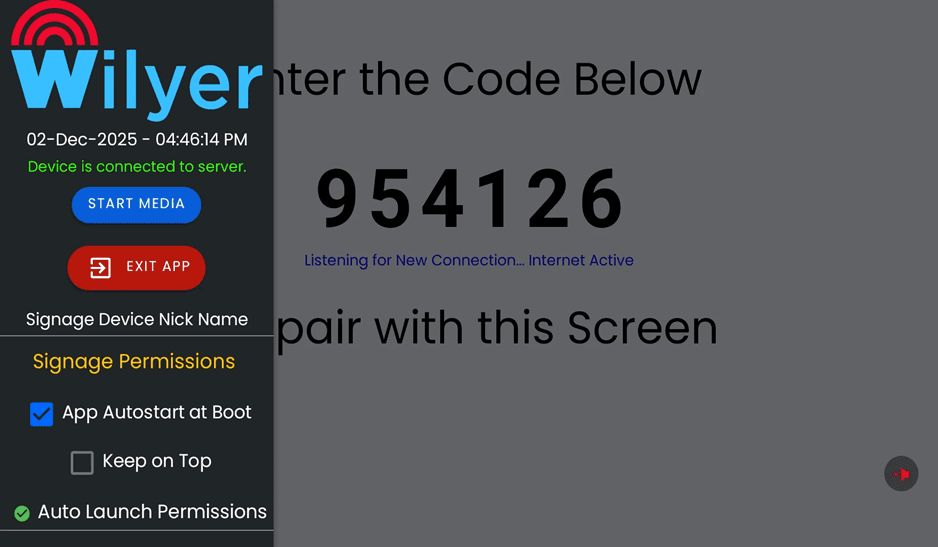
Step 33: Final Pairing Screen
And now the clean Wilyar interface showing the code is displayed on your TV. The status grants "Listening to New Connection... Internet Active". Now what you must do is to log into your Wilyer dashboard at cms.wilyersignage.com, go to Screens, type in Add New Screen and insert this pairing code. After entering in the dashboard, the digital signage TV will instantly connect and be prepared to show content. This will be the first step to digitize TV to digital signage.

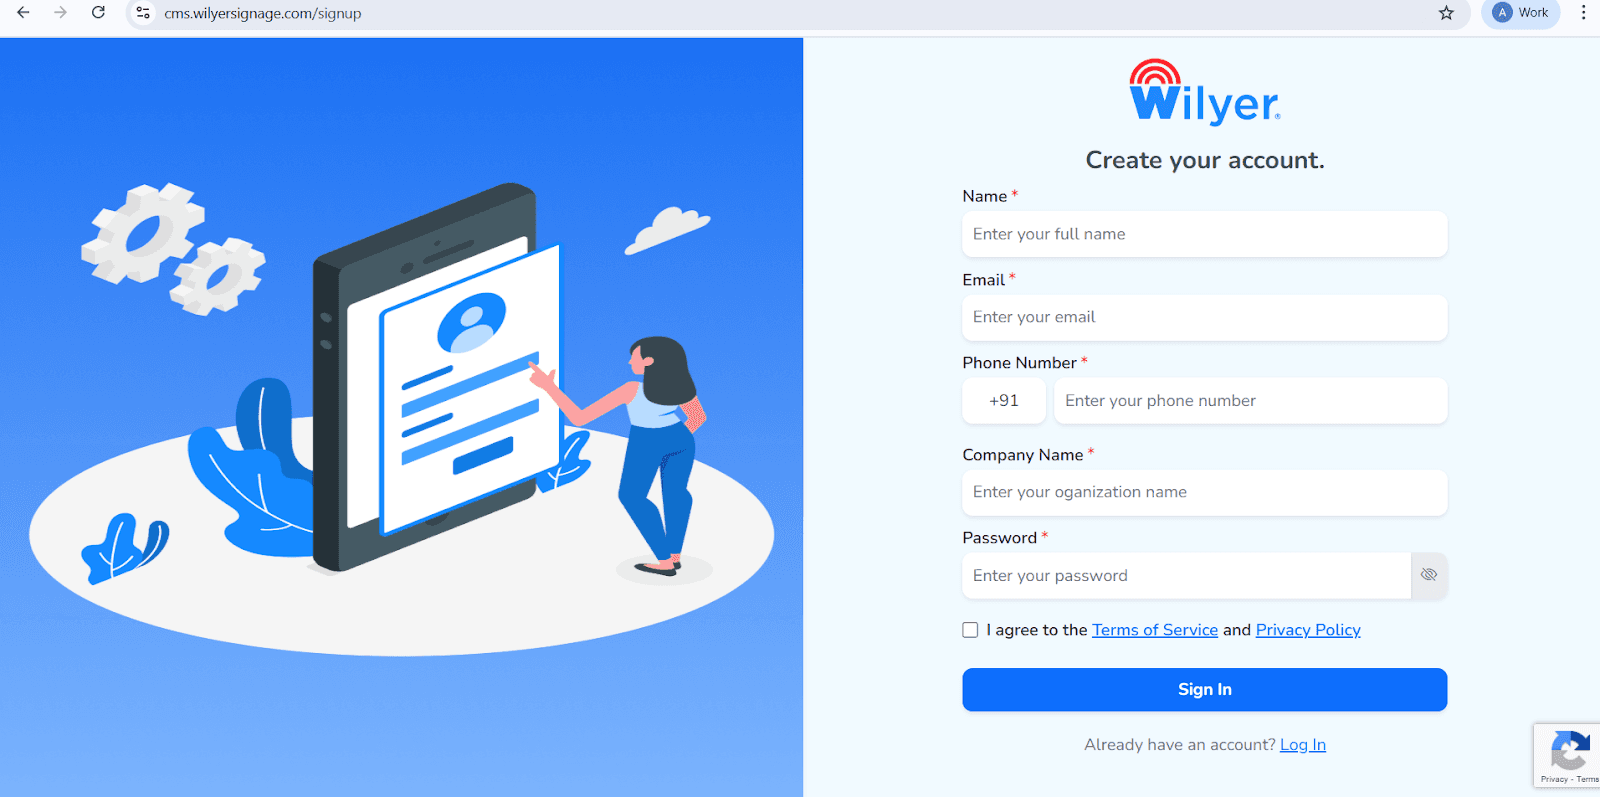
Step 34: Create Your Wilyer Account
To get started with Wilyer, create a new account by completing the registration form.
Enter your Full Name, Email Address, Phone Number, Company Name, and set a secure Password.
Review and accept the Terms of Service and Privacy Policy, then click Sign In to complete your registration.
If you already have an account, select Log In to access the platform.
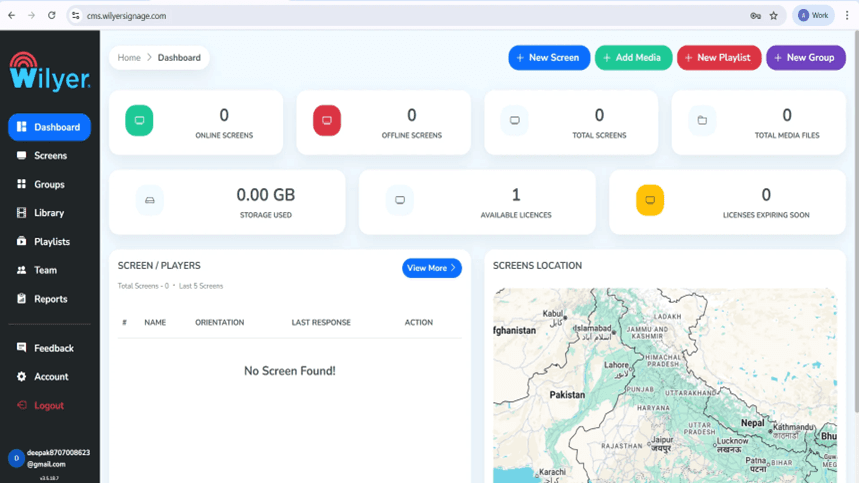
Step 35: User login to Wilyer Dashboard.
Upon signing in, you will be taken to the Wilyer Dashboard, where you will have a summary of your digital signage network. This comprises online and offline screens condition, registered displays, uploaded media files, storage usage, and licenses. The dashboard is the control centre of the management of your signage environment.
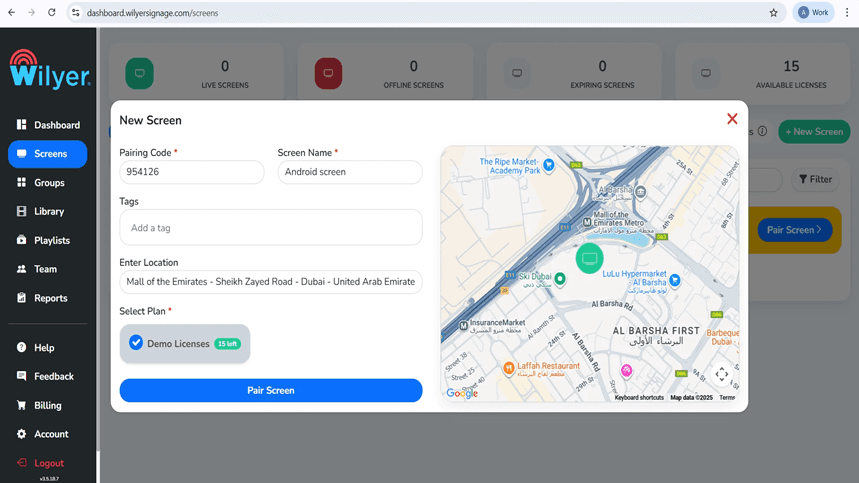
Step 36: Add and pair your android TV.
On the dashboard, there will be + New Screen or Add Screen. Input a 6-digit pairing code on your android television. Select a proper screen name, add some useful tags, make a choice of the place of installation, and choose a suitable license plan. Click Pair Screen and the pairing process is done.
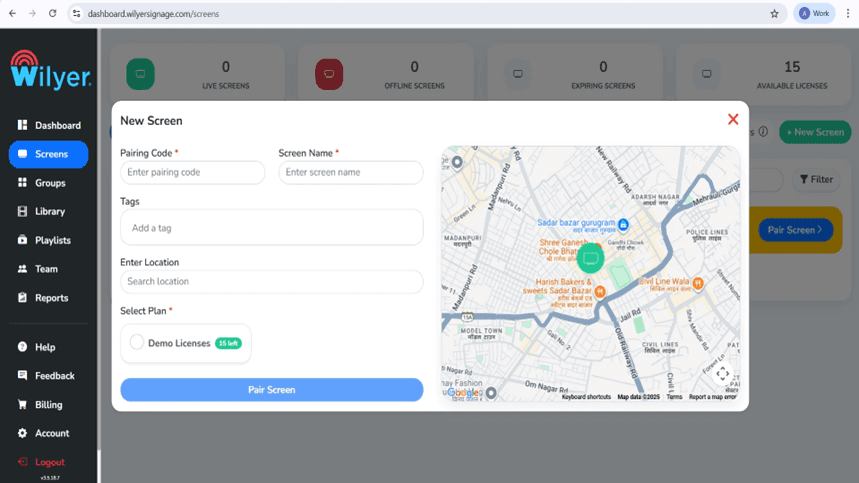
Step 37: Finish Screen Pairing through Dashboard.
Go to the Screens menu and press Pair Screen. Type in the pincode displayed on your TV, a screen name, tags and the location of display. Select a license available and verify to be able to put the screen into action.
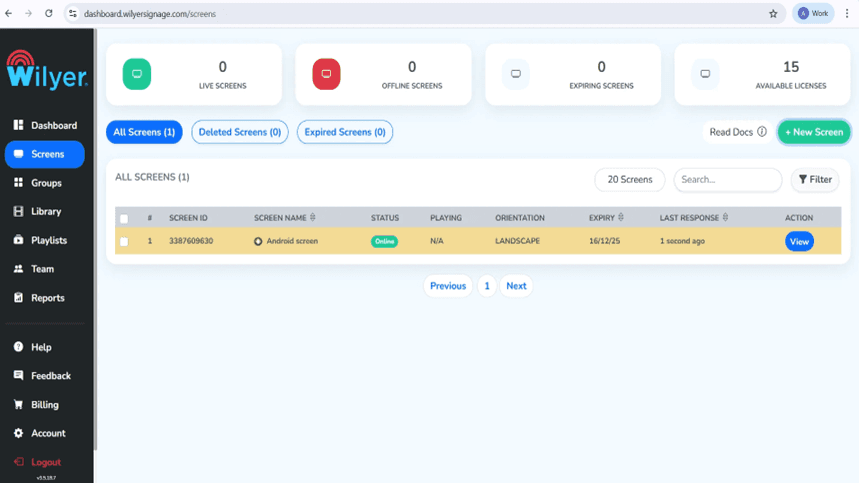
Step 38: Screen Successfully Connected
After connecting, the screen will be displayed on the Screens page with Online status, and it is a confirmation of successful activation. Such information about the screen as ID, orientation, license validity, and last response time will be visible. At this point, the display is prepared to be assigned content and configured and monitored in real-time.
Designing Digital Signage Content.
Step 39: Upload Media Assets
Click on the Library section and add images, videos or other media files. Formats supported on the platform include JPG, PNG and MP4. The media library is the basis of creating playlists with a strong visual appeal.

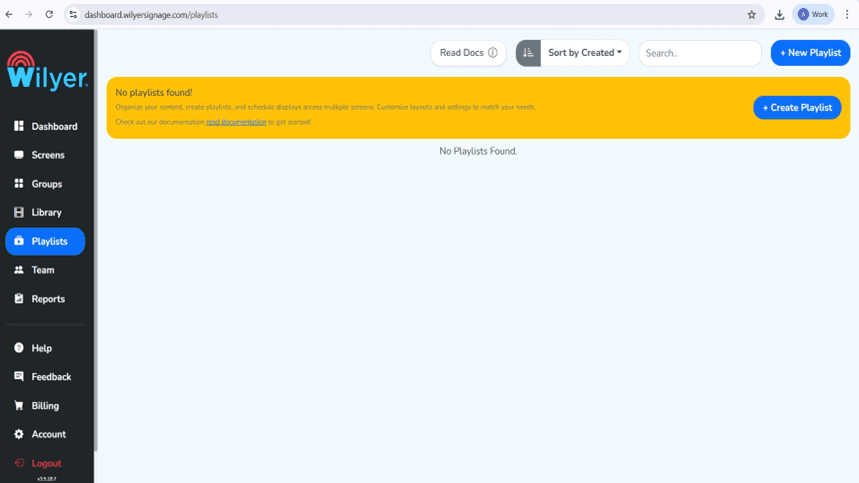
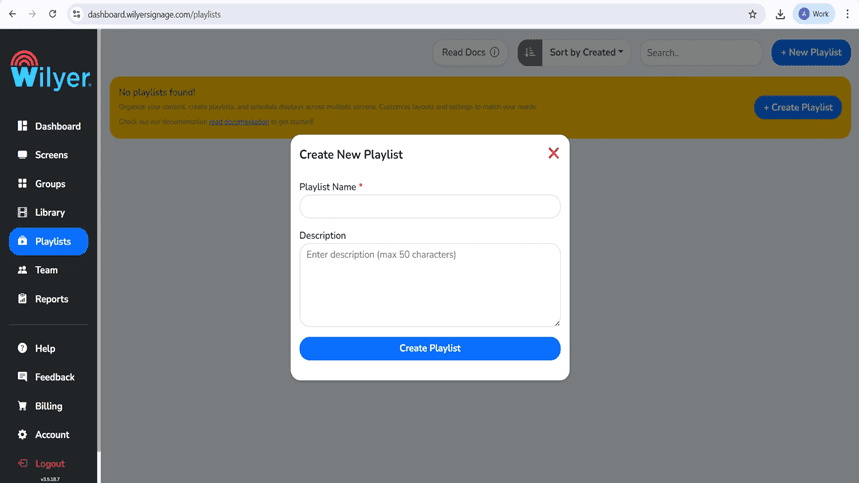
Step 40: Create a Playlist
Click on Playlists and New Playlists. Include some self-description and optional description to aid in sorting out content. This is the playlist that will be used to plan and show media on the screens that are connected to it.
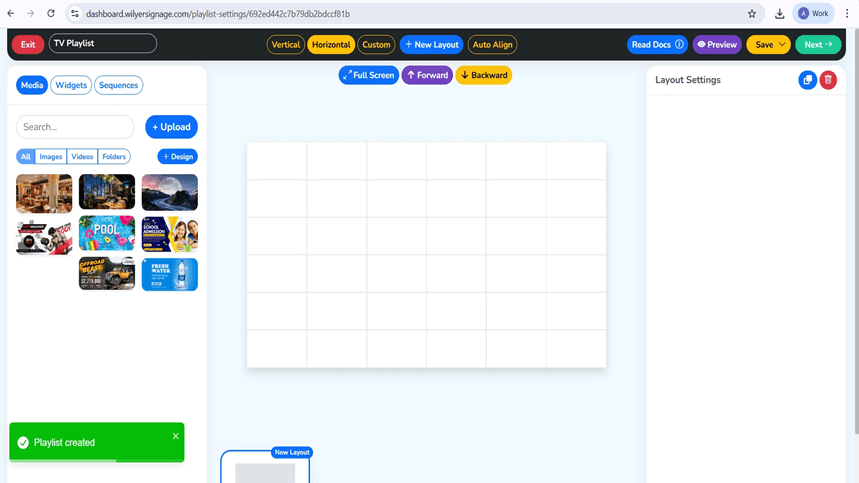
Step 41: Construct Your Playlist Style.
Select a Vertical layout, Horizontal layout or Custom layout using the playlist editor. Drag and drop media files to the canvas, set the time of slides and effects of transition. Work with the live preview that helps to check out your design in real time.
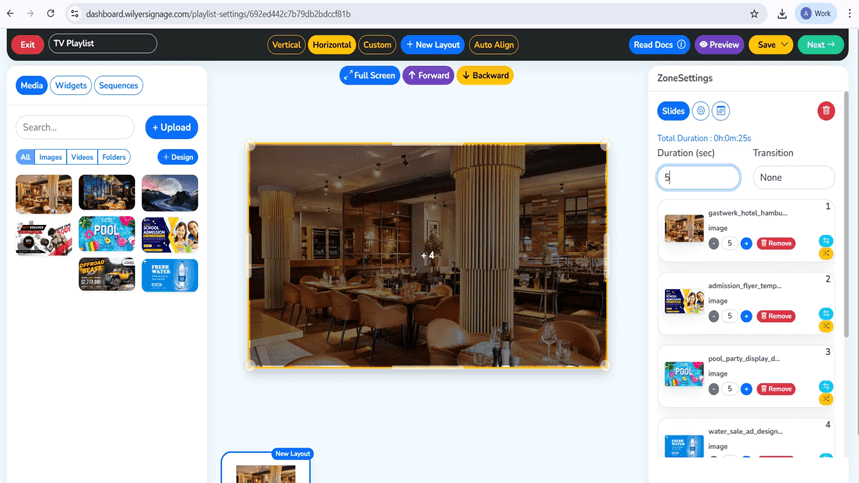
Step 42: Media Playback settings.
Insert media at the relevant areas of layouts. Every object is turned into a slide so that you can manage where to display and how long to display and transitions. The length of the playlist is automatically updated. Preview Mode- go through content before saving.
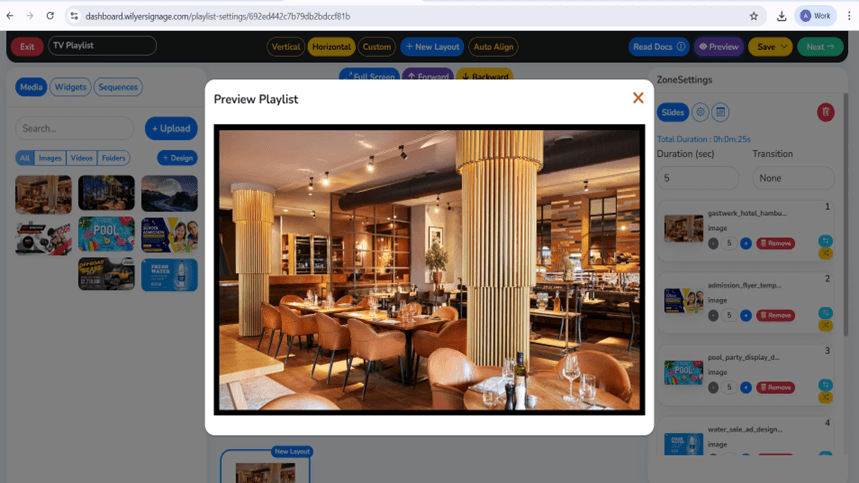
Step 43: Preview the Playlist
You can choose Preview to see the way the playlist will look on the display. Check alignment of layout, sequence of media, timing and transition to get a proper and professional presentation.
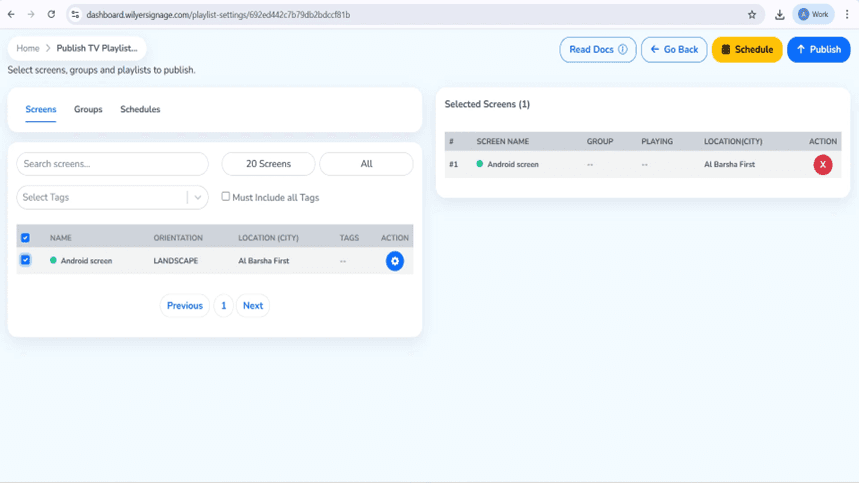
Step 44: Publish Content on Screens.
Once the playlist has been prepared, publish it and choose the target screens or screen groups. Make sure that you are selected and deploy the content at the moment.
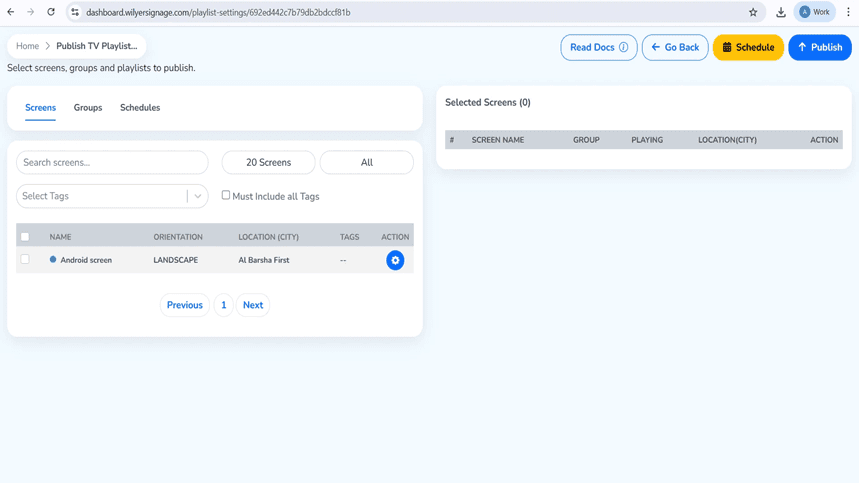
Step 45: Plan or Publish the Playlist.
Either decide to publish the playlist immediately or at a certain time. Click on the selection of the display or group and verify.
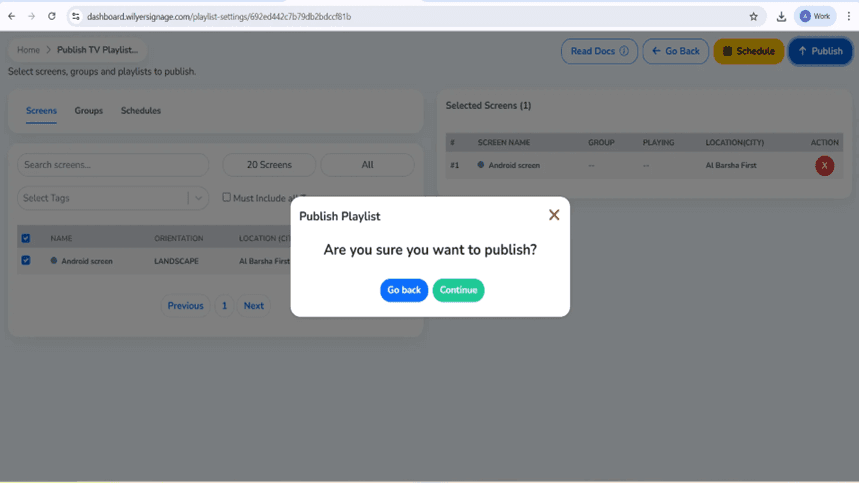
Step 46: Confirm Publishing
Look at the publishing information on the confirmation dialog. Click Continue to continue or go back to make any changes in case of need.
Step 47: Track Playlist Playback.
Monitor deployment in the Playlist Report. The successful status will ensure that all the content has been sent and the screen is online and ready to play.

Final Step: Playlist Live on Screen.
Now the playlist is on, and it is playing on the attached display. The playback is based on the chosen layout, sequence of playback and time. Check images, positioning and effects in order to have a uniform professional viewing experience.

Advantages of this Digital Display Solution.
This is a low cost digital signage TV system that offers many benefits compared to an actual commercial display software solution. To begin with, you are utilizing current digital signage systems - your smart TV, which has removed the cost of the expensive proprietary signage player systems. Second, the digital signage solution is based on the cloud that provides the opportunity to control the content of the screens remotely through the online control panel. Third, this TV digital signage can be expanded with ease either on a single display or on hundreds of them spread over various sites.
The content management screen platform is an enterprise grade platform that allows scheduling, multi zone layouts, remote updates and real time monitoring. Your television screen adverts are as advanced as any commercial digital menu board system, and at one-tenth the price. This digital signage technology makes any television a professional marketing and communication device.
Use Cases for Your Digital Signage Display
After you have used smart TV in digital signage, there are no limits to its use. Restaurants can develop dynamic digital menu boards which will update the menu boards throughout the day. Promotional material and information about products can be shown in retail stores. Announcements, metrics boards and directory information in companies can be displayed in corporate offices. Wayfinding and patient information can be offered in healthcare facilities. Hotels are able to post welcoming messages and schedule events.
This digital signage TV solution is suitable in any industry due to its versatility. As a single screen or a network of displays are needed, this low-end digital signage solution to TV will fit your requirements. The digital signage software gives you everything you require to make the contents to be very interesting, professional and it catches the eye and conveys the message.
How to Run Your Digital Signage System.
Once installed and rearing, you will have access to the Wilyer dashboard at cms.wilyersignage.com where you can manage the content of your screens. Post photos, videos, and add playlists that will be shown on your digital signage. The digital signage can be configured on the cloud whereby it is possible to schedule changes, view the status of the screens and update numerous TVs at the same time. This show display software has professional features and is extremely easy to use.
The digital signage system is equipped with such features as scheduling of the content, i.e. you can schedule various content at different times of the day. Prepare morning announcements, afternoon promotions and evening specials which will be rotated automatically. Screen content management interface enables one to easily structure media libraries, create playlists and distribute the content throughout your digital signage network.
Cost Comparison: Traditional and TV Digital Signage.
The conventional commercial display software platform KSFs cost between 2 and 5,000 USD per display with proprietary digital signage hardware. This low-cost digital signage solution on TV only requires less than 500 dollars per screen with a Wilyer subscription alongside your current TV set. The savings are high particularly with the application of several screens. This electronic picture display gives the same functionality to costly options and saves you a lot of money when it comes to investment and maintenance costs.
Take into account that you probably already have the TV and this will save even more money. Using old systems, you are tied to proprietary digital signage hardware and can be prohibitively high content management charges. This online digital signage solution is flexible, controllable, and cost-effective, which proprietary solutions cannot afford.
Troubleshooting Your Digital Signage TV
In case you have problems once you convert a TV into a digital signage, the first step is to check to see whether your WiFi connection is stable. The digital signage on the cloud base needs regular internet connection. Ensure that your digital signage applications are not out of date in the Play Store. Make sure that all necessary permissions are given and in particular Display over other apps. Reboot your TV when the signage player machine is not responding. The majority of the problems can be solved by just re-booting your digital signage display.
To view content that is not being updated on your TV screen advertising panel, you must confirm that you have published the playlist on your Wilyer dashboard. Make sure that you have set the content on the right screen. To operate the screen content management system, it has to be configured properly. When the pairing code fails to be connected, you can make sure that your TV has an active internet connection and restart the Wilyer application. In case of any issues, contact the Wilyer customer care team that is able to assist in troubleshooting your digital signage system.
The Top Reason why Wilyer is the best digital signage software to use on any TV.
Wilyer is one of the best digital signage apps due to a number of reasons. First, it is specifically built to work with a smart TV when applying digital signage as it will work best with the consumer TVs. Second, the user-friendly interface will enable the management of the content of screens even to non-technical users. Third, the digital signage architecture is based on the cloud and offers enterprise level reliability and scalability. Fourth, Wilyer also provides complete support and frequent updates that will ensure your digital signage system is up to date.
It has everything you want in an expensive commercial display software - scheduling, multi-zones layout, remote management, analytics, etc. but at a fraction of the price. The basic pairing operation, automatic permissions set up and secure connection is what makes your digital signage TV run flawlessly. This is why Wilyer is the perfect digital display contender to businesses of any size. Wilyer is sizable enough to suit you: small cafe with a single TV or a chain with hundreds of stores.
Conclusion: Change Your Business Communication.
The art of turning TV into digital signage exposes business communication to great opportunities. This is a low cost digital TV signage system that will give out professional performance at a low cost as compared to the expensive cost of the conventional digital signage hardware. Through this entire 34 step tutorial, you have now learned how to transform a TV into digital signage by using the Wilyer platform which is the best digital signage software on any television.
You can have a digital menu board, informational displays, promotional screens, or wayfinding solutions and that is what this cloud-based approach of digital signage offers. When consumer television hardware is combined with professional commercial display software, a strong and affordable digital signage system emerges that competes with proprietary offerings at a higher cost. From the beginning of installation until pairing and permission configurations, each process is made easy and reliable.
Begin your digital signage TV revolution. Wilyer Digital Signage Player is installed on your smart TV, the required permissions are provided, it is connected to the cloud platform with the help of your own unique code, and you start creating interesting content that attracts attention and conveys the message. This is the future of advertising on TV screens and business communication that is more accessible and cheaper than ever. A professional digital signage display is your new destination.

