برنامج عرض الإعلانات الرقمية على الموقع
كيف يمكنك نشر وصيانة خادم إعلانات محلي؟
دليل خطوة بخطوة لنشر وصيانة خوادم الإشارات المحلية.

نشر خادم الإعلانات المحلي هو عملية مباشرة، ولكنها تتطلب إعدادًا دقيقًا وتعاون تكنولوجيا المعلومات لضمان تشغيل النظام بسلاسة وأمان. الهدف الرئيسي هو إنشاء خادم محلي يمكنه استضافة وإدارة وتوزيع جميع محتويات الإعلانات داخل الشبكة الخاصة بمنظمتك.
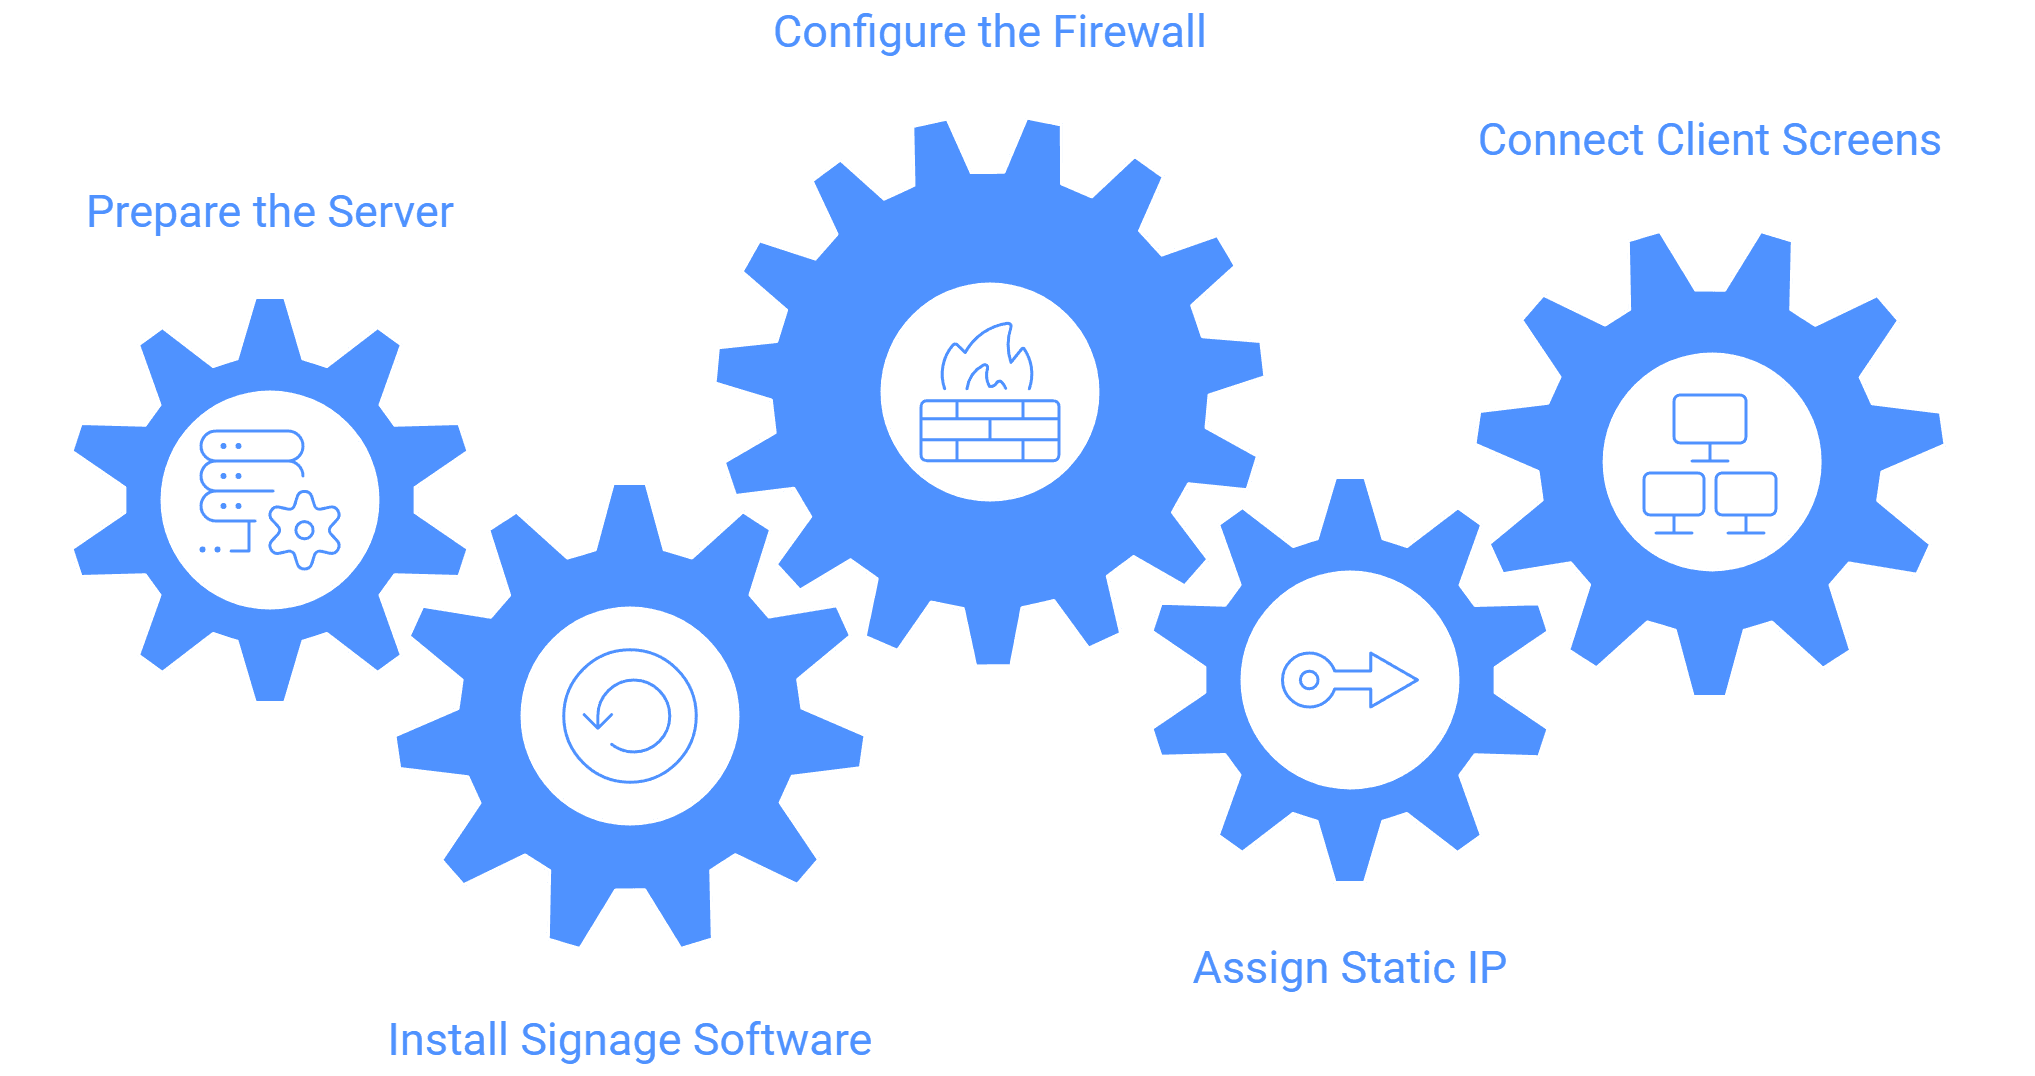
عملية النشر:
تحضير الخادم: اختر نظامًا قويًا، ويفضل أن يكون خادم ويندوز أو لينكس مزودًا بمعالج Intel i5 أو أعلى وذاكرة تخزين لا تقل عن 512 جيجابايت. هذا يضمن تشغيل وسائل الإعلام بسلاسة وتوفير مساحة لتخزين المحتوى.
تثبيت برنامج الإعلانات: يقوم البائع الخاص بالإعلانات (على سبيل المثال، Wilyer Signage) بتثبيت المكونات الأساسية مثل قاعدة البيانات، وتخزين الملفات، وتطبيق الخادم على جهازك.
تكوين جدار الحماية: يقوم فريق تكنولوجيا المعلومات لديك بتعيين أذونات جدار الحماية للسماح للأجهزة المحلية (الشاشات أو مشغلات الوسائط) بالاتصال بشكل آمن بالخادم.
تعيين عنوان IP ثابت: قم بتخصيص عنوان IP ثابت للخادم حتى تتمكن كل شاشة من الوصول إليه باستمرار دون انقطاعات في الاتصال.
توصيل شاشات العميل: قم بتثبيت برنامج عميل الإعلانات على كل جهاز عرض واربطه بعنوان IP الخاص بالخادم. بمجرد الاتصال، تبدأ الشاشات في مزامنة المحتوى وتشغيله.
الصيانة:
للحفاظ على الأداء، تأكد من أن:
يظل الخادم قيد التشغيل خلال ساعات العمل.
يتم أخذ نسخ احتياطية منتظمة من ملفات الوسائط والتكوينات.
يتم مراجعة إعدادات جدار الحماية بشكل دوري.
يقوم فريق تكنولوجيا المعلومات بمراقبة الاتصال والقابلية للوصول بين الخادم والشاشات.
مع الإعداد المناسب والصيانة، يمكن للخادم المحلي لإعلانات أن يدير بشكل موثوق نشرات كبيرة عبر شاشات متعددة مع ضمان السيطرة الكاملة والأمان على جميع المحتويات.

