Non Smart TV
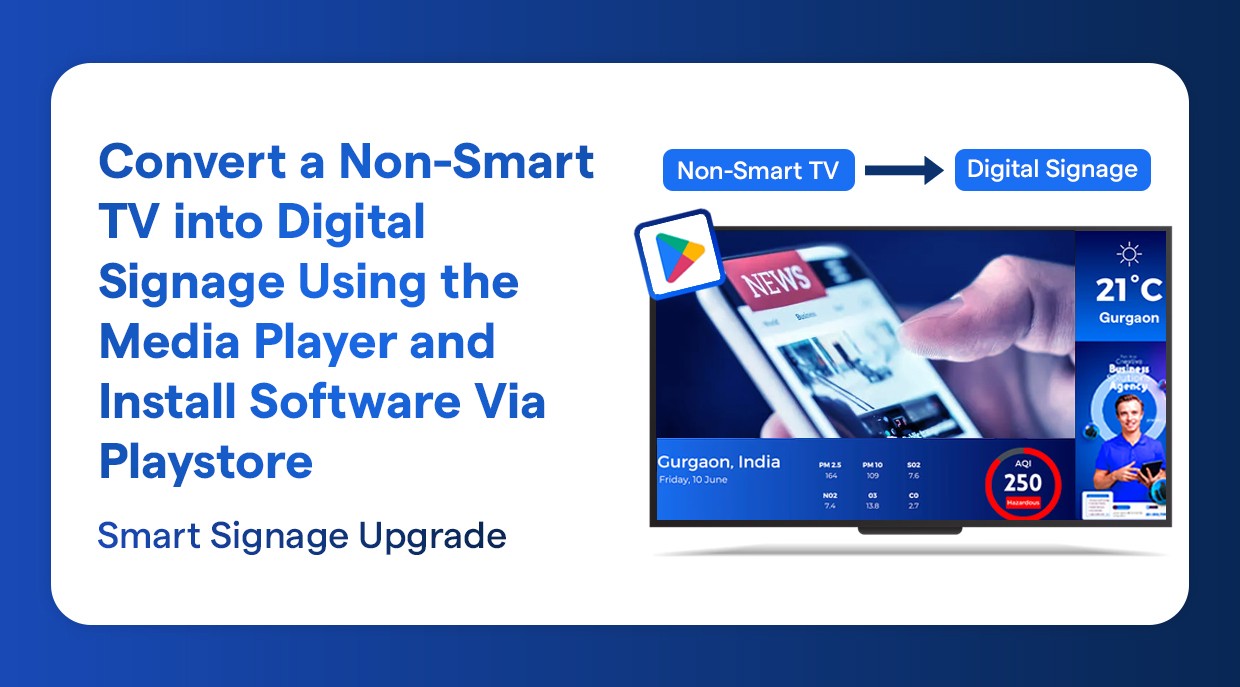
Convert a Non-Smart TV into Digital Signage Using the Media Player and Install Software Via Playstore
Turn any non-smart TV into digital signage using a media player and Play Store app installation.
Feb 12, 2026
You can easily convert a non-smart TV into a digital signage display by using a media player installed via the Play Store. For this setup, you can use an Android media player or an Amazon Fire TV Stick.
Both options connect to the TV through an HDMI port and allow you to install digital signage software, manage content remotely, and display images, videos, menus, or announcements professionally. This method is simple, cost-effective, and ideal for businesses, restaurants, schools, and retail stores.
What is the difference between Non-Smart TV or Android TV
You can Install apps directly on Android TV
Android TV has its own Operating System
We can use Android TV without a Media Player
On Non-Smart TV, we cannot run our application directly, we need an operating system for that, for example - a media player.
Until you cannot convert a non-smart TV to an output source via an HDMI cable, just an ordinary screen.
Benefits of Using a Media Player for Non-Smart TVs
A media player allows any non-smart TV to function as a modern digital signage display. It connects easily through HDMI and provides access to digital signage software.
Key advantages include:
Enables digital signage on non-smart TVs
Supports content playback such as images, videos, and menus
Allows remote content management through a cloud dashboard
Provides scheduled and automated content updates
Ensures smooth, continuous playback without interruptions
Cost-effective alternative to replacing existing TVs
What You Need to Set Up Digital Signage on a Non-Smart TV
Make sure that you have the following before you begin:
A non-smart HDMI input television.
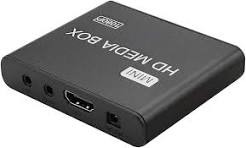
Android media box or Amazon fire stick.
Reliable internet connection of WiFi.
Play Store Google account.
Wilyer Digital Signage account.
Step 1: Access Your Smart TV Box Home Screen
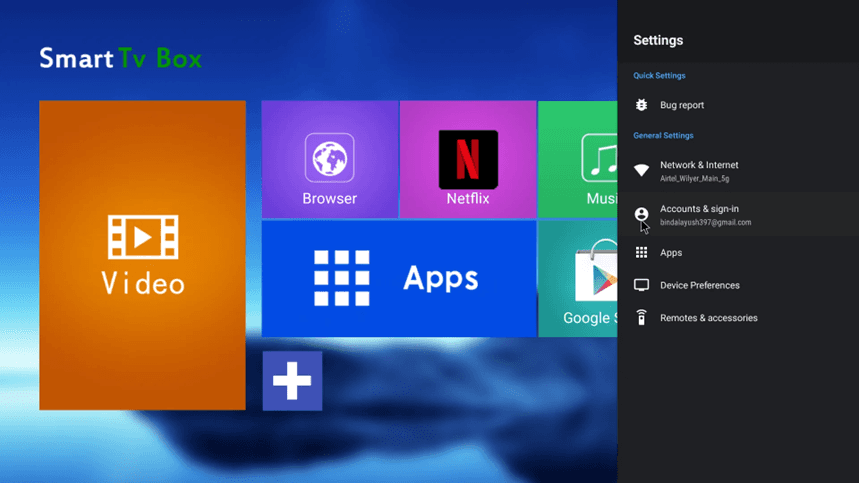
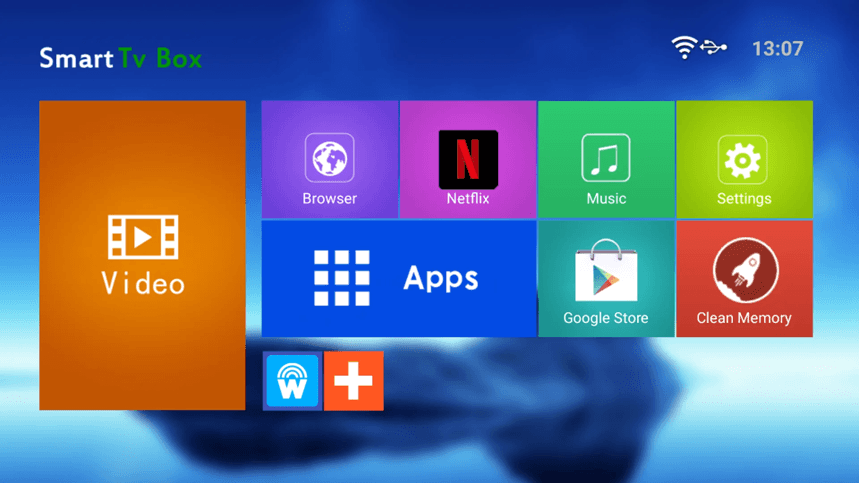
It begins by firing up your Android television box or media player and going to your home screen. Here we have an interface of a Smart TV Box. You will find different app tiles such as Video, Browser, Netflix, Music, settings, Apps, Google Store and Clean Memory.

Step 2: Open Settings
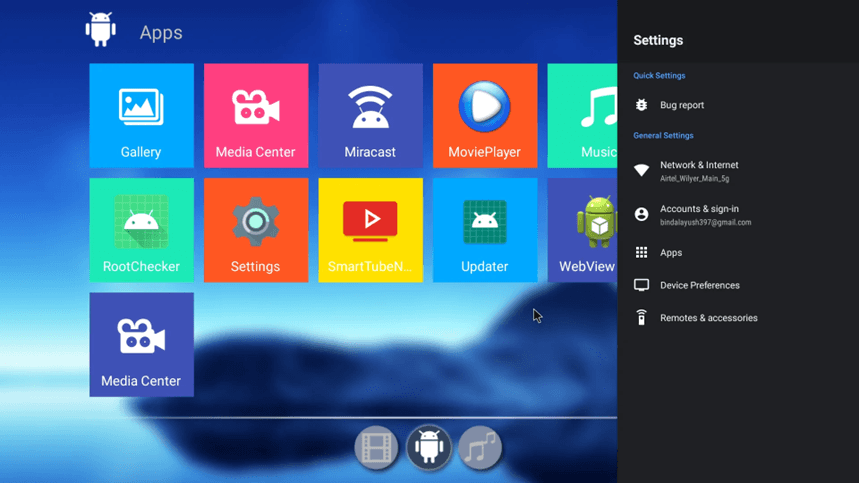
Tap the Settings icon (gear icon) in order to enter the configuration menu of your device. This will open a sidebar with several settings options such as Network and Internet, Accounts and sign-in, Apps, Device Preferences and Remotes and accessories.
Step 3: Go to Google Play Store.
Go back to the home screen and choose the icon of Google Play Store. It is at this point that you download the Wilyer Digital Signage Player app to transform your TV into a digital signage player.

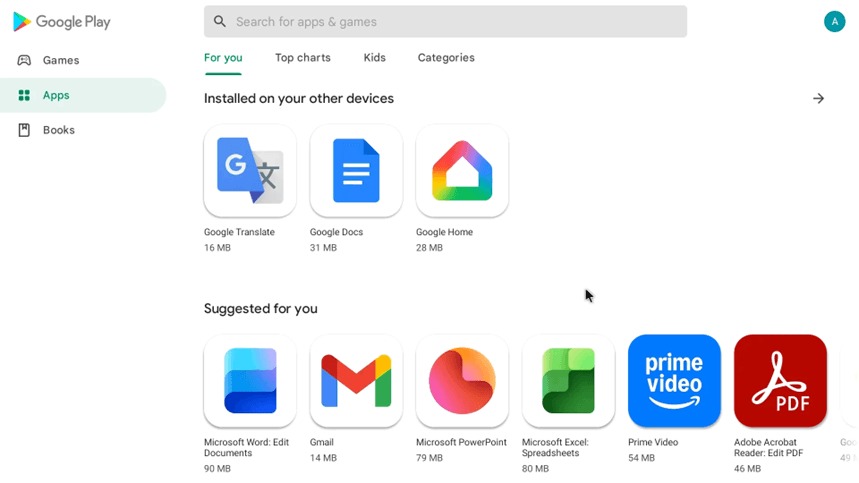
Step 4: Open the Apps Section of Google Play Store.
The Google Play Store has a navigation bar that includes multiple sections. You may navigate through various sections of the store with ease. It is also possible to access installed apps across devices through this navigation bar. Some of the most downloaded applications include Microsoft Office, Gmail, PowerPoint, Excel and Amazon Prime Video.
Step 5: Search for Digital Signage App
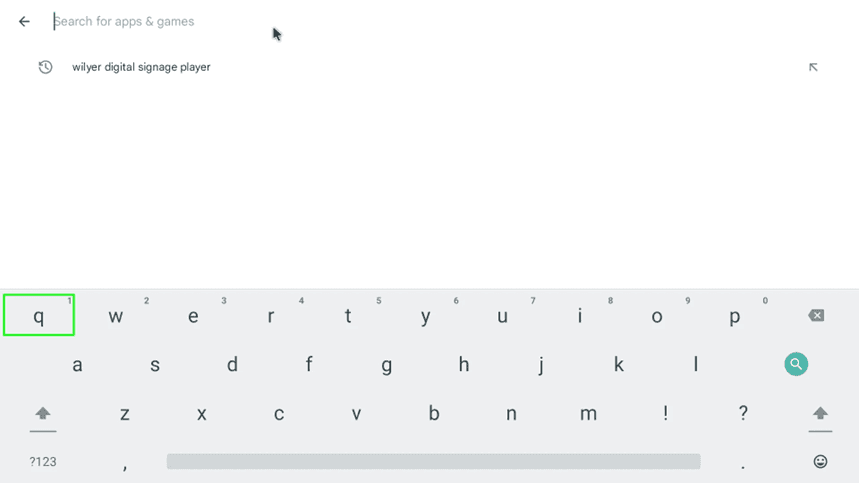
Click on the search box on the top and enter wilyer digital signage player. You will also have a history of past search: wilyer digital signage player. The on-screen keyboard will be visible so that one can easily input text.
Step 6: Type the App Name
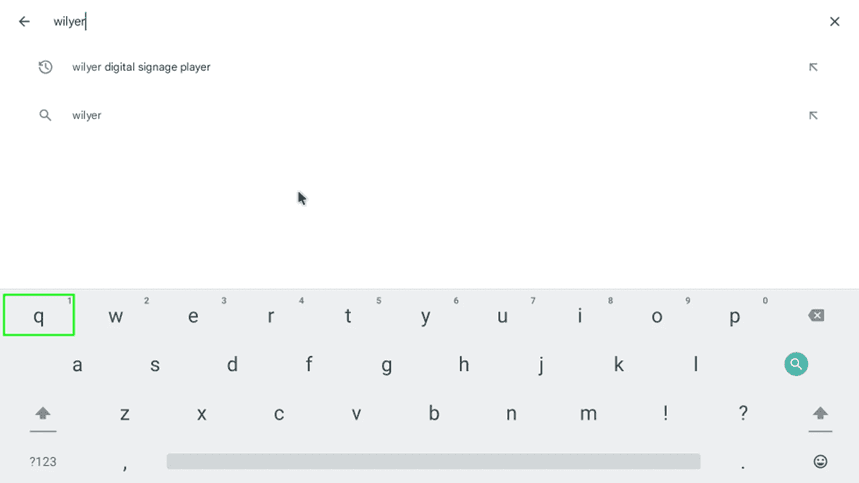
Keep typing 'wilyer' in the search field. You will see search offers as you type in such as wilyer digital signage players and simply wilyer. It is a digital signage software application that is particularly used to turn ordinary TVs into digital screens controlled by the cloud.
Step 7: Select Wilyer Digital Signage Player App.
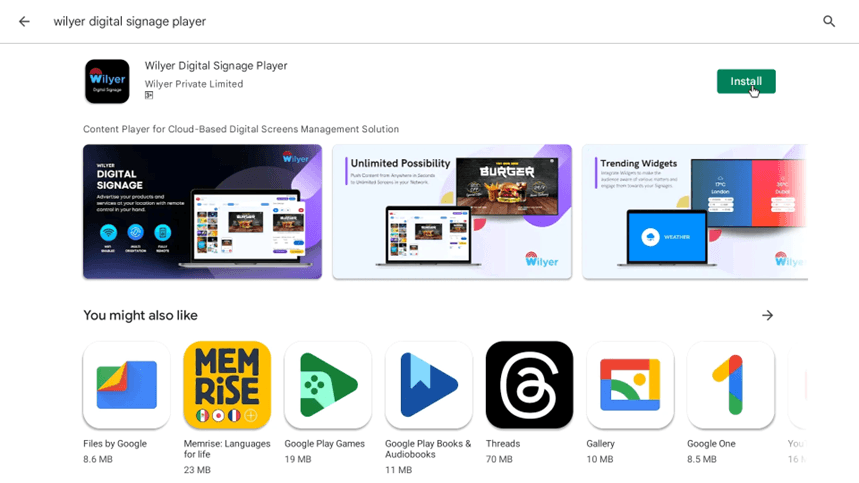
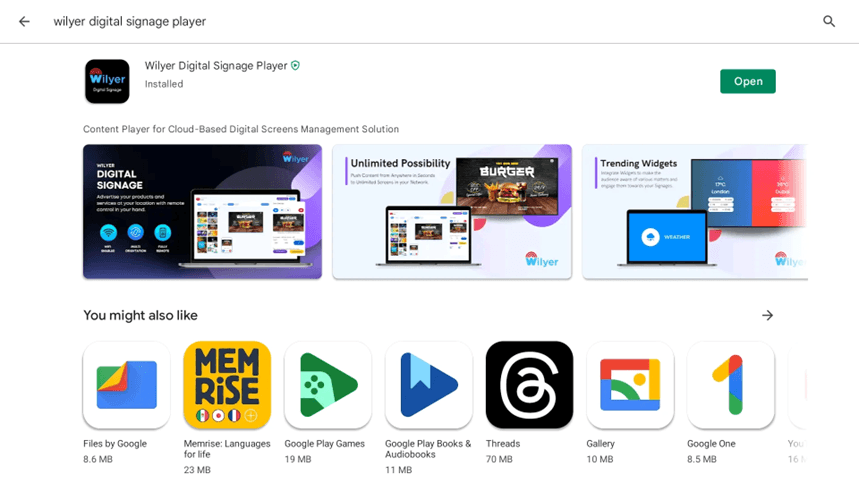
Based on the search findings, choose Wilyer Digital Signage player by Wilyer Private Limited. The application description is that it is a Content Player of Cloud-Based Digital Screens Management Solution. The app page will have advertisement graphics of the features such as Unlimited Possibility, Trending Widgets and the digital signage platform interface.
Step 8:Install Digital Signage App.
To start the process of downloading and installing the Wilyer Digital Signage Player, press the green button with the text Install. The app is 21.00 MB in size. There will be a progress indicator in the process of installing it.

Step 9: Track the Process of Installation.
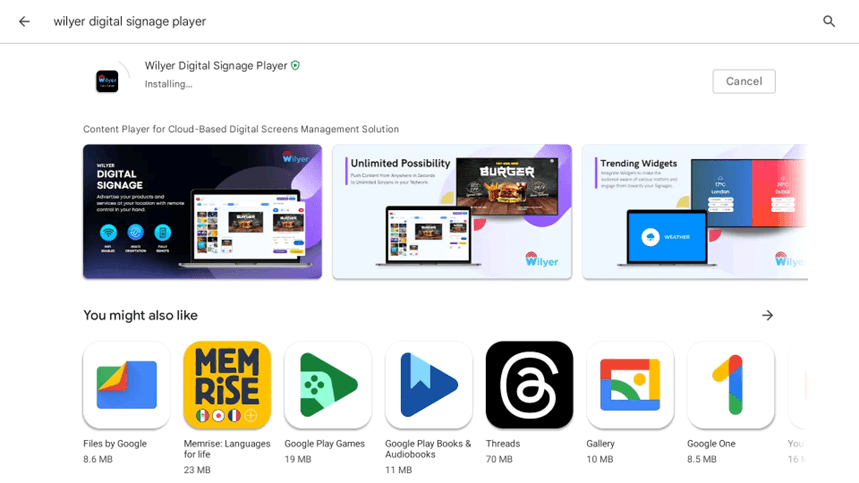
Let the installation take place. A progress bar will be displayed with downloading and installing. It has an option of Cancel button in case you want to cancel the installation. This is a cloud-based digital signage player that can be installed within the shortest time within most android devices.
Step 10: Complete Installation
After the installation is complete, you will be presented with an installed status and green open button. Now the Wilyer Digital Signage Player is installed in your device and is now ready to turn your non-smart TV into a digital signage screen.
Step 11: Return to Home Screen
Go back to your television box home screen. Just like your other app tiles ( Video, Browser, Netflix, Music, Settings, Apps, Google Store, and Clean Memory ), you can see the Wilyer Digital Signage app icon has now been added there, with a characteristic looking “W” logo in blue.
Step 12: Access Apps Menu
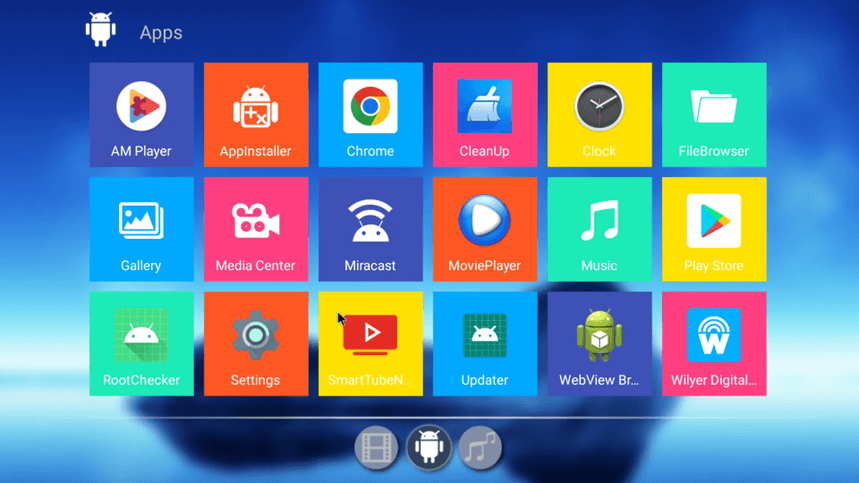
Click on the 'Apps' title to view all installed applications. You'll see a comprehensive guide of apps including AM Player, AppInstaller, Chrome, CleanUp, Clock, FileBrowser, Gallery, Media Center, Miracast, MoviePlayer, Music, Play Store, RootChecker, Settings, SmartTubeNext, Updater, WebView Browser, and the newly installed Wilyer Digital Signage app.
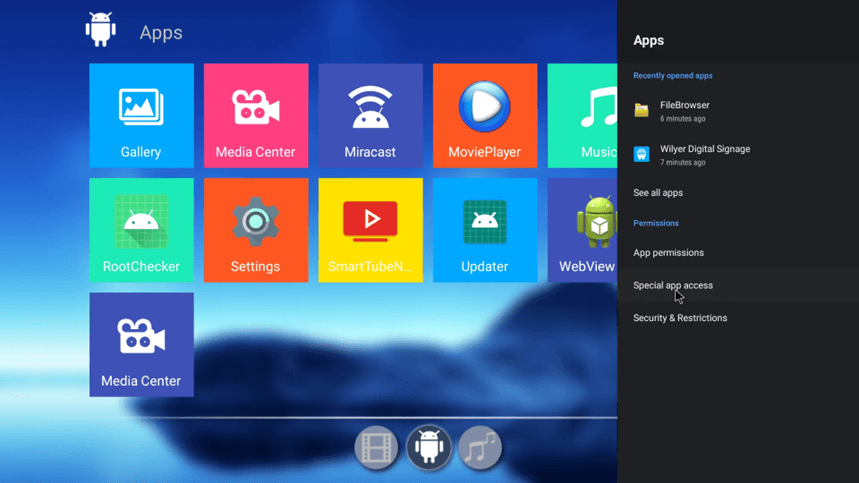
Step 13: Assign Display Permissions.
You should provide the player with special permissions in order to make sure that the digital signage works correctly. Go to the apps menu and make open Settings, then go to Apps Special app access Display over other apps. This authorization permits the digital signage content to be overlaid on other applications and this is necessary to the 24/7 use of digital signage.
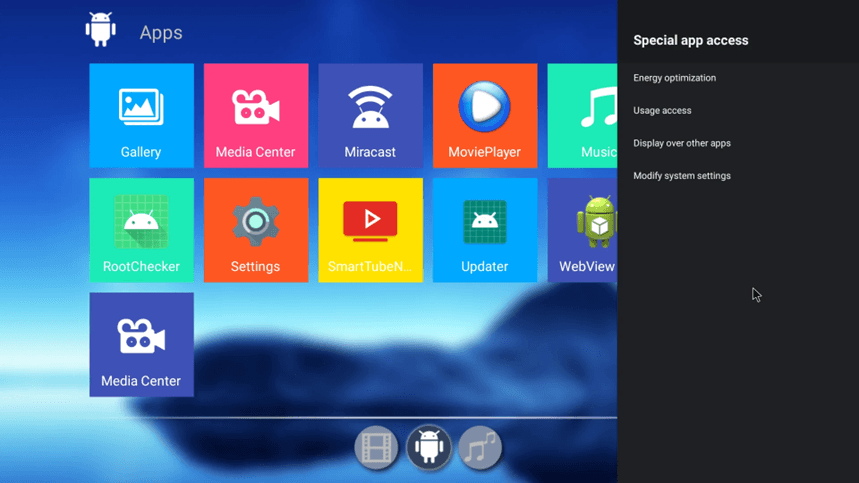
Step 14: Click on Special Permissions.
The apps settings menu will be available, so go to the menu and tap on the Special app access. More sophisticated permissions are found in this section like, Energy optimization, Usage, Display over other apps, and Modify system settings. The environments are essential in effective digital signage.
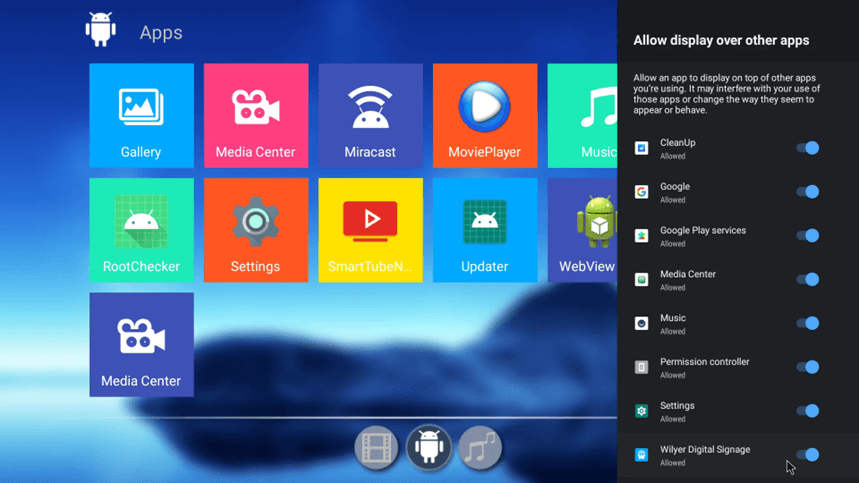
Step 15: Allow Display Over Other Apps
Choose to show on top of the other applications. A list will appear that contains apps with their permission status. Keep scrolling down until you find Wilyer Digital Signage which displays Not allowed. The screen describes that letting an application show over other applications might mess up your use of those applications or alter the manner in which they appear or act.
Step 16: Enable Overall Permission
Locate the Wilyer Digital Signage application in the list and switch the permission switch, which was not allowed to the Allowed mode. This allows the digital signage player authorisation to post content over the rest of the applications which is needed to have the signage visible even when there is another background activity. This makes the digital display not interrupted.

Step 17: Verify Permission Granted
Ensure that Wilyer Digital Signage application is at present displaying an authorized position. The toggle switch is to be in the on position. The app has now been listed as one of the authorized apps alongside other legitimate apps such as CleanUp, Google, Google Play services, Media center, Music, Permission controller, and Settings. Your digital signage media player device has been set up correctly.
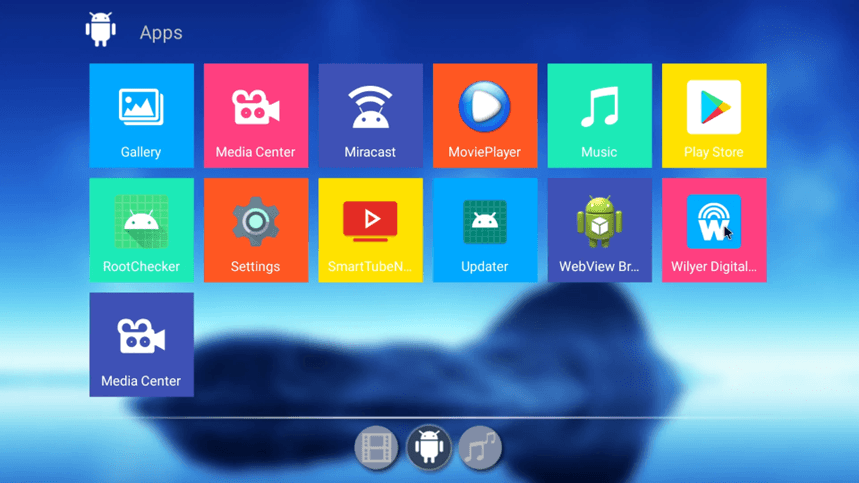
Step 18: Launch Digital Signage Player
Go back to your apps and click the Wilyer Digital Signage icon. The application now appears on the first row with Gallery, Media center, Miracast, Movieplayer, music and Play store. The opening of this digital signage player interface will occur upon launching this app.
Step 19: Connect to Your Digital Signage Account
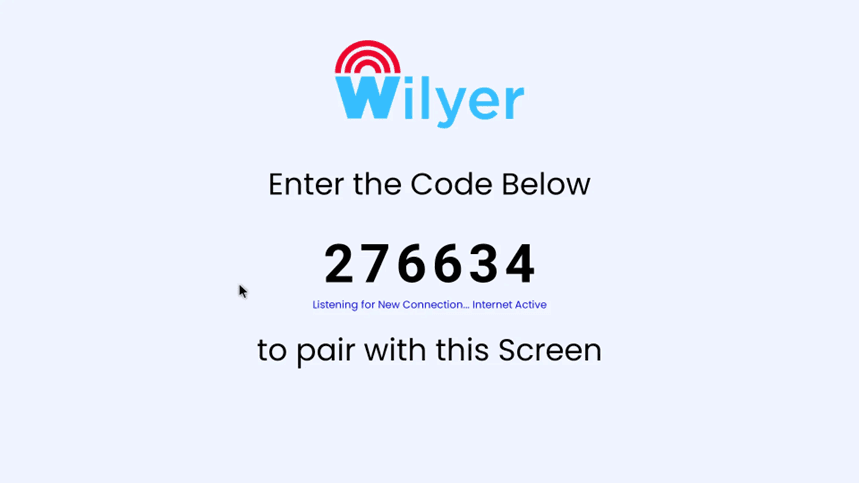
The Wilyer Digital Signage Player will show a pairing screen and a pairing code (6-digits (276634) in the case). On the screen, there is the entry point to code below and the text 'Listening to New Connection. ‘Internet Active’ confirms that you are connected to the internet and are online. Under the code, there is a statement that it should have been paired with this Screen.
On the computer or even mobile device, one needs to log in to your Wilyer Digital Signage cloud CMS (Content Management System) at wilyer.com to complete the set up. Go to the screens section and press add new screen. Use this 6-digit pairing code to attach your TV with your digital signage account. After pairing it, you are able to control all your digital signage content remotely on the cloud based dashboard.
Congratulations, You have a Digital Signage Solution.
You have managed to go and make your non-smart TV a professional digital signage! This allows the display of dynamic content such as digital menu boards, promotional videos, announcements, social media feeds, weather widgets, news tickers, etc all on the TV: managed remotely through Wilyer which is a cloud-based application.
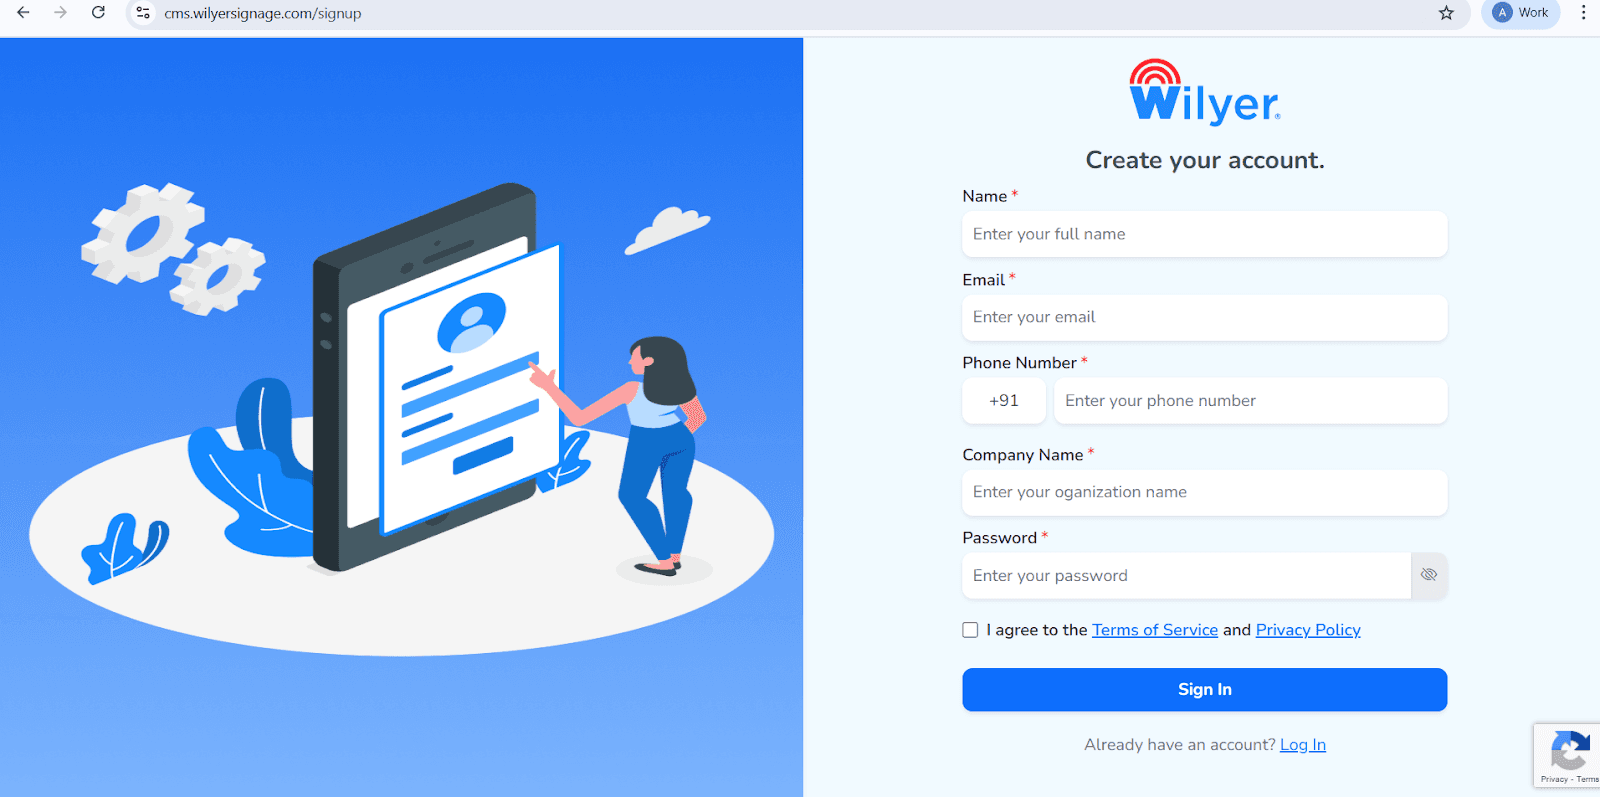
Open the Wilyer Registration Page
Visit the official Wilyer Cloud CMS sign-up page to begin setting up your digital signage account.
Enter Your Full Name
Provide your full legal name, which will be registered as the primary administrator for the signage dashboard.
Add Your Email Address
Enter a valid and active email address. This will be used for account access, verification, and official communications.
Provide Your Phone Number
Enter the mobile number associated with the account, including the correct international country code.
Enter Your Company Name
Specify your business or organization name to establish a professional identity within the Wilyer platform.
Create a Secure Password
Choose a strong password to ensure the security of your Wilyer account and data.
Accept the Terms and Privacy Policy
Review and accept the Wilyer Terms of Service and Privacy Policy by selecting the confirmation checkbox.
Complete the Registration
Click the blue Sign In button to complete the registration process and access the Wilyer dashboard.
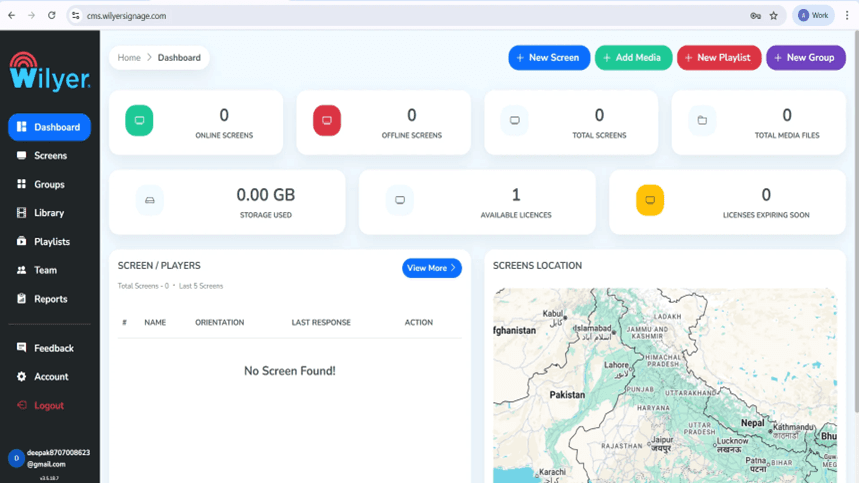
Step 20: Log In to the Wilyer Dashboard
Logging in to your account, you will land on the Wilyer Dashboard, which serves as the primary management platform for your digital signage system. Within this dashboard, you will find all of the current active and inactive screens in addition to how many screens are registered in, where each of your digital signs is stored, how much storage you are using, and how many licenses are available. With this dashboard, you can effectively monitor, manage, and control your entire signage ecosystem.
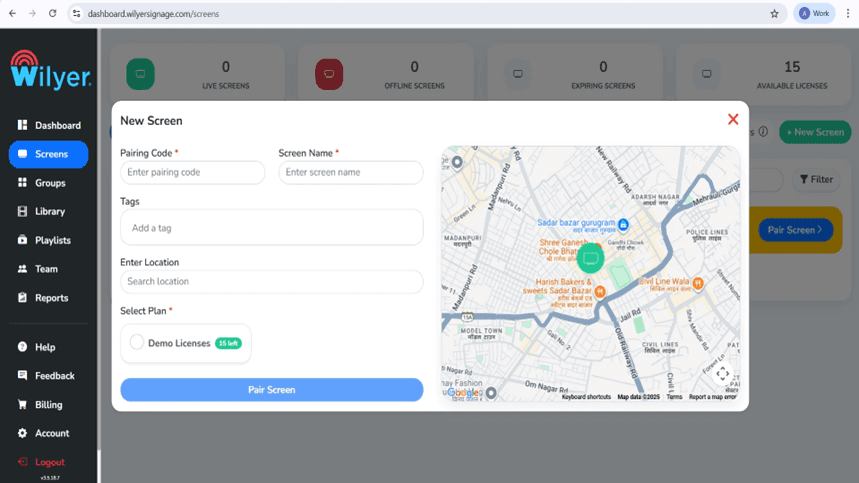
Step 21: Pair Your Android TV
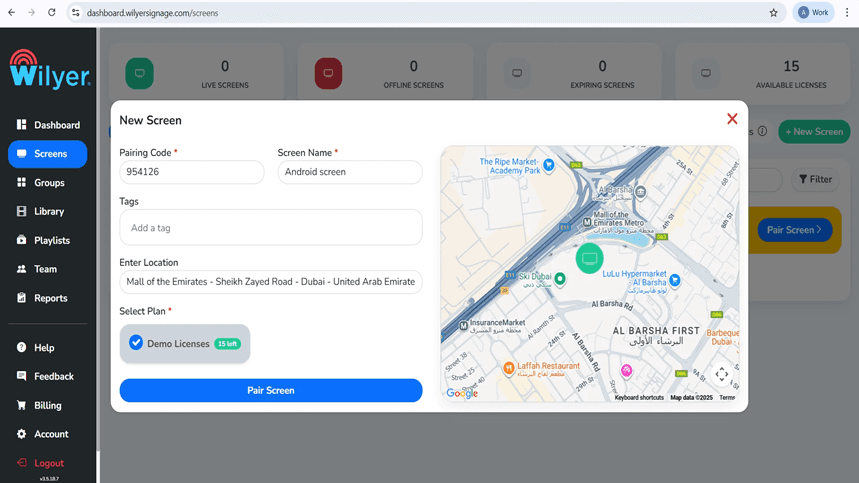
Click the plus sign (+) next to "Screen" or "Add Screen" on the Dashboard to create a new display. You will see a window with a 6-digit pairing code that will appear on your Android TV. Create a clear, descriptive title for the screen, add appropriate tags, indicate where it will be installed and select a license type that is suitable for your intended use. Then click "Pair Screen" to finalize the pairing process.
Step 22: Finish Screen Pairing through Dashboard.
To pair the screen with Wilyer's web dashboard, go to the Screens section in Wilyer's web dashboard and then follow these instructions:
Pair Screen - Input the Pairing Code shown on your TV, confirm the Screen Name and assign appropriate Tags and Installation Locations; then select from the Menu of Available License Plans and select Pair Screen to activate.
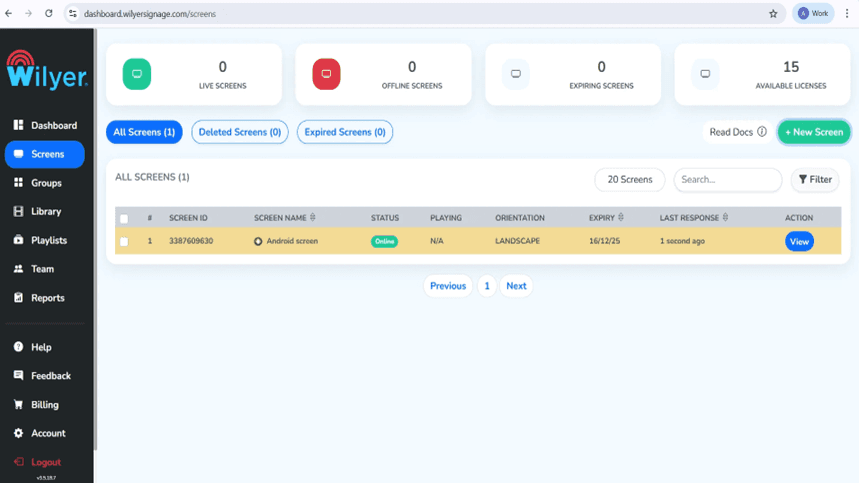
Step 23: Screen Successfully Paired
When the pairings are finished, you'll see the display shown as Online in your list of Displays. You will see all important details regarding your display, including its Screen ID, how the display is oriented (landscape vs portrait), when the License will expire, and when the last response was received by the display. At this point, the display is ready to be assigned play lists, configured, and monitored in real time.
Producing Your Digital Signage Business.
Step 24: Upload Media Files
Go to the Library area, select Upload Media, and upload any image, video or other media file types that you want to include in the Library section. The platform provides multiple file formats, including JPG, PNG and MP4, etc. The Media Library is where you will build your Digital Signage Playlists by using the media you uploaded.

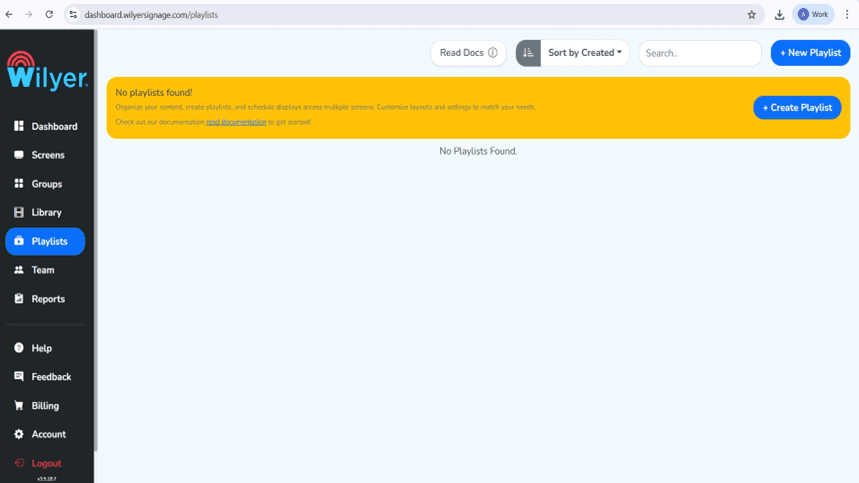
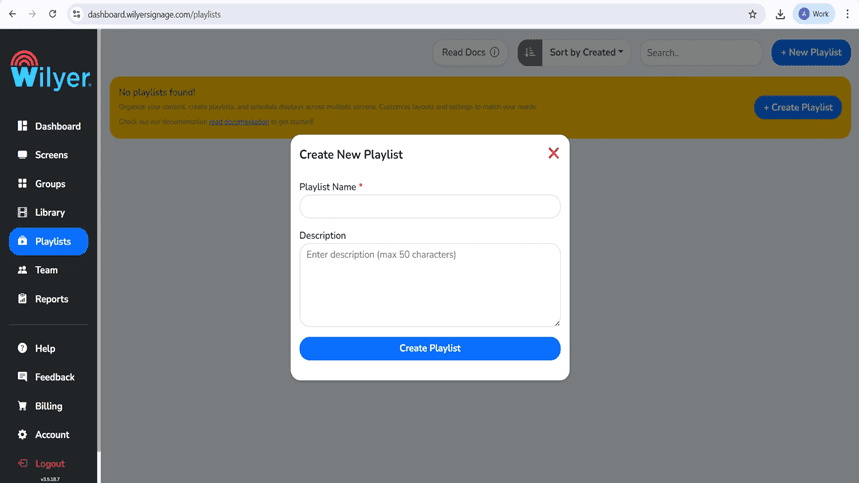
Step 25: Create Your First Playlist
Visit the Playlist area and choose the option to create a new playlist. Provide a meaningful name (and an optional description) for your new playlist to help keep track of related items to be displayed across all your connected devices.
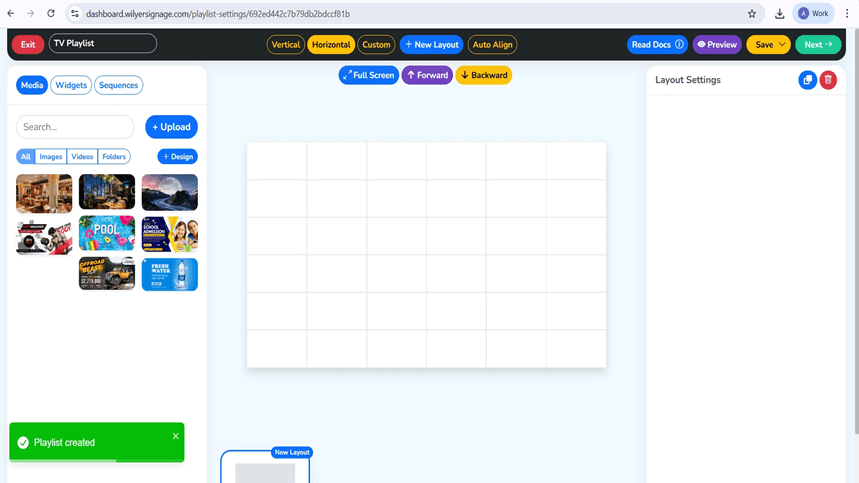
Step 26: Choose and make up the Playlist Layout.
The interface of the playlist editor allows users to place and arrange music tracks on their virtual canvas in a way that works best for them (i.e., vertical/panel vs. horizontal/traditional). Users will drag and drop their content into place, create slide durations, and select transition effects. Additionally, users will have access to a live preview as they create their presentation to see how it will look when complete.
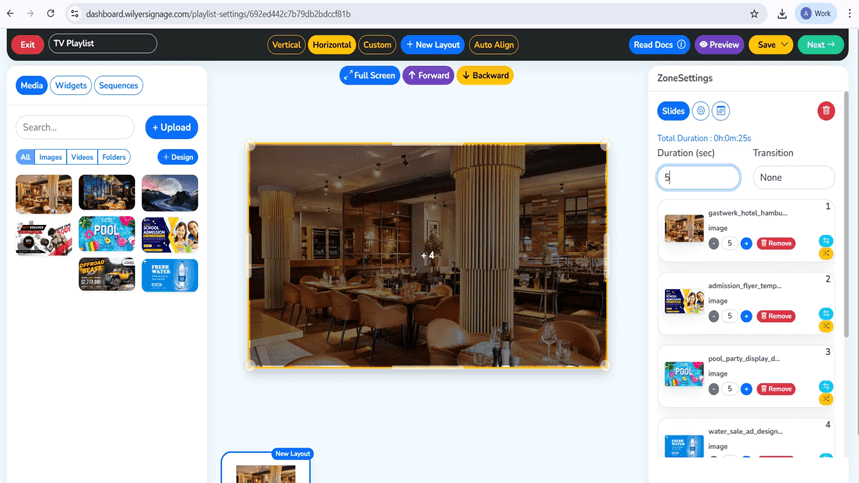
Step 27: Configure Media and Playback Settings
Images or videos can be inserted into the previously created layout zone. Each media file will appear as a slide in the playlist, thus giving you the opportunity to determine what order they will be played in, how long they will play for, and what transition effects will be used between slides. As you add or remove files from your playlist, the total duration of your playlist will automatically adjust itself. After you have created your playlist, use Preview Mode to look at the playlist and make any final changes before saving and publishing your playlist.
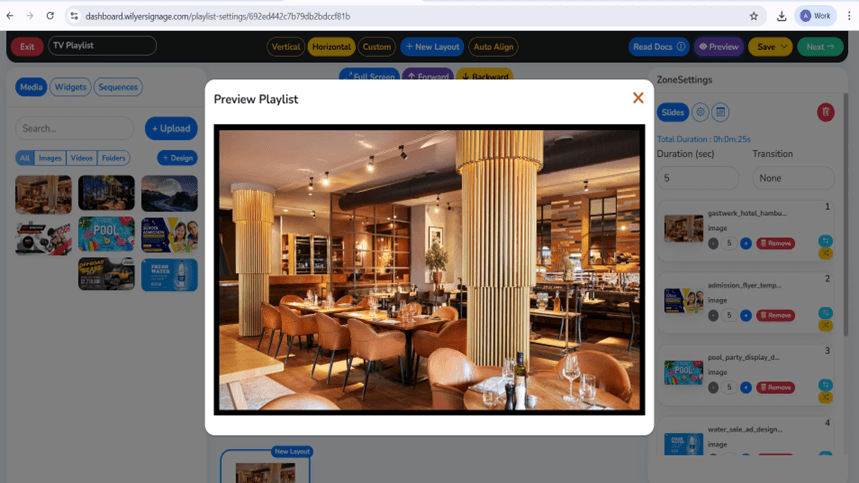
Step 28: Preview Your Playlist
To see what your playlist will look like on the display, click Preview. In Preview, you can also check your layout alignment, media order, playback times, and transition effects. Review each slide carefully for visual consistency (e.g., colors, styles) and to ensure accuracy of media content. Once you've completed your review and you are satisfied, you can use Publish to publish your playlist.
Step 29: Publish Content to Screens
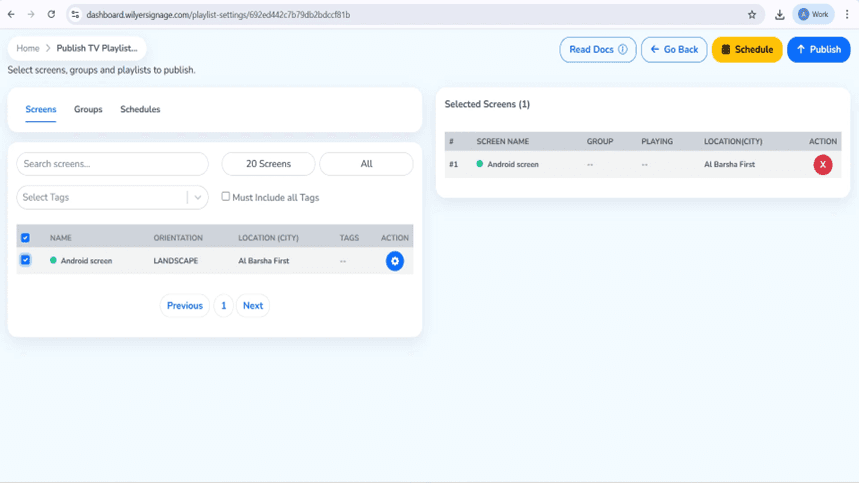
After you've completed your playlist creation, choose the Publish option on the next page. Once there, you'll be prompted to choose the screen(s) or screen groups that you want the content played on. Before deploying content, double-check to make sure you're choosing the right playlist and intended displays. This will help ensure that your content is delivered accurately.
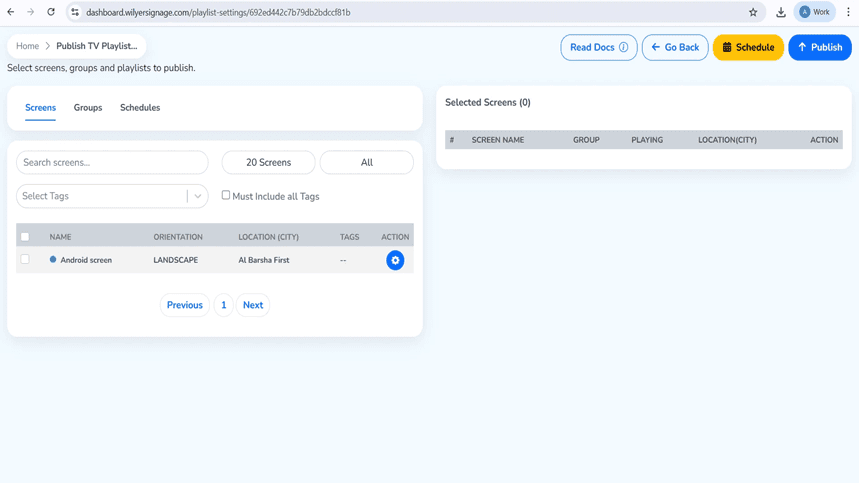
Step 30: Publish or Schedule the Playlist
To select a target display or display group for your playlist go to the Publish TV Playlist page. You can choose to Publish the Playlist immediately or Schedule it for a specified Date and Time, based on your needs and requirements for deploying the Playlist. Finally, you can select which method works best for you, by clicking on the option to Publish or Schedule.
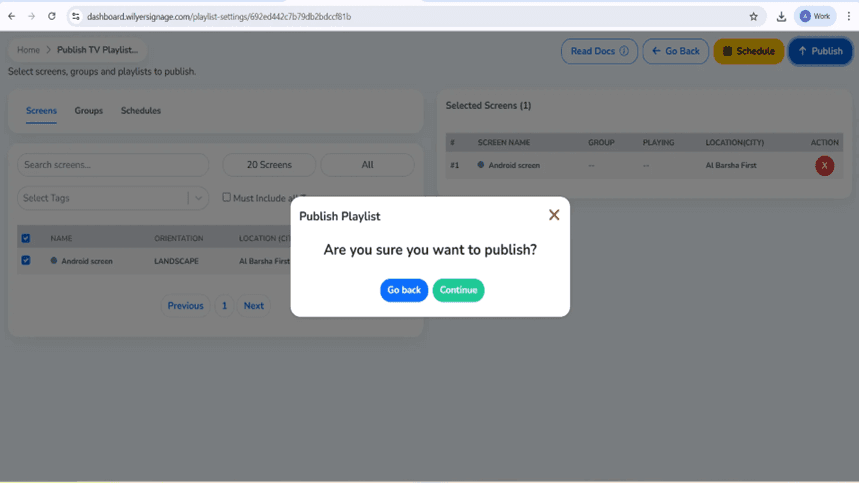
Step 31: Confirm Playlist Publishing
You will see an approval dialog just prior to publishing that will enable you to check your entries before confirming. If everything appears correct, hit Continue to confirm your approval. If you have to make changes hit the Go Back button to go back and make any necessary edits to your playlist or screen selection.
Step 32: Monitor Playlist Delivery Status
You will need to use the Playlist Report to track the progress of delivery after it has been published. In this report, you will see the list of targeted screens, current data transfer status, and the percentage of complete deliveries. The Successful status shows that all files for a screen have been delivered and the screen is now live (i.e., can play back). Once all of the delivery requirements for all of the screens have been satisfied, playback of all screens will commence.

Final Step: Playlist Live on Screen
Your music playlist is now playing on the connected screen and is available for you to view. The content is displayed in the same order as chosen and all transitions are in-time with your selection to provide a seamless transition between songs while playing; however, make sure to review visuals and transitions so as to give the audience a better presentation of a polished and professional looking playlist.

Conclusion
At this point, your digital signage hardware is installed, and you can start browsing the Wilyer platform features so that you could produce captivating content to display. Post photos and videos, create your own layouts, add social media feeds, add weather and news feeds, and set your content calendar. Your digital signage system through TV is prepared to communicate to your audience with professional images that are dynamic.
The current digital signage installation guide is compatible with any television that has HDMI and Android media player which makes it a perfect fit in small businesses, restaurants, retail stores, offices, schools, churches, waiting rooms and any other place that requires professional digital display but does not need to spend a lot on commercial digital signage displays.

Multi-Platform Compatibility for Every Digital Signage Display
Run Wilyer’s digital signage software on your preferred operating system with zero hassle.
