Table Digital Signage
Fastest Way to Convert and Set Up an Android Tablet for Digital Signage
Quickest Way to Set Up Android Tablets for Digital Signage
Jan 6, 2026
Introduction
Turning a tablet into a digital signage display is easier and more practical than most people realize, especially with Wilyer Digital Signage Software. If you already have a tablet sitting unused, there is no need to invest in expensive screens or specialized hardware to get started.
With the right digital signage software, your tablet can be transformed into a professional, easy-to-manage display for menus, promotions, announcements, videos, or brand messaging. It is an affordable and flexible solution for businesses, restaurants, offices, and even personal spaces. In this guide, we will show you how a simple tablet can become a powerful screen that you can control and update anytime, from anywhere.
This approach is ideal for businesses that want a cost-effective solution without compromising on quality. Tablets are compact, energy-efficient, and easy to mount on walls, counters, or stands. By installing a digital signage app, you can remotely manage and update content in real time, schedule displays, and keep your screen locked in kiosk mode so it runs continuously without interruption. For anyone already searching for digital signage and owning a tablet, this is the smartest and most affordable way to get started—simple setup, minimal cost, and maximum flexibility
Three ways to install digital signage application on your tablet:
Using Google Play Store: To use the application on your tablets, access to the Google Play Store with an active Google Account is essential. Signing in allows you to download, install, and update the digital signage application seamlessly across all devices. This ensures a smooth and consistent experience, enabling your tablets to run the signage software securely and reliably. With Play Store access, you also benefit from automatic updates, app stability, and compatibility, making it easier to manage your tablets as dedicated digital signage displays without any technical complexity.
Using Chrome: This occurs when an app is downloaded via the Chrome browser on a tablet. It is useful for large deployments, enabling faster bulk installation, consistent configurations, controlled version management, and simplified rollout across multiple devices in enterprise or multi-location environments.
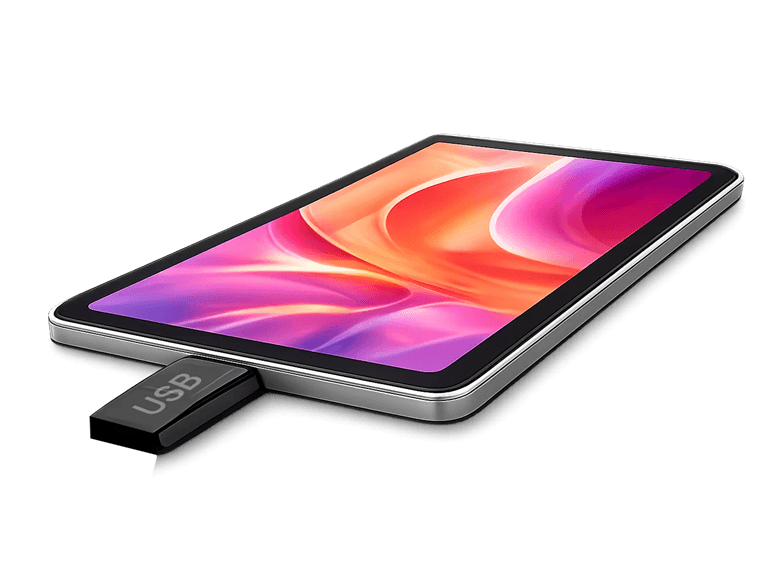
Using USB (Fastest): Store the Wilyer Digital Signage Android application on a USB drive then connect it to your tablet with a USB OTG cable. Install the application from the file manager of the tablet.
Wilyer Latest APK: https://files.wilyer.com/apks/cloud/wilyer-signage-v3.9.6-nov-3-2025-c96-official-release.apk
The Wilyer digital signage app can be downloaded to a laptop using the provided link. Once downloaded, the app file may be transferred to a pen drive, and the remaining installation steps can be completed by following the instructions in the blog post.
What You Need to Set Up Digital Signage on a Tablet
For your tablet digital signage setup, you’ll need a tablet connected via USB for continuous power and reliable operation. A stable USB connection ensures uninterrupted display, prevents battery drain, and supports long-term usage, making it ideal for always-on digital signage environments.
Before we begin, make sure you have:
A tablet with Android (any model).
A USB flash disk with the digital signage app (APK file in the case of Android).
Wi-Fi internet connection
5-10 minutes of setup time
Step 1: Open My Files and get to the App Drawer.
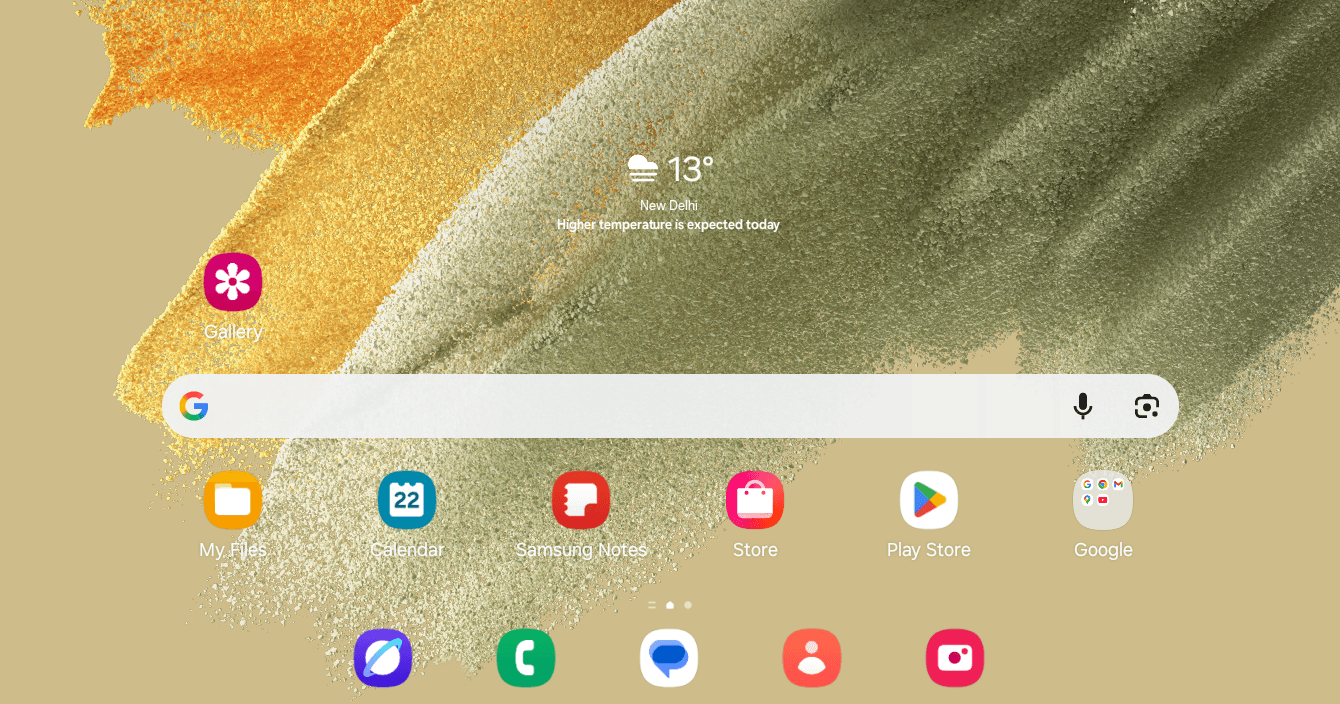
At this point we must get the file manager so that we can install the digital signage software. To view the app drawer (i.e. all the applications you have), swipe upwards at the bottom of the home screen of your tablet.
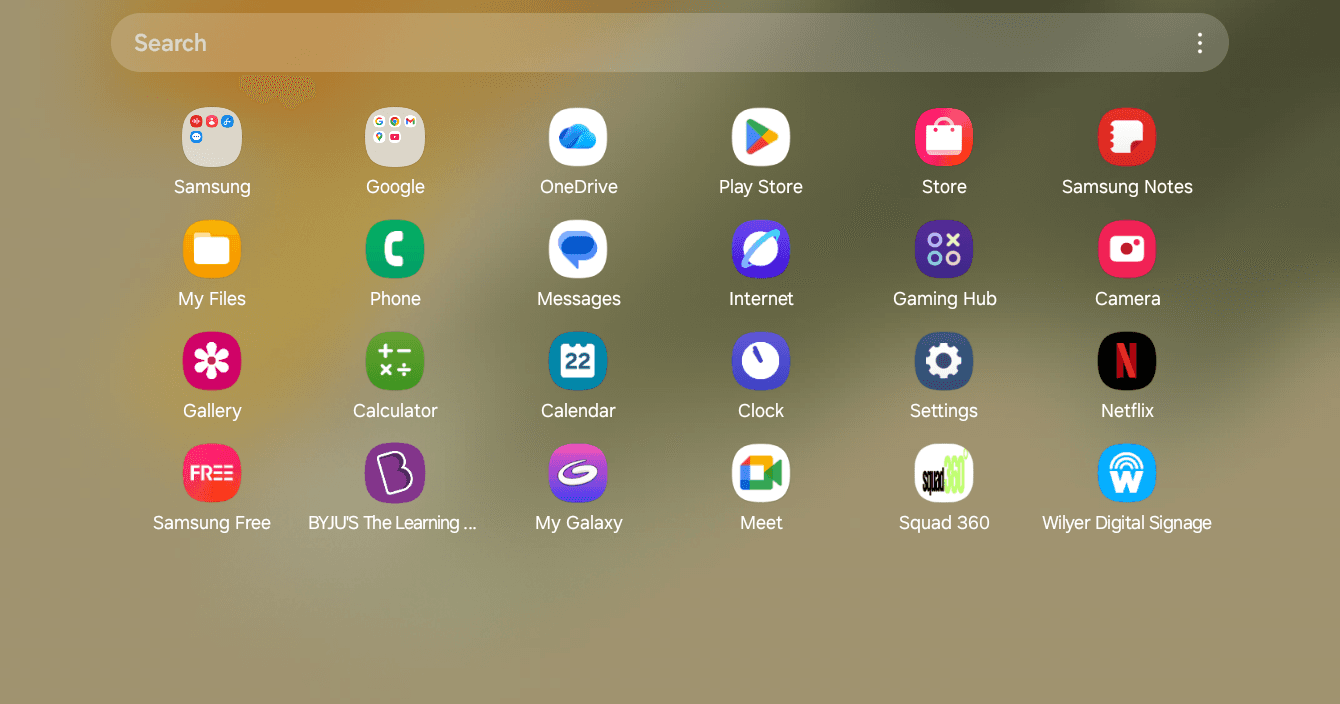
Find and press the My Files application (with a symbol of an orange folder on Samsung devices). This is a file management application that will give you access to the storage and any other USB device attached to your tablet.
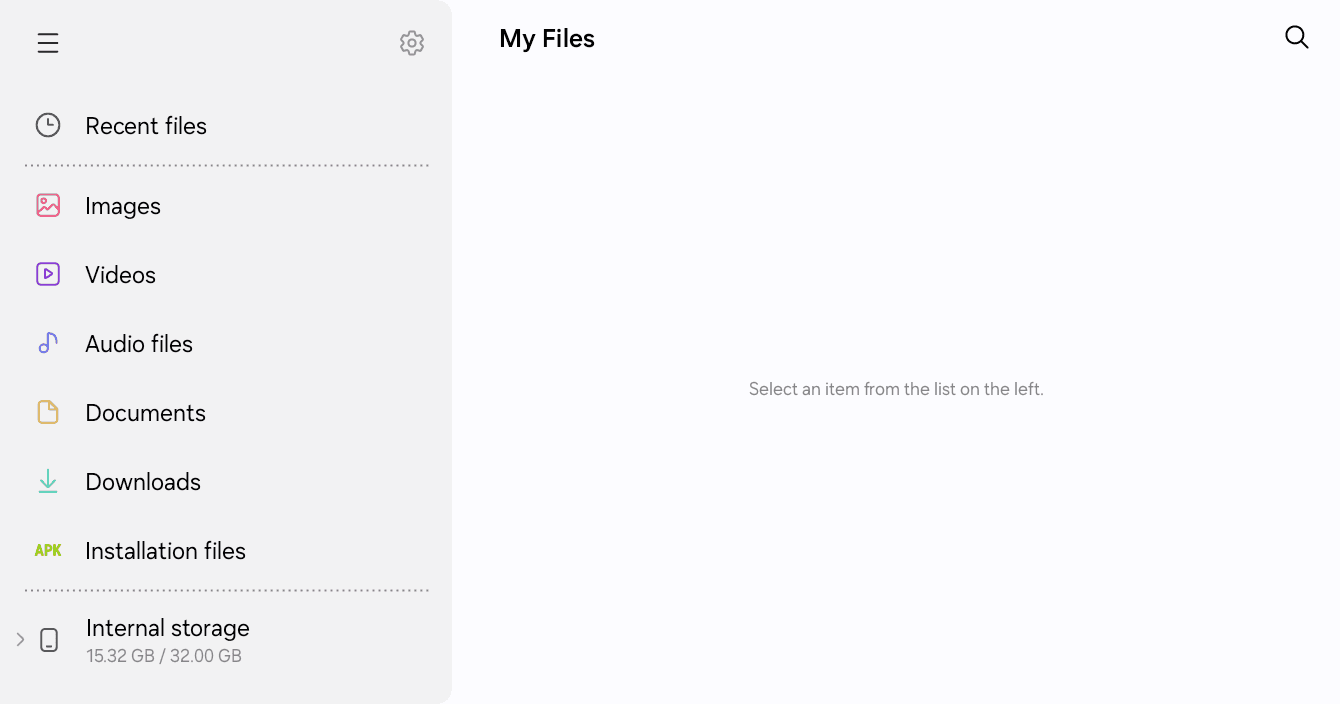
Step 2: Attach USB drive and Find the digital Signage Application.
Select your USB drive with an apk file of the Wilyer Digital Signage in your tablet USB port. USB OTG (On-The-Go) has been supported in most modern tablets enabling them to access USB storage devices.
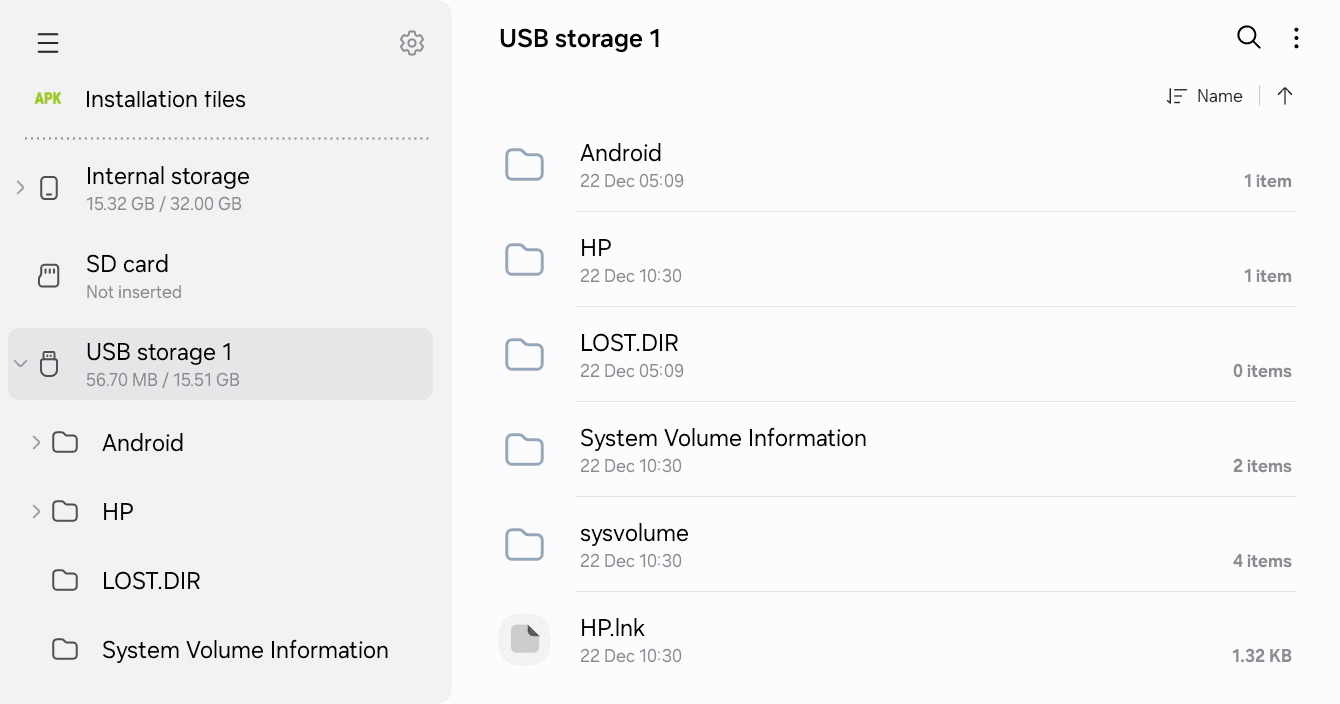
Go through the folders till you find the "Wilyer app" folder. The file that you find in this folder is the installation file to your tablet signage player software.

Step 3: Install the Digital Signage App (APK)
Go to the Wilyer app folder and tap the APK file of the name wilyer-signag...al-release.apk. Android-based digital signage tablet application package.
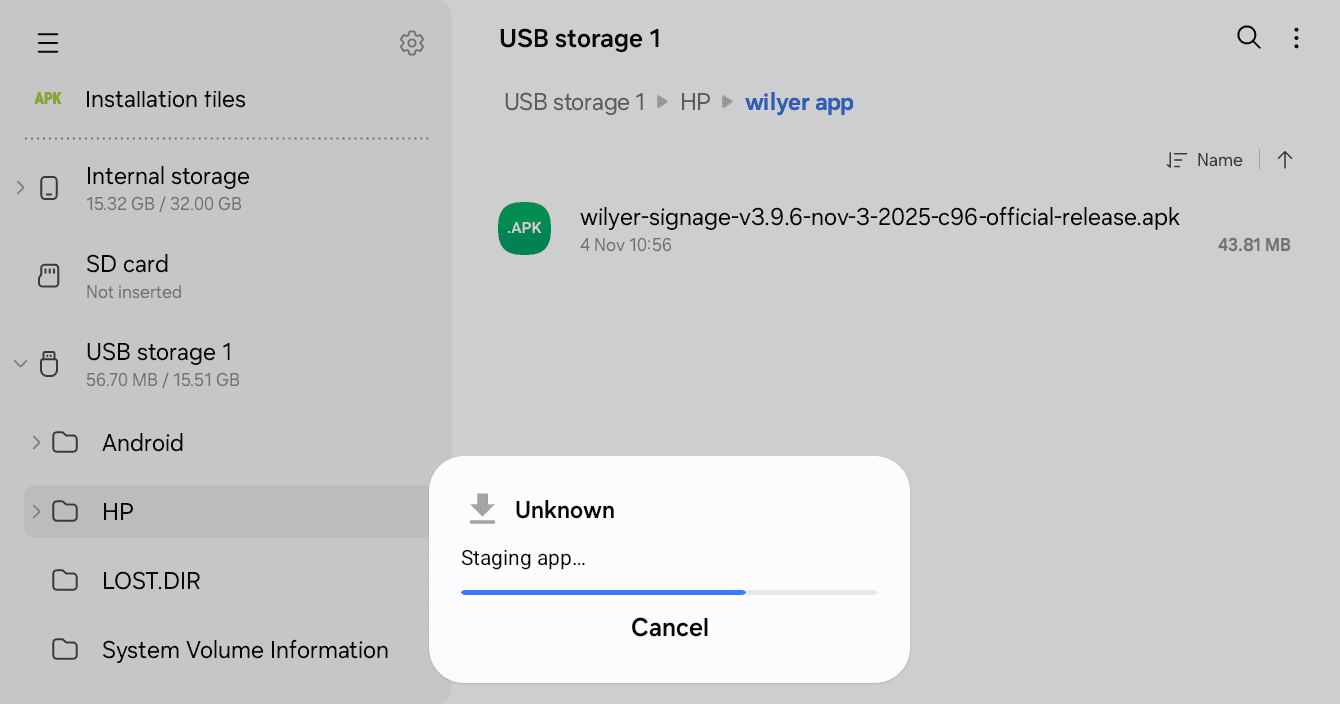
The app will start staging in your tablet to be installed. The first label you will see is the Unknown label and the system authenticates the application.
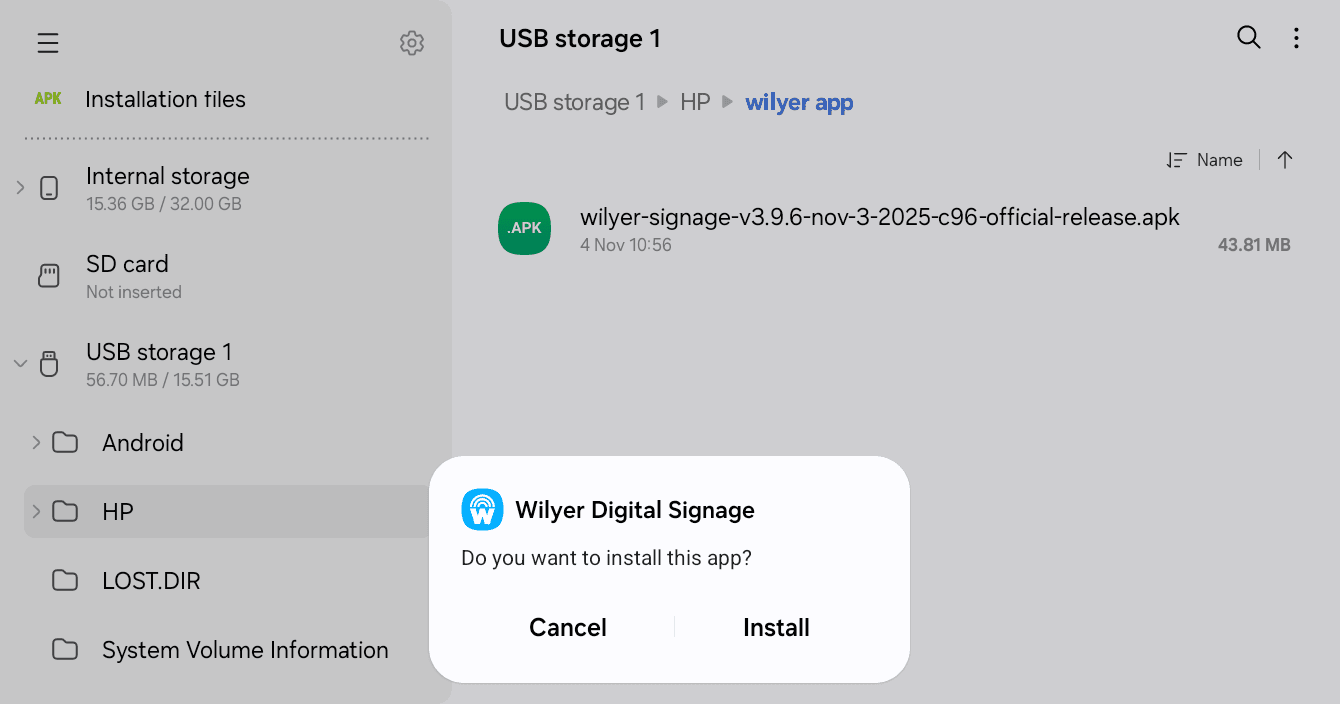
A pop-up will be displayed with the name of the app being Wilyer Digital Signage. It is your tablet signage management product that will make your device look professional and digital.
Installation Tap Install to start the installation process. The system will provide the question: Do you want to install this app?
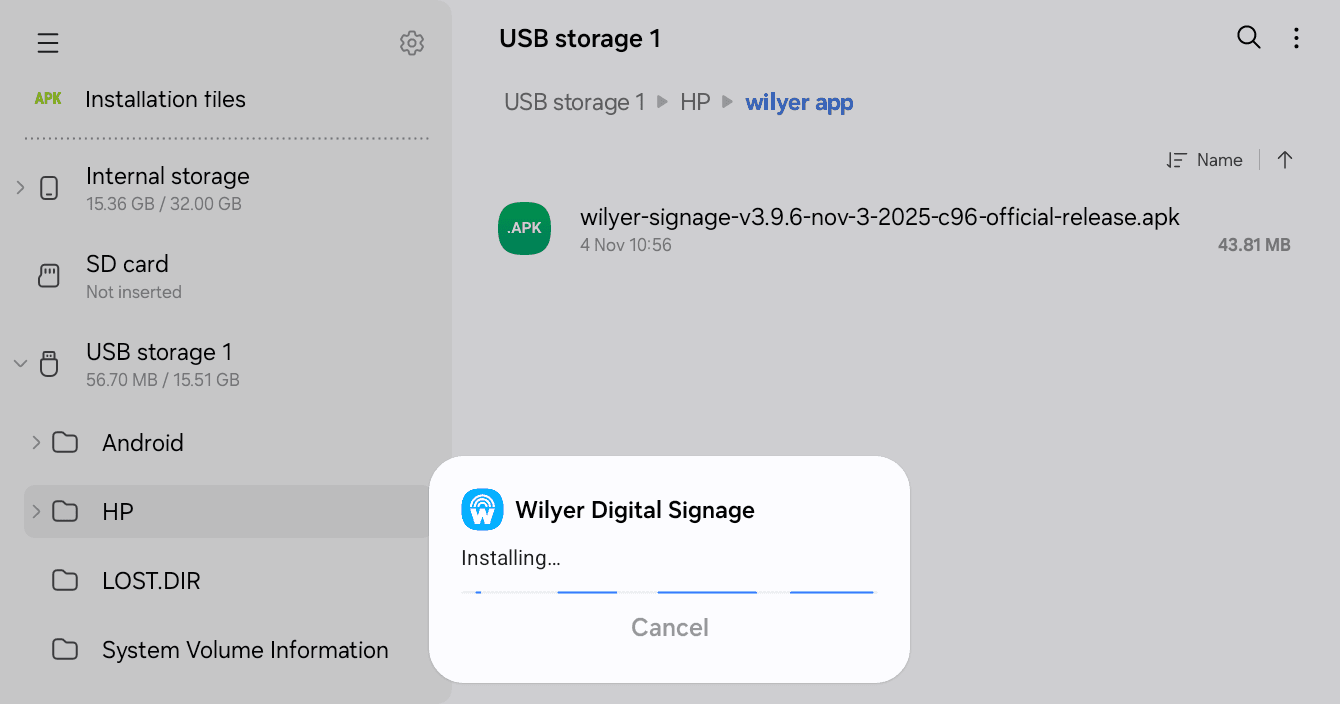
The progress bar will be installed and it will display the installing progress. because the tablet digital signage application is being installed on your device.
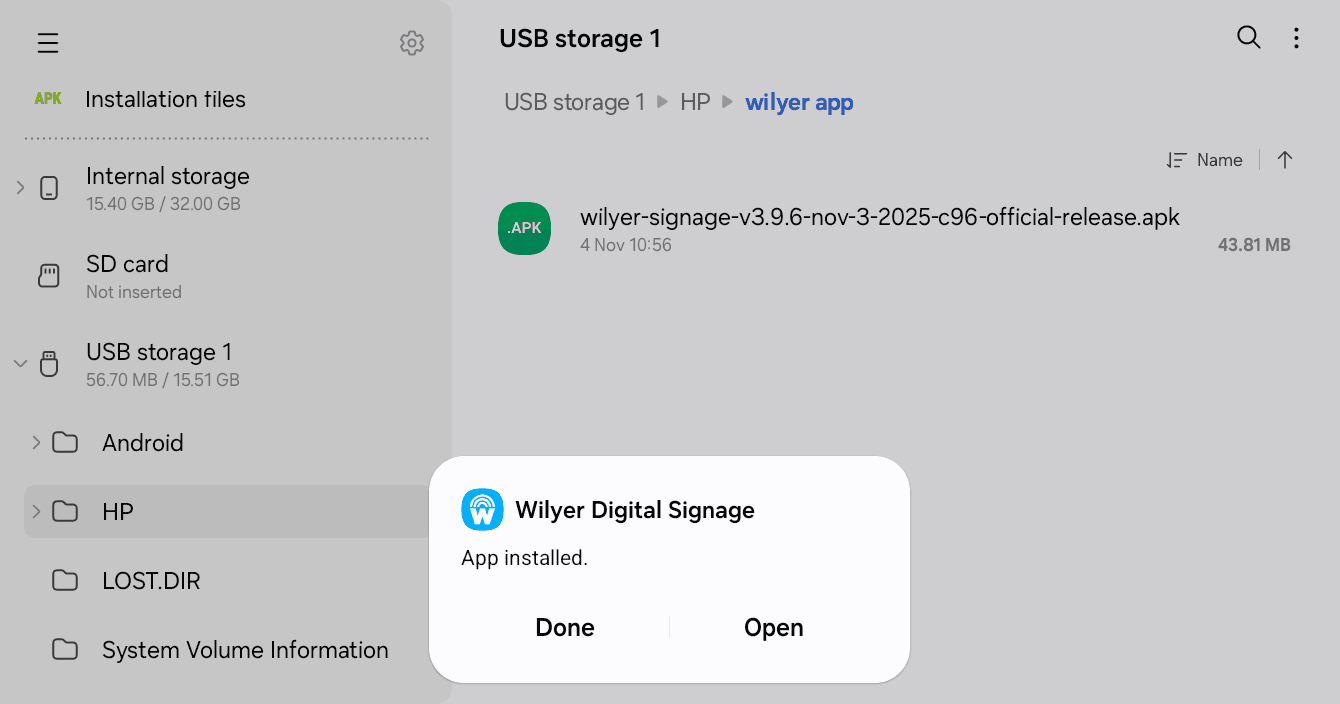
App installed will appear when installed. two choice message:Done and Open. Open and start your new tablet digital signage system instantly.
Step 4: Launch and Pair Your Tablet Digital Signage
The Wilyer Digital Signage app icon is currently located in your app drawer. It has a blue icon and the Wilyer logo, which is easy to recognize among other applications.
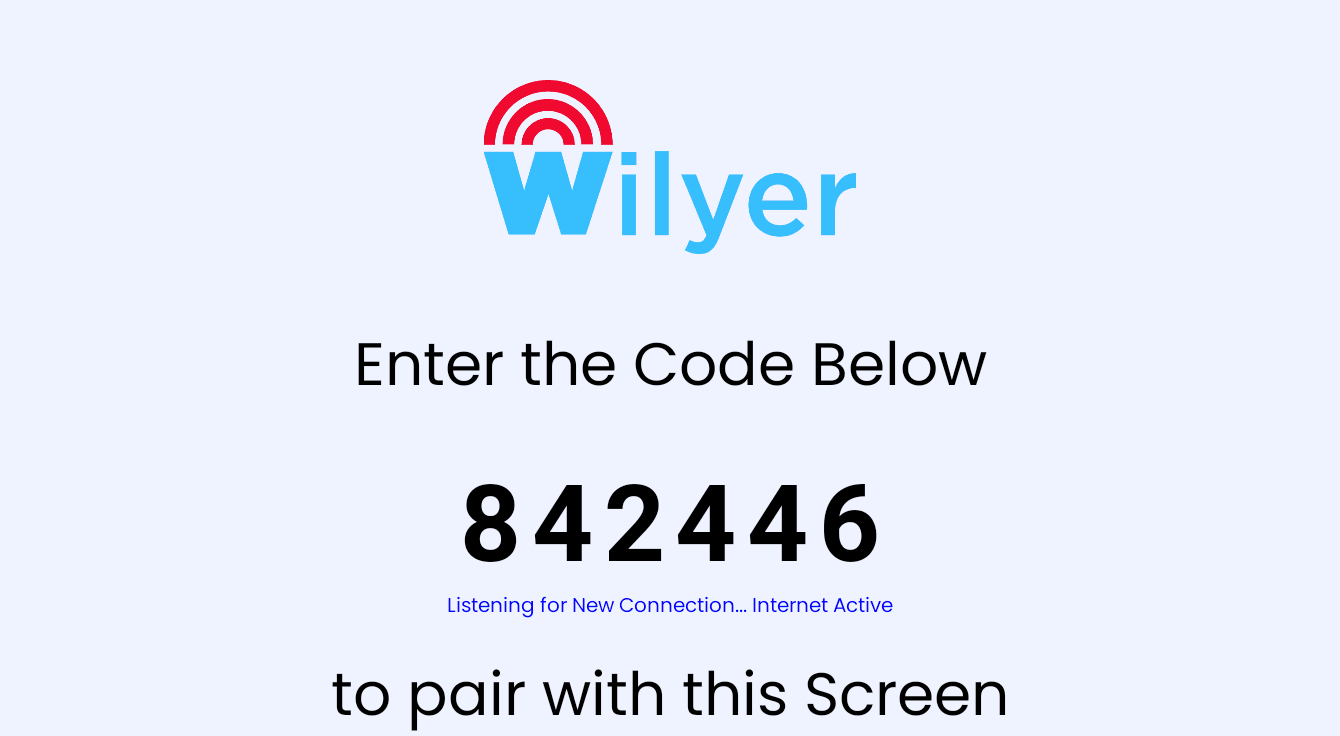
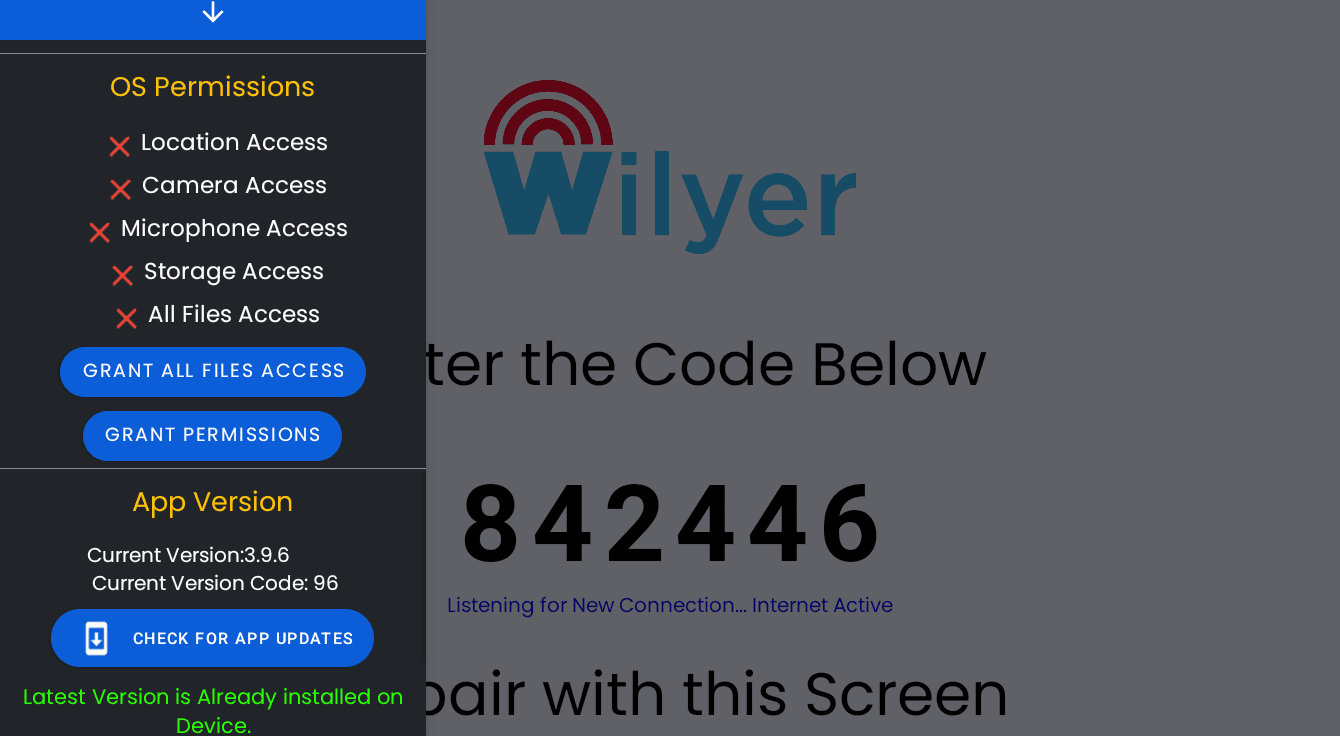
The first thing that you see when you first open the app is the pairing screen. This is your interface of tablet signage management. The screen also shows a pairing code of 6 digits which you will use to roam your tablet to the cloud digital signage CMS.
Step 5: Connect to Wi-Fi Network
The initial process of installing your tab tablet digital signage system is to get access to an internet connection. You must have a Wi-Fi connection to your tablet to interact with the cloud digital signage platform.
When you are in the home screen of your tablet, you need to swipe down to get the quick settings panel.
Touch the Wi-Fi icon and activate the Wi-Fi connection. In the status message, you will have the status of Turning on as the wireless adapter is switched on.
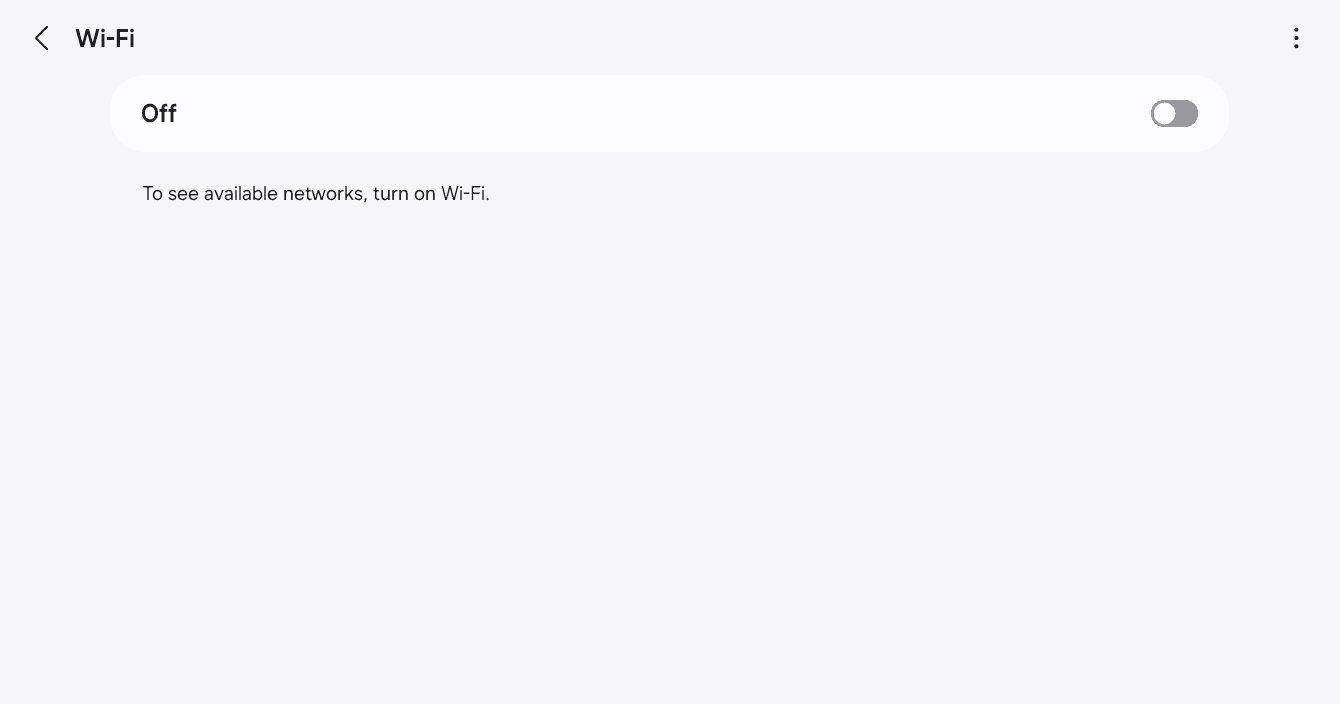
After switching on Wi-Fi, your tablet will search for the available networks. Choose the type of network you want out of the existing networks. Here we are connecting to Your Network, which is the current network.
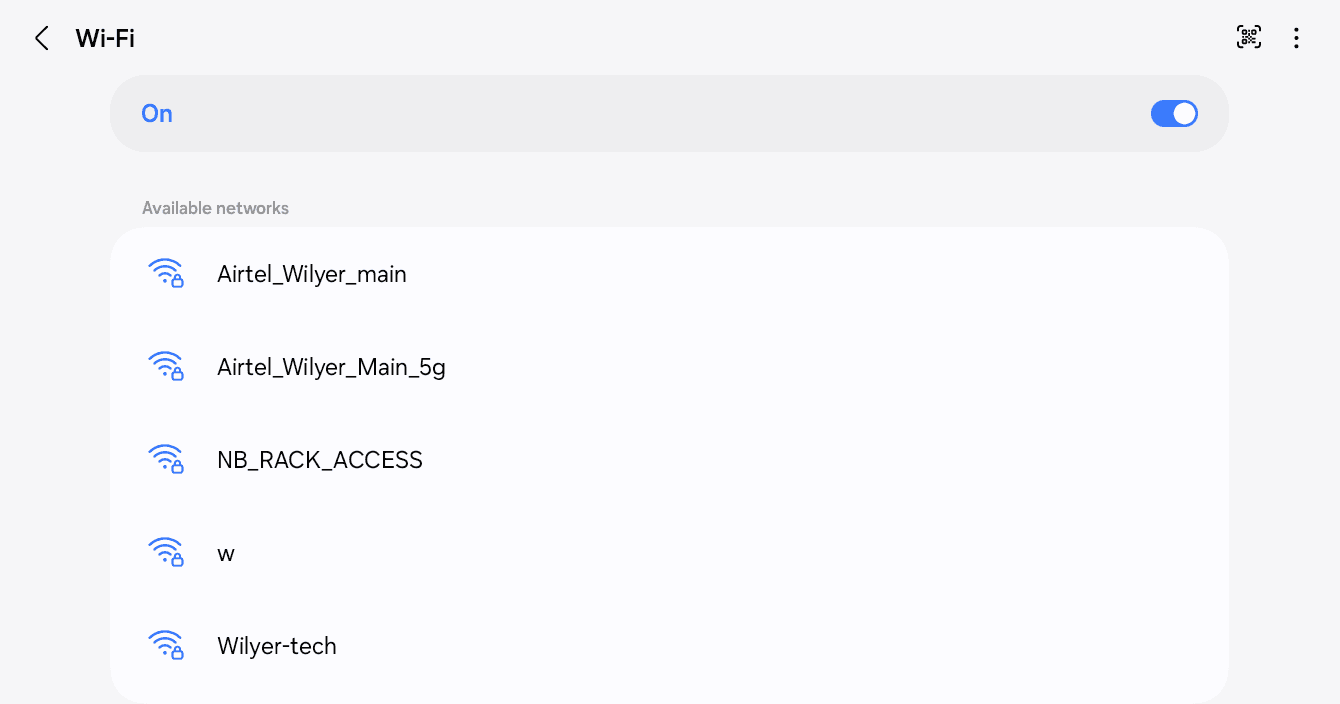
Tap Done to finish the Wi-Fi. It is now connected online and you are already one step ahead to being a smart digital signage display.
Paste this pairing code in your Wilyer account dashboard and connect the device and start to control your content remotely. The aural message is "Listening... New Connection... Internet Active" makes sure that your tablet has been paired.
Step 6: Configure App Permissions for Optimal Performance
In order to have your tablet digital signage system running smoothly, you would need to configure some permissions. Go to the home screen and go to Settings.
Open the settings and go to connections to make sure that you have your Wi-Fi on. Digital signage in the cloud requires a reliable internet connection.
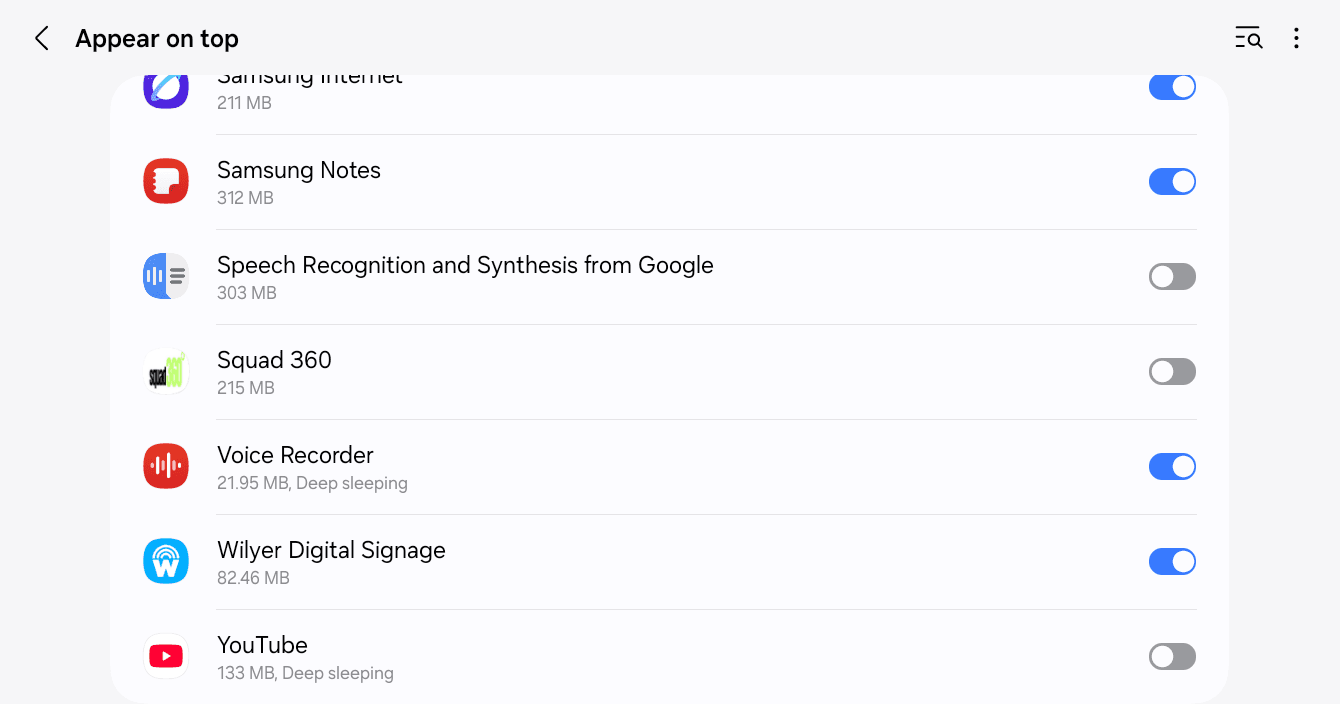
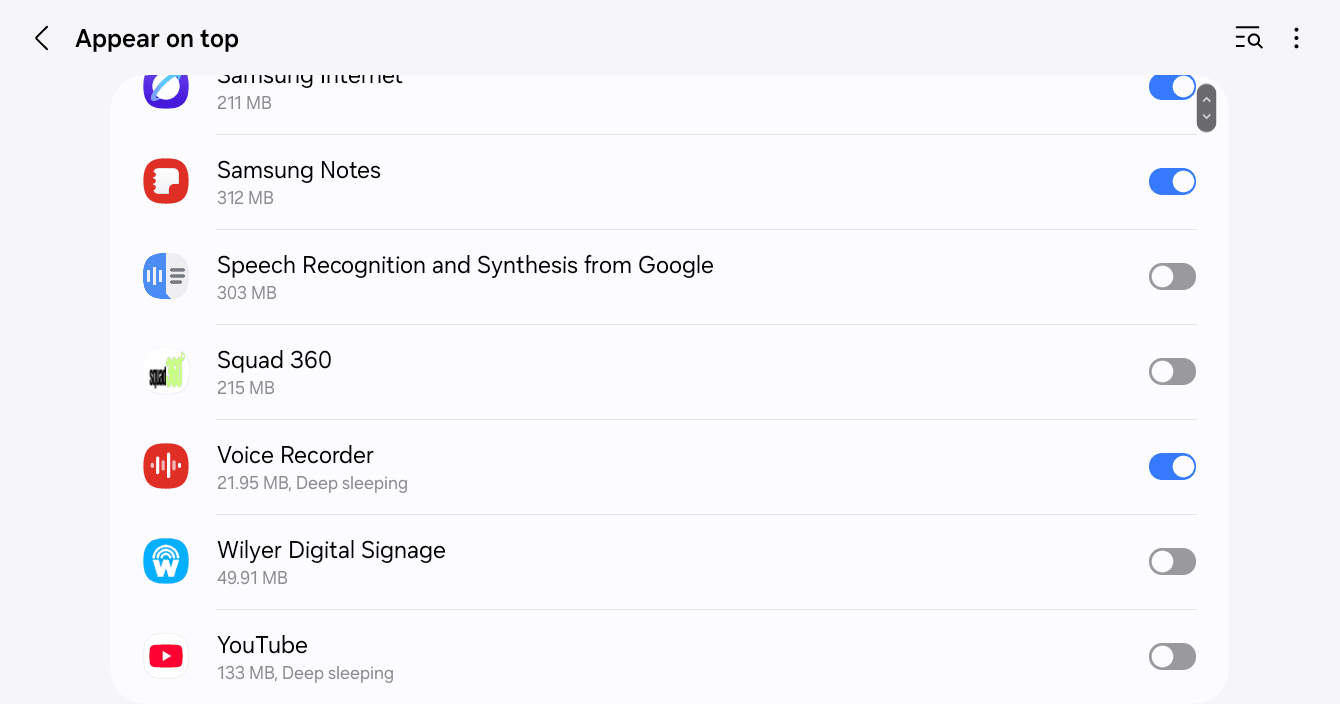
The screen of Appear on top states that: This permission will enable the appearance of an app on top of other apps you are using. This could conflict with the usage of other applications.
Find the wilyer digital signage in the list of the apps. You will see the toggle is at this moment off (greyed out).
To allow this to be permitted, tap the toggle switch adjacent to Wilyer Digital Signage. The switch will change to blue, which means that now the accord has been approved.
This is necessary to your tablet digital display solution because it will enable the signage app to remain on the top of all other applications and therefore your content can be seen at all times and will not allow a user to access other applications by mistake.
Step 8: Tap on the In-App Settings Menu.
Go to your home page and open the wilyer digital signage application once again. At this point you must configure the app-specific settings to ensure you achieve the best performance of tablet signage.
Upon opening the app, you will get the main screen with the pairing code. On the screen, there is an in-app settings menu that can be tapped. There will be a sidebar which slides in to the left that has detailed configuration options regarding your smart tablet digital signage.
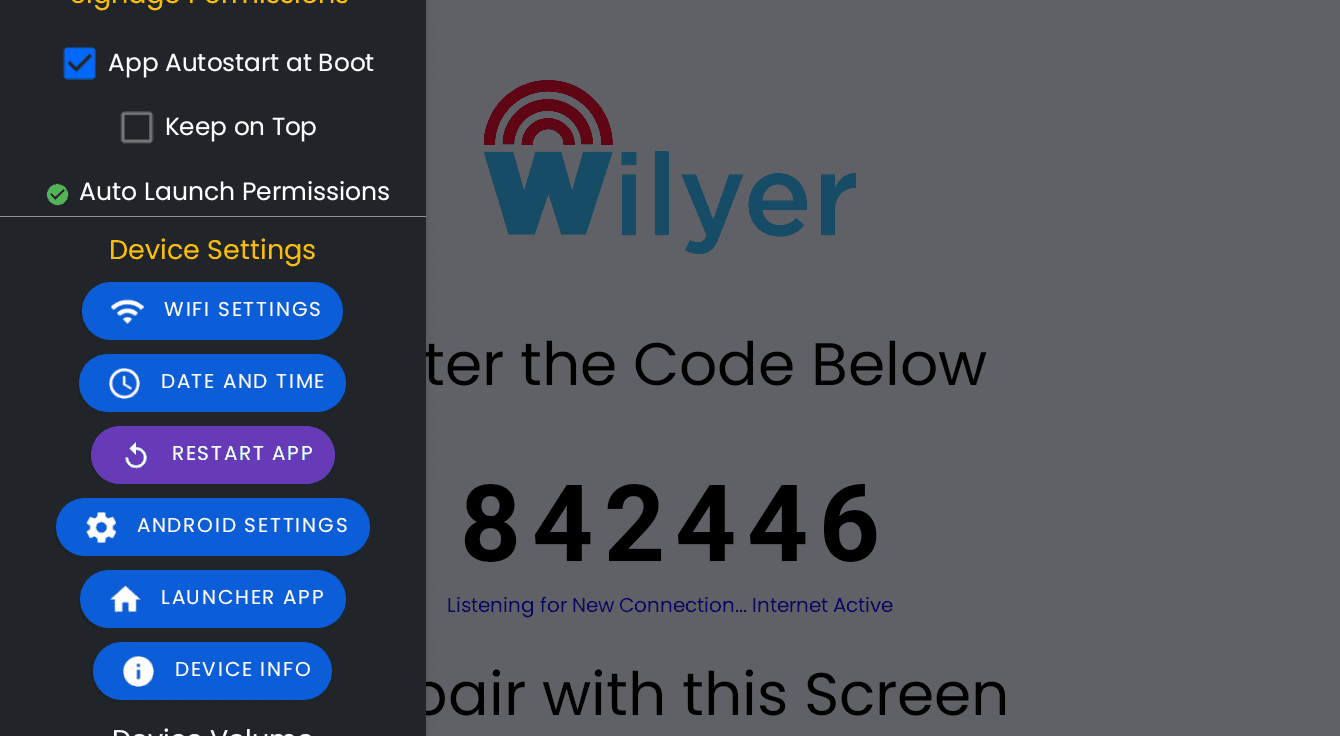
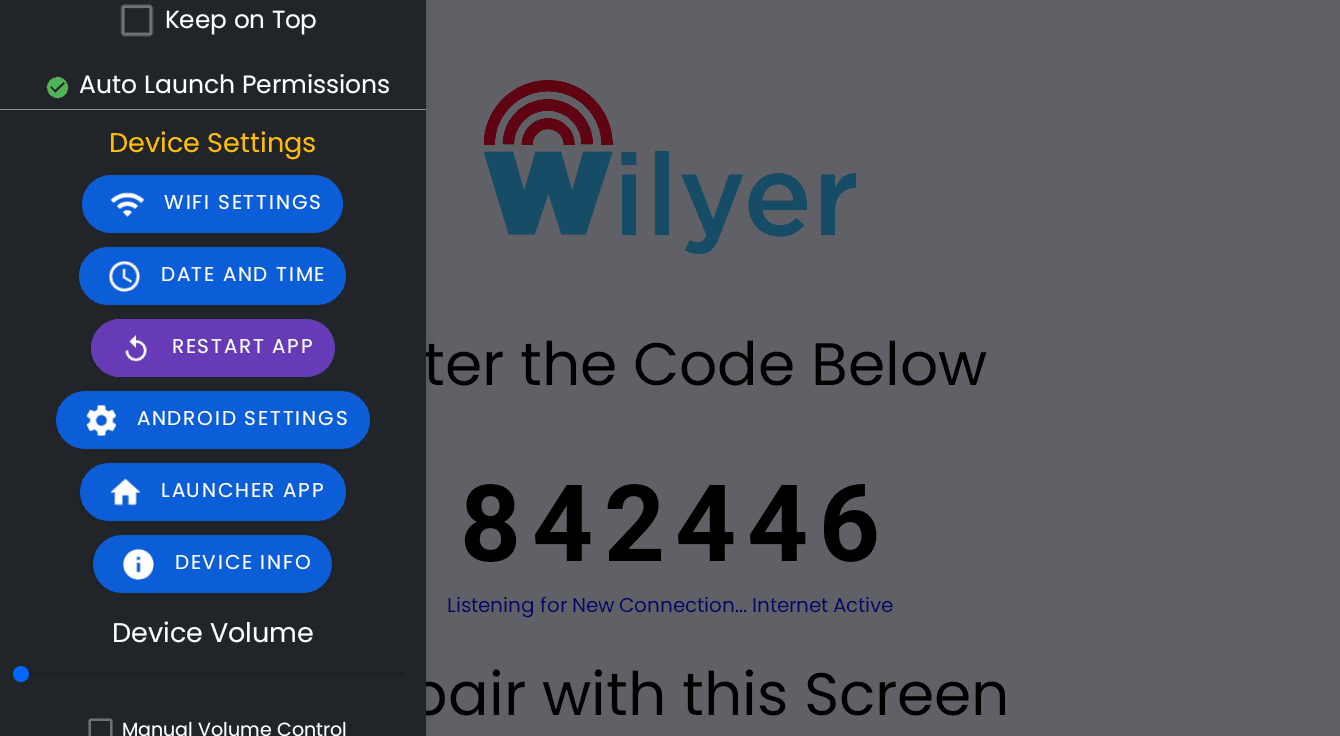
The settings menu has a hierarchical structure and consists of different sections:
Customize Signage Device Nick Name - Customize your device name.
Signage Permissions Configure app autostart and display settings.
Decive Setting - Easy access to the Wi-Fi, date/time and Android settings.
Volume on the device - Video audio control.
OS Permissions - give required Android system permissions.
Step 9: OS Permissions configuration.
Go down the settings menu to the OS Permissions. This is the point at which you will provide the required Android system permissions to your tablet commercial digital signage to work well.
You will find a list of permissions that have red X marks on them meaning that they are not granted yet:
Location Access
Camera Access
Microphone Access
Storage Access
All Files Access
Click on the blue button GRANT PERMISSIONs on the bottom. The application will walk you through the process of allowing each permission separately.
Tap While using the app when asked to get access to the Camera. This will enable you to take photos or record videos of what your digital signage software on tablets captures in case your content strategy involves interactivity.
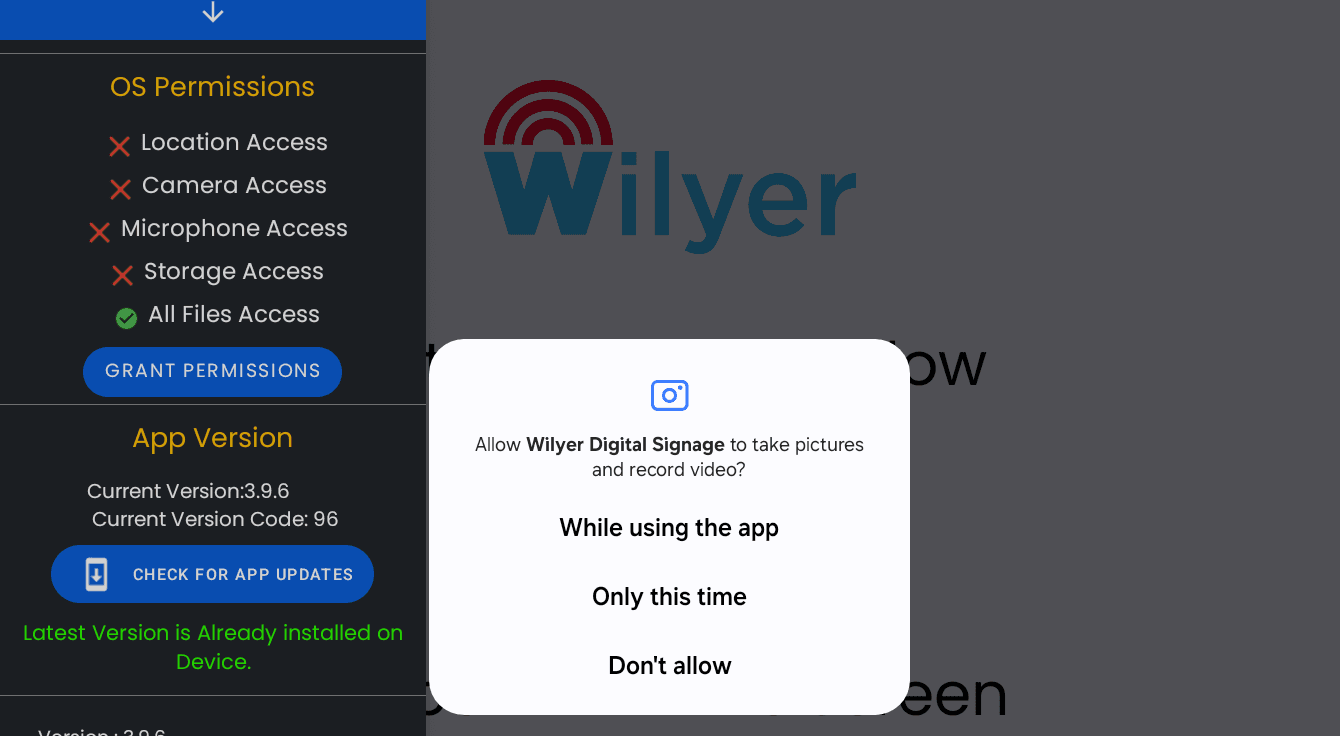
Stick to the on-screen directions to provide the rest of the permissions. These permissions provide plenty of access to all the features of your tablet digital signage system, to be able to have access to all the essential features of that device to display rich multimedia content.
Step 10: Verify Setup and Begin Using Your Tablet Digital Signage
With all the required permissions done, your tablet digital signage system is finally configured and is ready to use! The application will go back to the main screen with the pairing code and the connection status.
On your screen, you are notified of all the important points:
The Wilyer logo at the top
Status message displayed in green color: server connected.
There are two action buttons, one being "START MEDIA" and the other is "EXIT APP"
Your unique pairing code (e.g., "354579")
Status: Listening to New Connection... Internet Active"

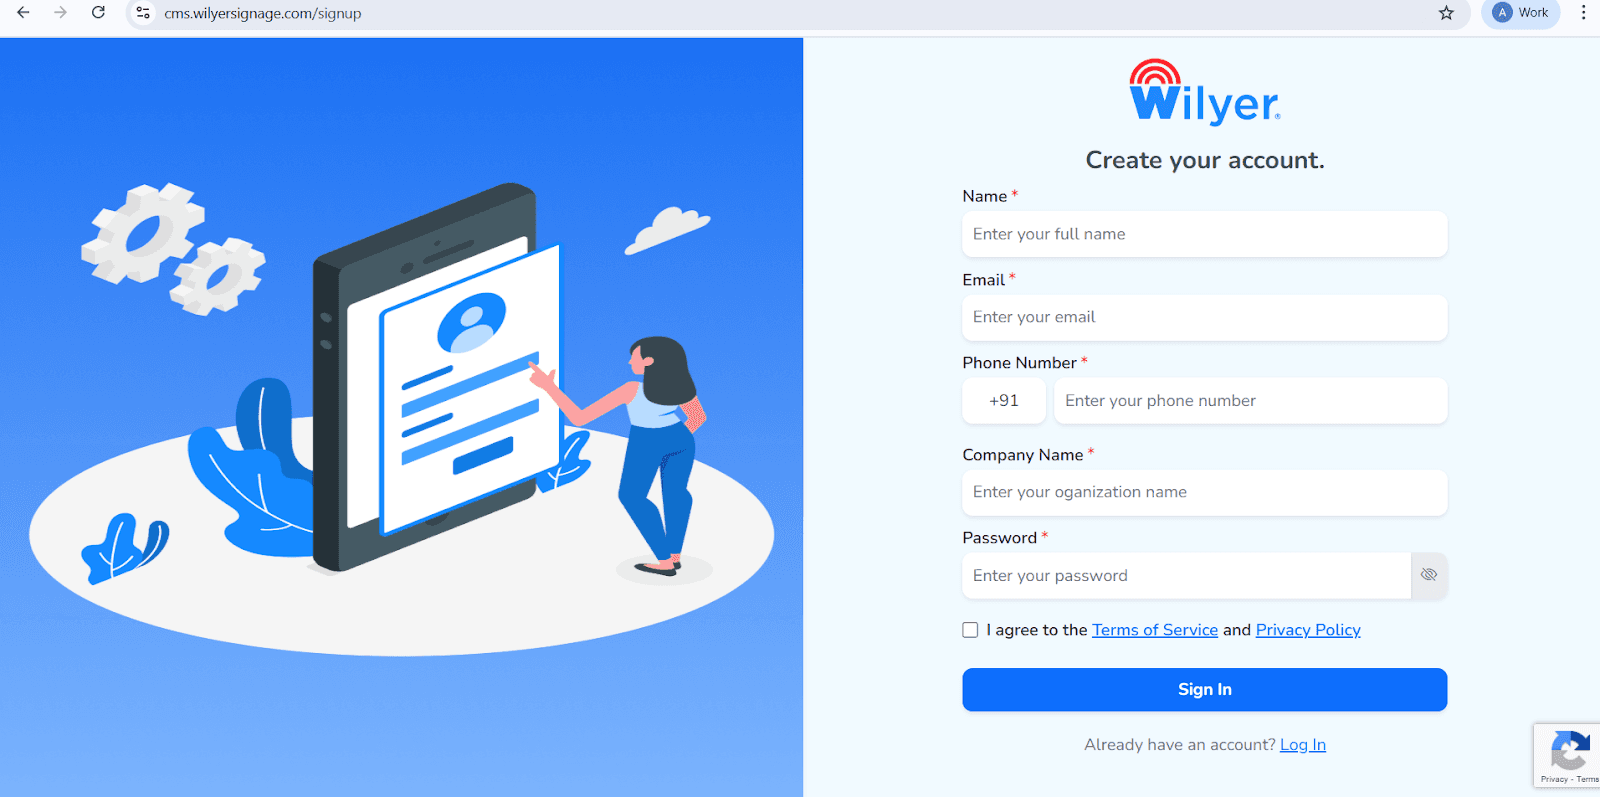
Open the Wilyer Sign-Up Page
Visit the official Wilyer Cloud CMS registration page to begin creating your digital signage account.
Enter Your Full Name
Provide your complete legal name, which will be used as the primary user for managing the signage dashboard.
Provide Your Email Address
Enter a valid and active email address. This email will be used for login, account verification, and important notifications.
Enter Your Phone Number
Add the mobile number that will be associated with this account, including the correct international country code.
Fill in Your Company Name
Enter your company or organization name to establish a professional identity within the Wilyer signage network.
Create a Secure Password
Set a strong and secure password to ensure the safety of your Wilyer account.
Accept the Terms and Privacy Policy
Review and accept the Wilyer Terms of Service and Privacy Policy by selecting the confirmation checkbox.
Click the “Sign In” Button
After completing the registration form, click the blue “Sign In” button to create your account and access the Wilyer dashboard.
Next Steps to Activate Your Tablet for Digital Signage
Start by signing up or logging in to your Wilyer digital signage dashboard using a computer, laptop, or any other device. Once logged in, navigate to the Add Device section to register your tablet as a signage screen. Enter the pairing code displayed on your tablet to securely connect it to your account.
Next, assign a clear device name such as Restaurant Main Display or Reception Counter to easily identify it in your signage network. You can then link playlists or media content specifically created for your tablet digital signage. Finally, tap the START MEDIA button on the tablet to launch the signage and begin displaying your content instantly.
Your tablet is now, essentially, a high-quality digital signage display which automatically downloads and delivers the content you assign using the cloud-based digital signage CMS on tablets. The device will be in kiosk mode so it will not be accessed by unauthorized persons and this will guarantee your content will play continuously.
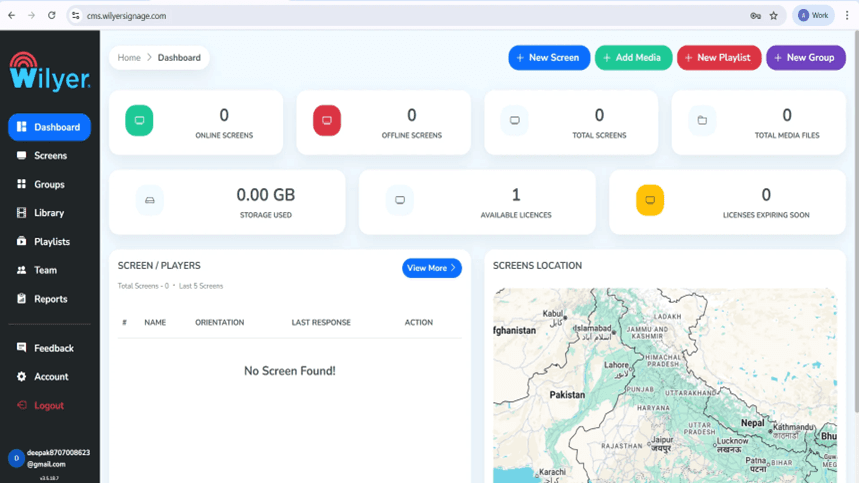
Step 11: Log-in to Wilyer Dashboard.
Upon signing in, the Wilyer Dashboard will be your management dashboard. It will give you the full picture of your digital signage network, both online and offline displays, the number of displays registered, the number of media uploaded, storage usage and available licenses. Using this dashboard, you are able to monitor and control all your signage environment.
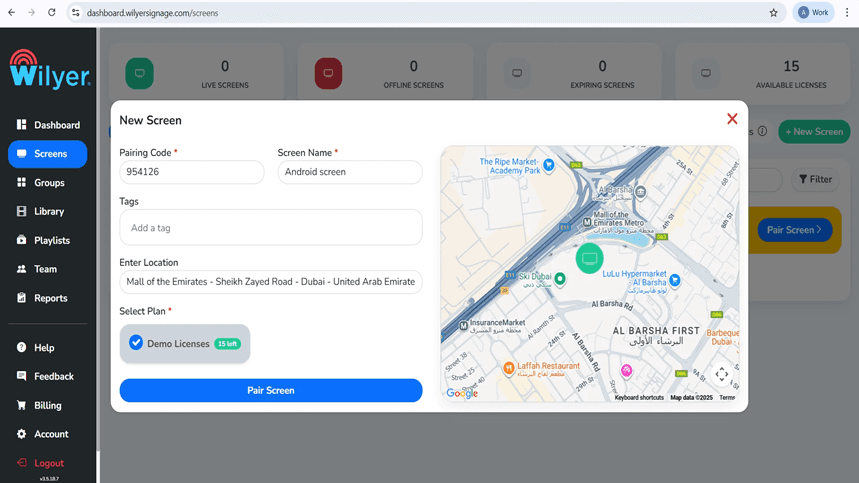
Step 12: Pair Your Android Tablet
Registering a new display Opting to create a new display from the dashboard, choose + New Screen or Add Screen. Use the 6 digit pairing code on your Android Tablet. Enter a descriptive screen name, create relevant tags, select the place of installation, and choose a suitable plan of license. To complete the connection, click Pair Screen.
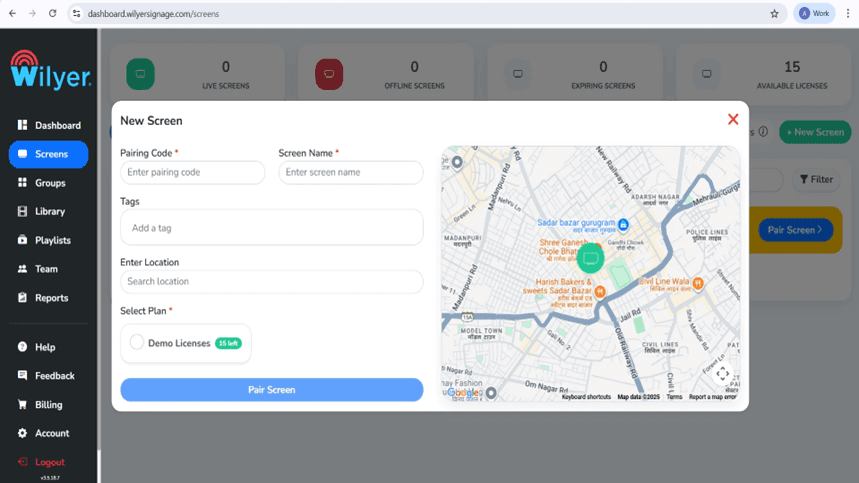
Step 13: Screen Pairing Finished through Dashboard.
Go to the Screens tab of the Wilyer web dashboard, and press Pair Screen. Enter the code shown on your television which pairs and confirms the screen name, attach tags and your location. Choose a license plan that is available and click on Pair Screen to start and connect the display.
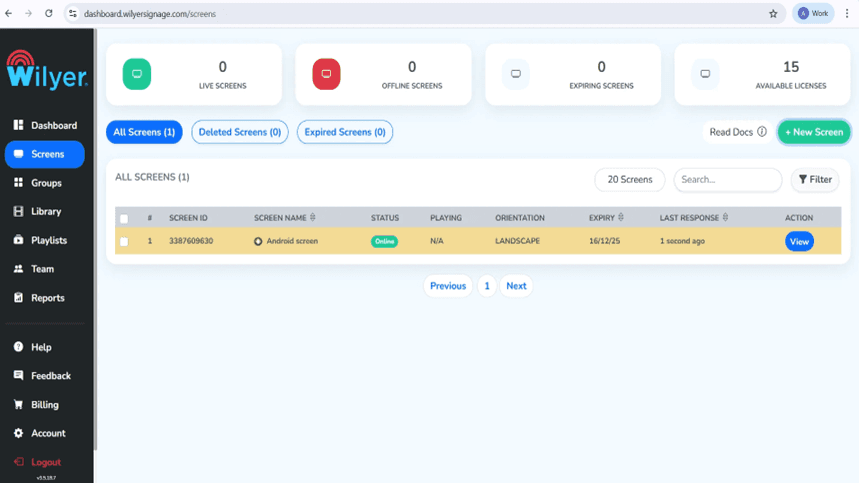
Step 14: Successful Pairing Screening.
After the pairing, the display is shown in the Screens section under Online status that proves the successful connection. You are able to see some important information (Screen ID, orientation, expiration date of your license and last response time). The screen now has been left to playlist assignment, configuration and the real time monitoring of the performance.
Producing Your Digital Signage Content.
Step 15: Upload Media Files
Go to the Library and press the Upload Media button to make an addition of images, videos and other files with content. The platform works with various formats, such as JPG, PNG, and MP4. The media library is a place where playlists based on visual appeal are built.

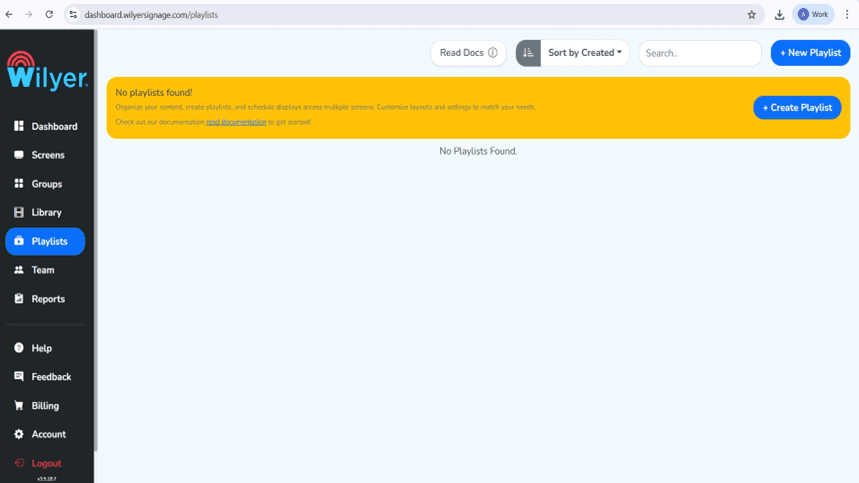
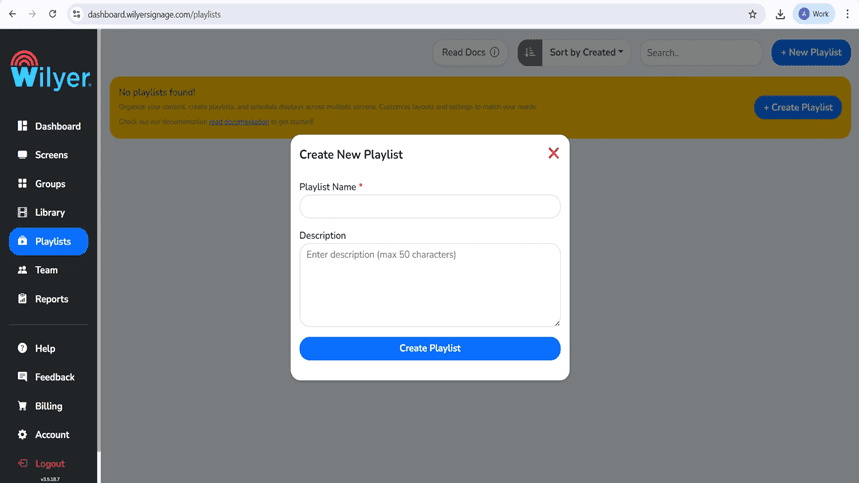
Step 16: Make Your First Playlist.
In the Playlists section, either click + New Playlist or Create Playlist. Add a descriptive name of the playlist with a clear description. This playlist will be utilized to arrange and show material in all your linked screens.
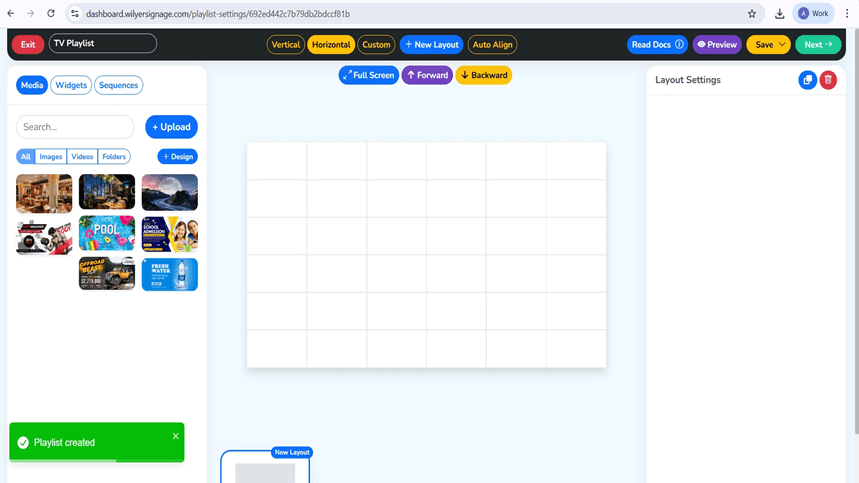
Step 17:Identify and create the Playlist Layout.
The Vertical, Horizontal and Custom layouts are available as options when organizing your content using the playlist editor. The library has drag and drop media files on the canvas, set slide lengths, and added transition effects. The editor contains a real-time preview option of visualization.
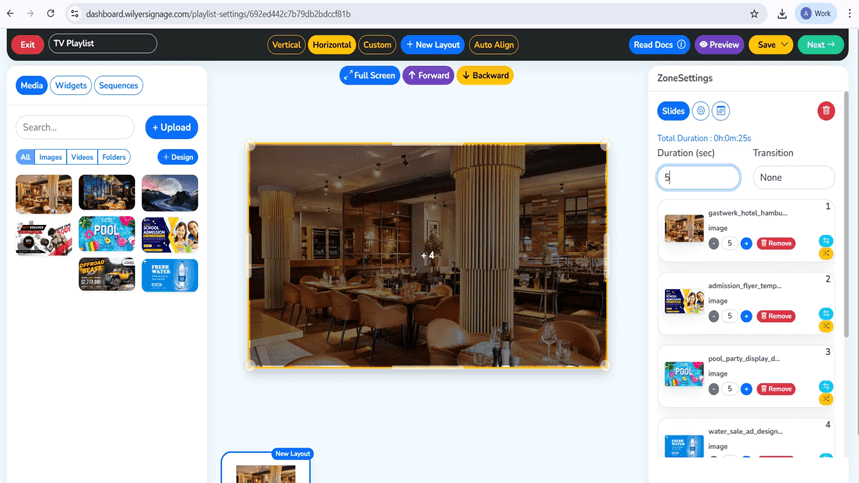
Step 18: Media and Playback Settings.
Drag pictures or videos to the specification layout areas. Every media file is turned into a slide in the playlist giving you the ability to manage display characters, playback sequence and transitions. The duration of the playlist will automatically be updated when some content is added and removed. Preview Mode Preview your playlist before saving and releasing.
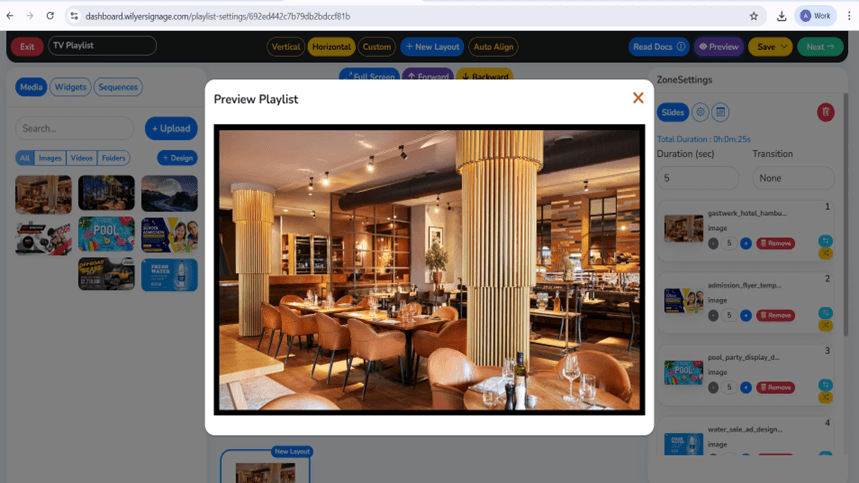
Step 19: Preview Your Playlist
Click Preview to preview the way your playlist will appear on the screen. Layout alignment, media sequence, timing and transitions are shown in the preview. Check every slide to the letter to make sure that images, time, and transitions are correct and then move on to publication.
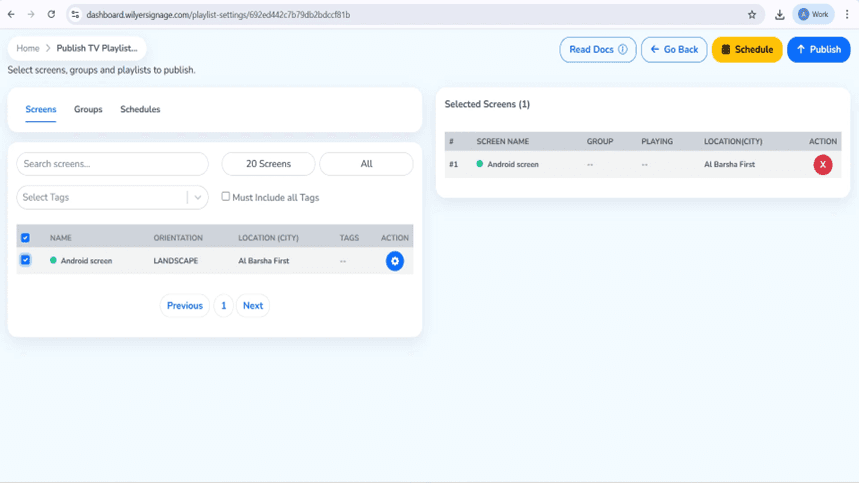
Step 20: Screens: Publish of Content.
After completing your playlist, you should then click Next and Publish. Choose the target screens or the groups of screens in which the content is to be displayed. Select your option to playlist to the selected displays.
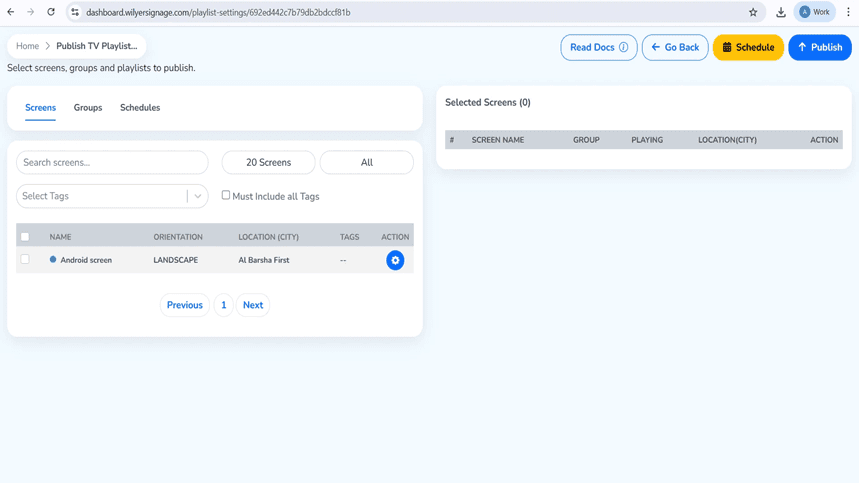
Step 21: Publish or scheduling of the Playlist.
In the Publish TV Playlist page, choose the display or display group. You can post the playlist now or post it to play at a given time and date. Select Publish or Schedule according to the option of your deployment.
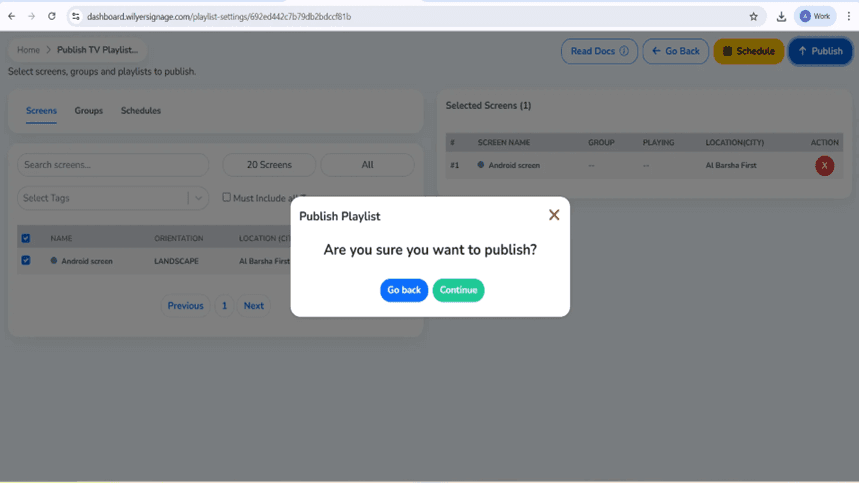
Step 22: Content confirmation Publishing.
A confirmation dialog will be used before deployment. Read the information attentively. When all is right, then click Continue to publish. In case of any necessary changes, choose Go Back to change the playlist or screen choice.
Step 23: Track Playlist Delivery Progress.
Delivery progress can be tracked when the Playlist Report is utilized after publication. The report shows specific screens and information transfer and the percentage of completion. A Successful status is received when all files are delivered and the screen is online. The playback will not be provided until all the requirements are fulfilled.

Final Step: Live on Screen at last.
Your playlists have been published and are currently playing on the display connected. The content is displayed based on the layout chosen, the sequence in which it plays and the timing so as to enable a seamless and mistake free execution. Check visuals, positioning and transitions, to ensure that you present your audience with a polished professional display.

Key Benefits of Tablet-Based Digital Signage
With your new digital signage system with tablets in place, the following are the benefits that you can look forward to:
Cost-Effective Solution
Repurpose the latest tablets to create commercial digital signage displays without having to purchase costly dedicated hardware. Thousands of dollars will be saved by using this tablet-based digital signage strategy in lieu of the conventional digital signage solutions.
Content Management in the clouds.
The digital signage CMS allows you to update your content at any place using a tablet. Manage and schedule content, make playlists and command several screens all with one dashboard.
Versatile Applications
Ideal when used on tablets as digital menu boards, retail store displays, office announcements, event signage, waiting room displays and so on. Tablet screen signage is flexible and therefore is suitable for both big and small businesses.
Easy Setup and Maintenance
The whole installation of the signage is completed in less than 10 minutes as seen in this guide on the installation of tablet signage. No technical skills are needed and the system is simple to service.
Portability
Tablet digital display solutions can be relocated easily unlike fixed display hence ideal in pop up displays, temporary displays or rotating promotional materials in various locations.
Common Use Cases for Tablet Digital Signage
Restaurants and Cafes
Design interactive online menu boards that are updated automatically. Present daily specials, offers and seasonal products with appealing images.
Retail Stores
Display product details, prices, promotional videos and testimonials. Live update information in stores immediately in several locations.
Corporate Offices
Put announcements of the company, schedule of meetings, details of visitors, internal messages on tablet signage boards all over the office.
Healthcare Facilities
Display waiting time, health tips, appointment reminders, and wayfinding information within waiting areas and other common areas.
Education
Announcements, schedule of shared classes, news about events, and emergency alerts throughout the campus by utilizing smart tablet digital signage.
Best Practices of an Optimized Tablet Signage System.
Keep Tablets Charged
Always keep your tablet plugged in so that it is available 24/7. Thinking of a secure mount, with inbuilt charging.
Tablet Optimization.
Create tablet-specific, screen-size, and screen-orientation content. Enhance the quality of images and clear fonts to have the finest visual experience.
Regular Content Updates
Use your tablet signage content management system to update content so that it is always up to date and applicable. Frequent changes keep the viewers interested.
Secure Mounting
Buy good quality tablet mounts or enclosures to avoid theft and damages. This is particularly relevant in displays that are facing the public.
Monitor Performance
To ensure your tablet is online, playing and that it is connected, keep track using the digital signage management software.
Conclusion
Congratulations You have just managed to turn the tablet into a professional smart digital signage display. This digital signage tablet solution is the best solution that combines low cost, flexibility and functionality to any business regardless of its scale.
Digital signage tablet based offers the tools you need to achieve success, whether you are operating a small cafe with a need to find an affordable digital menu board solution, have a retail store that wants to update your displays, or an office that requires more efficient internal communications.
The cloud digital signage platform is an opportunity to control the content on various screens at any location so that it is not difficult to ensure that your messaging remains relevant and interesting. With this same simple setup, you will be able to add more and more tablets to your digital signage network as the need to expand increases.
Begin producing powerful content, test on various layouts and schedules and see how your tablet digital signage system changes the manner in which you communicate with your audience. The digital display options are limitless using this strong, low priced digital display solution.

