

Android TV Digital Signage
How to Convert Android TV into Digital Signage
A step by step guide to turning Android TV into a digital signage display
Introduction
In the modern high-speed digital world, companies are in ever need of something new and fresh to draw attention to the audience, provide them with specific messages, and a memorable brand experience. Digital signage has become one of the strongest means in the current business communication which has changed the way businesses communicate with customers, employees and visitors. This complete tutorial is going to demonstrate how you can transform any android TV into a strong digital signage screen with Wilyer Digital Signage Player.
Understanding Android TV Digital Signage
Android TV digital signage transforms your regular android-based television to a commercial display system. With the help of special software such as Wilyer, you can open the business potential of consumer hardware, which is 60-80% less expensive than a high-end commercial display but with professional-level features.
Why Choose Wilyer Digital Signage Player?
Wilyer Digital Signage Player is a unique product designed by Wilyer Private Limited that has WiFi-enabled remote control, multi-orientation, unlimited screen management, cloud-based infrastructure, and real-time monitoring and analytics.
Installing Guide: Full-Step-by-Step Guide.
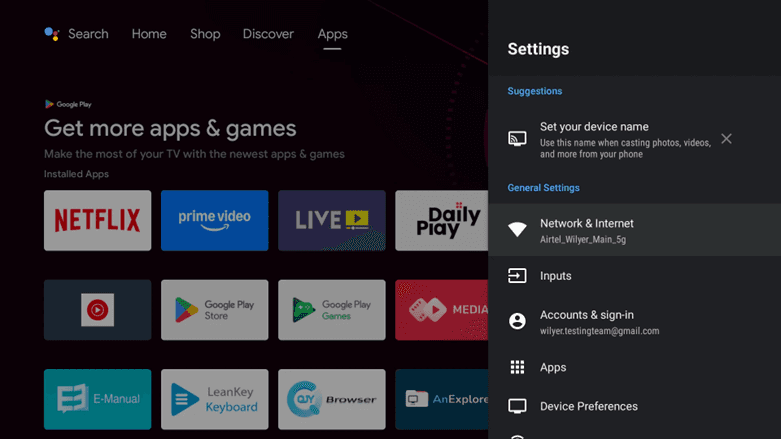
Step 1: Connect to WiFi Network
To set up WiFi on the device, open the device settings and go to "Network & Internet". Then, select the desired WiFi network from the list of available networks. You will then need to enter and confirm the correct password in order to connect. After connecting to the network, please wait a moment while the device establishes a connection to the network. It is important to verify that the WiFi signal strength is good and that the WiFi connection is indicated as "Connected" in the device's settings. The device must have a reliable internet connection in order to download updates, sync content with other devices to enable access to cloud services, and operate the digital signage application without interruption or other issues.

Step 2: Access Google Play Store.
You'll want to check your device's Apps and go into the Google Play Store on your Android TV. If you see a message asking you to log in to a Google account, do so to use the application store. After logging in to your Google account, you will be able to browse through the application store, search for applications, and download them onto your Android TV. Be sure to log into the application store correctly, or you may not have access to updates for applications or any functionality that requires being logged in.
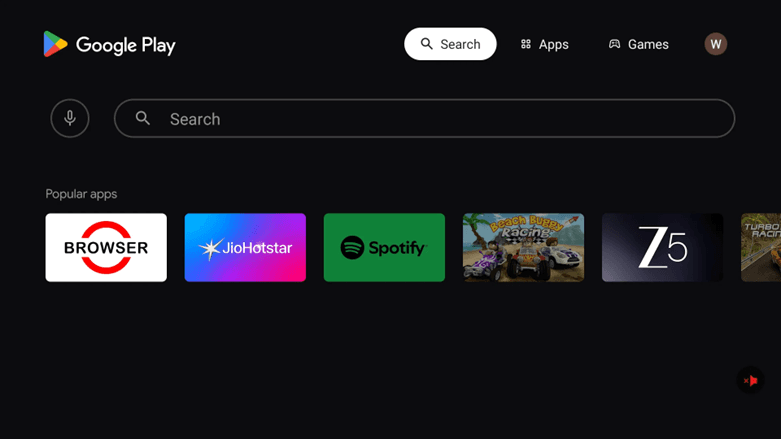
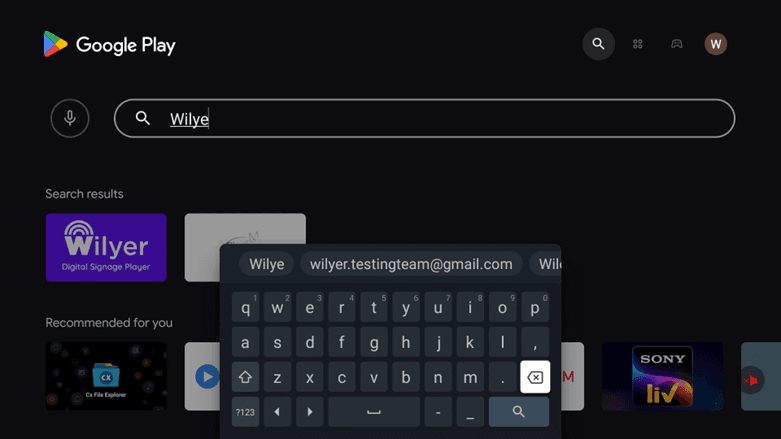
Step 3: Search for Wilyer Digital Signage Player
Click the search button and search wilyer or wilyer digital signage player. The Wilyer private limited official app has a purple Wilyer logo.
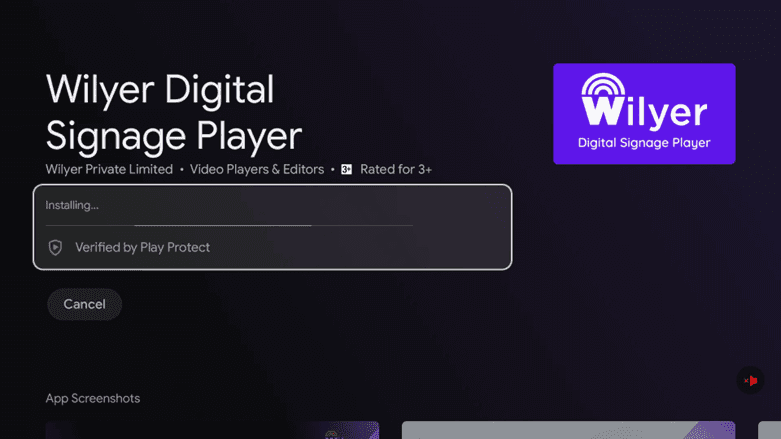
Step 4: Installation of the Application.
Click on Install and wait until the downloading and installation is complete (usually 1-2 minutes). Google Play Protect has verified the company.

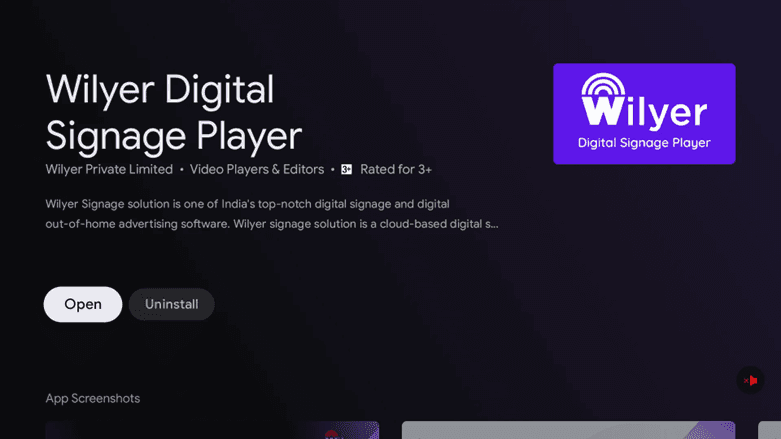
Step 5: Launch Wilyer App
From the installed applications list, locate Wilyer and open it using your remote control (to launch Wilyer use your remote control). If you have selected the application correctly, you will see the blue/purple icon used by this application.
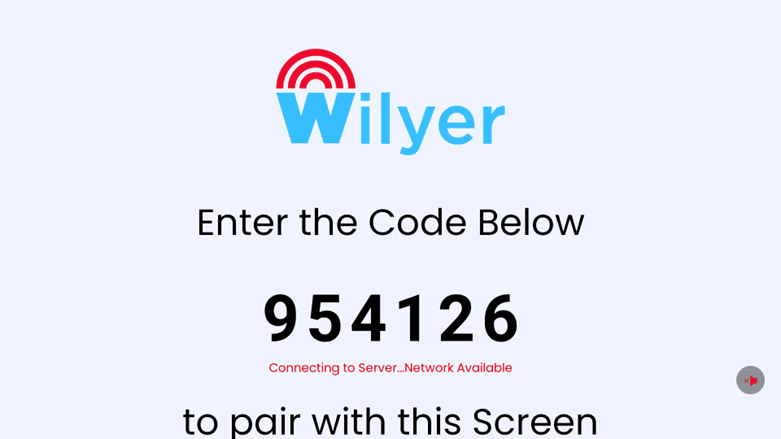
Step 6: Note Your Pairing Code
Upon launching the Wilyer application, the application will display a special six-digit pairing code. Write down this number carefully, because you'll need it to connect your television to the Wilyer web dashboard. This pairing process is secure and allows management and synchronization of the television display with content assigned to it from elsewhere.
Setting Up Your Wilyer Dashboard
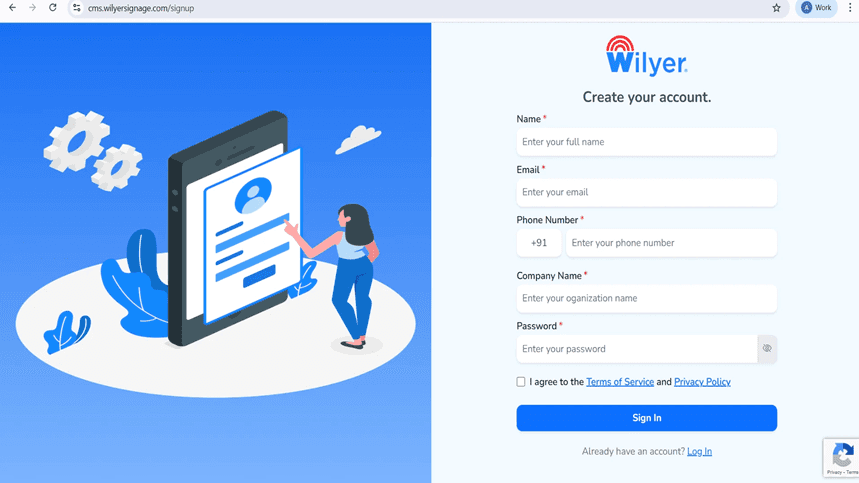
Step 7: Sign-up Your Wilyer Account.
Visit cms.wilyersignage.com/signup on your computer or mobile computer. Enter your name, email, phone number, company name and make a password. Agree to the Terms of Service and Privacy Policy and continue with creating your account by clicking on Sign In.
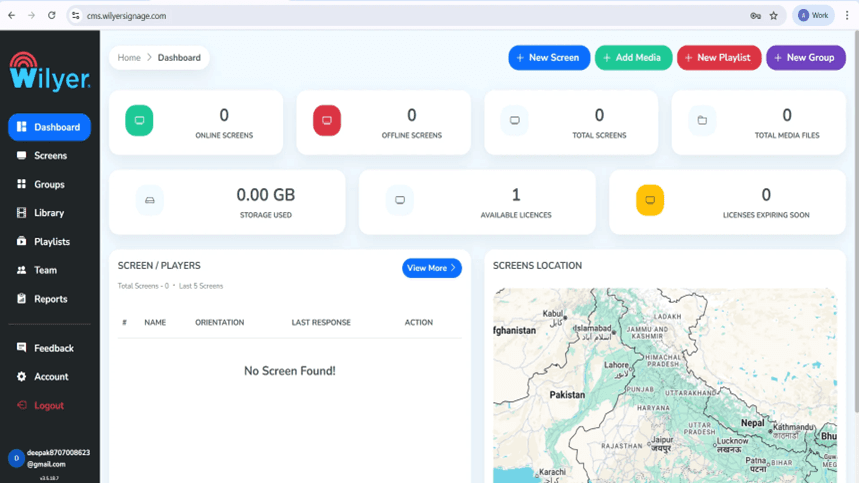
Step 8: Access Your Dashboard
Once you have signed in, you will find your Wilyer dashboard which displays online/offline screens, total screens, media files, used storage and the licensed items available. The dashboard gives you the entire visual of your digital signage network.
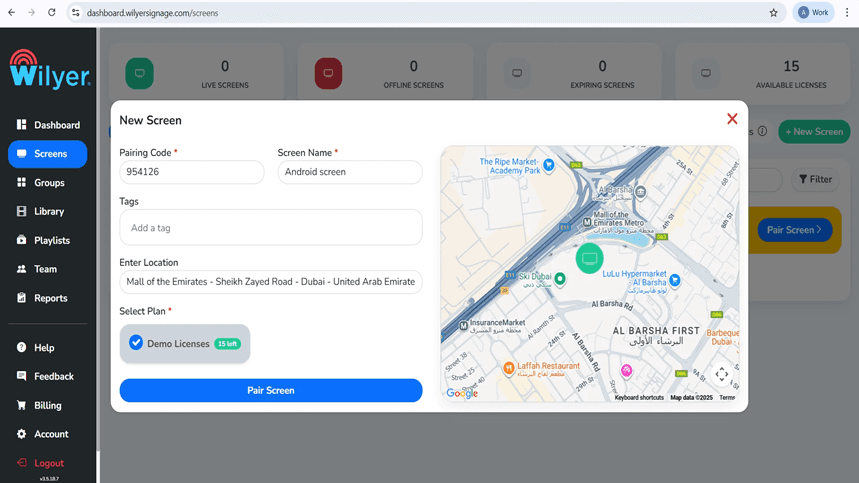
Step 9: Pair Your Android TV
Add a screen by clicking on the dashboard + New screen or Add screen. Enter the 6-digit pairing code of your TV, assign your screen a descriptive name (e.g. Android screen), can add tags, enter the location, and use a plan. Touch Pair Screen to finish the connection.
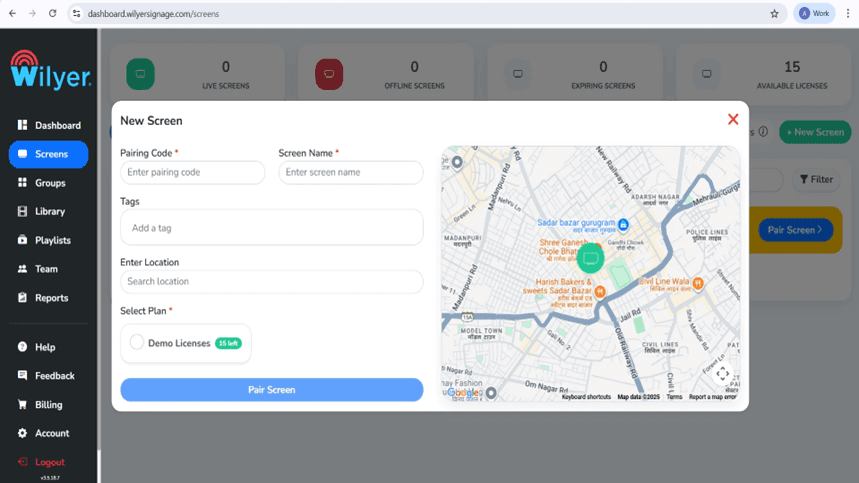
Step 10: Pair Screen on Wilyer Dashboard
Log in to the Wilyer web dashboard and navigate to the Screens section. Click on Pair Screen to add a new display. Enter the 6-digit pairing code shown on your TV, assign a screen name, add relevant tags, and specify the installation location. Select an available license plan, then click Pair Screen to successfully connect and activate your display.
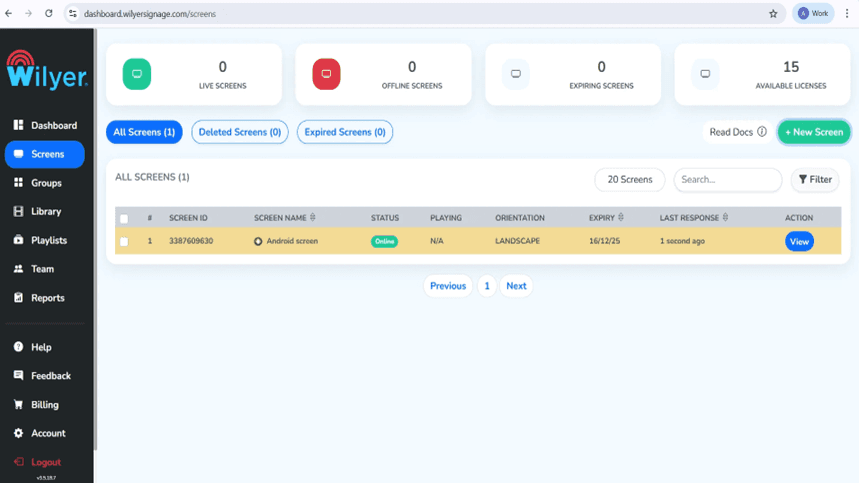
Step 11: Screen Successfully Paired
After you successfully complete pairing your device, the screen will appear under the “Screens” section in the Wilyer Dashboard along with its display status of “Online” (indicating that it is successfully connected). You will then be able to see the Screen ID, Orientation, Expiration Date and Last Response Time. Now that you have successfully paired your device, you can begin assigning Playlists, Managing Settings and Monitoring the Screen's Performance in real time.
Creating Your Digital Signage Content.
Step 12: Upload Media Files
Go to the Library section. Click on Upload Media and add images, videos and other files that contain content. Wilyer accepts different formats such as JPG, PNG, MP4, etc. This makes your media library the starting point of building a playlist that is engaging.

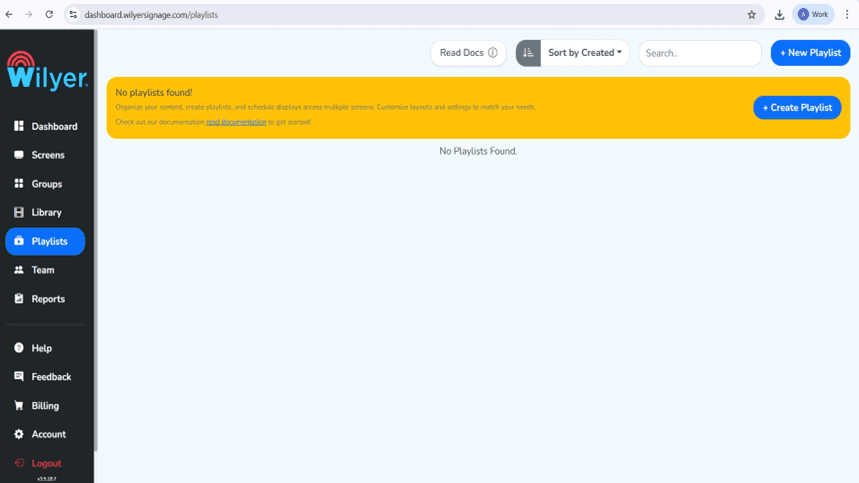
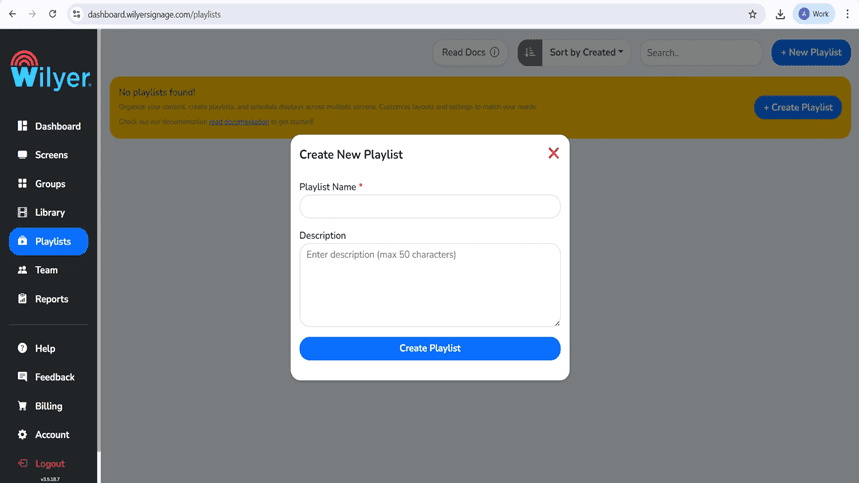
Step 13: Playlist Your First Playlist.
Please go to Playlists and either click + New Playlist or + Create Playlist. Name your play list and leave a description. This play list will be arranged to show on your screens.
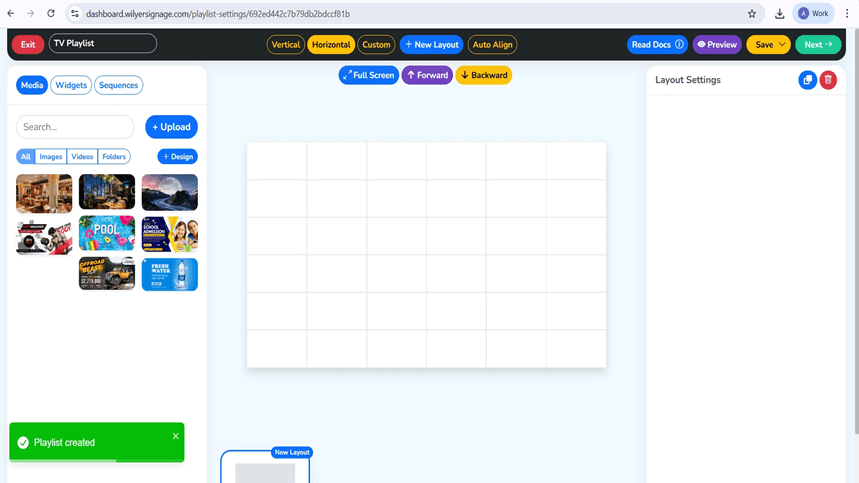
Step 14: Select Your Playlist Design.
Plays can be organized using the playlist editor. Select Vertical layout, Horizontal layout or Custom layout. Add media to the canvas by drag and drop of files in your library. Establish a time limit of individual slides and insert transitions. The editor offers live preview services.
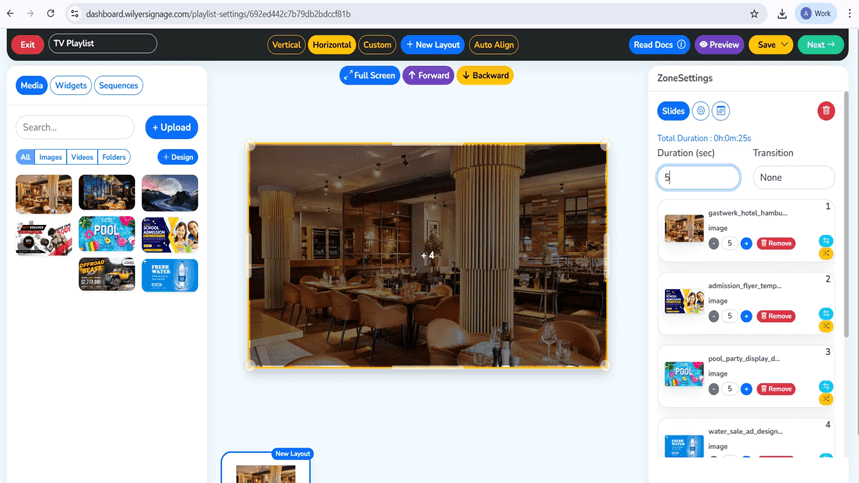
Step 15: Add Media and Configure Slide Duration
To import visual material into a specific area of a prescribed layout, drag either pictures or videos from the Media Library into the appropriate layout zone. Each file that is imported will automatically become a slide in your playlist; therefore, you can configure which files will be visible on-screen during a particular viewing period (i.e. duration), as well as the order of appearance between slides, and if so desired, create transition effects between these files. Your total playlist duration will update automatically each time you add or remove a file. Use Preview mode to review your content, then save your changes and publish the final product to your interface.
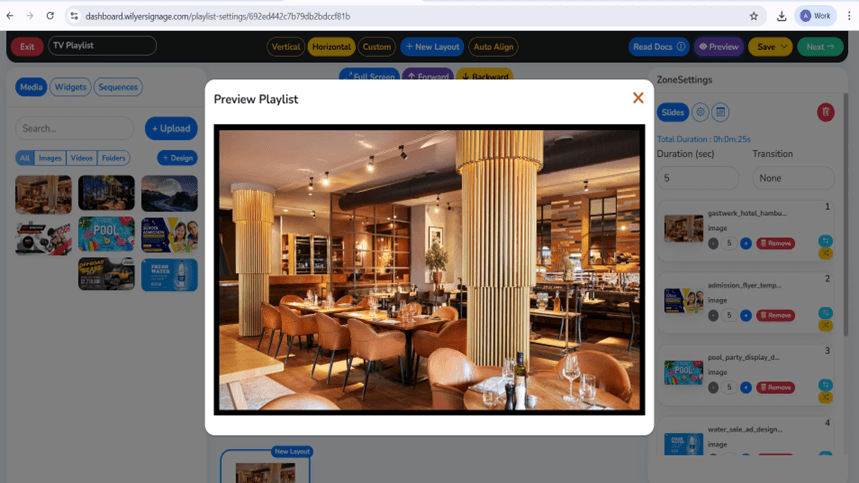
Step 16: Preview Your Playlist
To see what your playlist will look like on the TV, click this Preview button. The preview will show you exactly how the content will be shown, including the layout of the playlist and the order of the media and times at which it will play. Before saving and publishing your playlist, you should examine all slides in the preview to make sure the visuals, duration of each slide, and transitions are accurate.
Step 17: Publish to Your Screens
When you are ready with your playlist, just click Next and Publish. Choose the screens in which you wish to show this content. One can select single screens or groups. Click 'Publish' and confirm. The content will then kick off at once to your chosen displays.
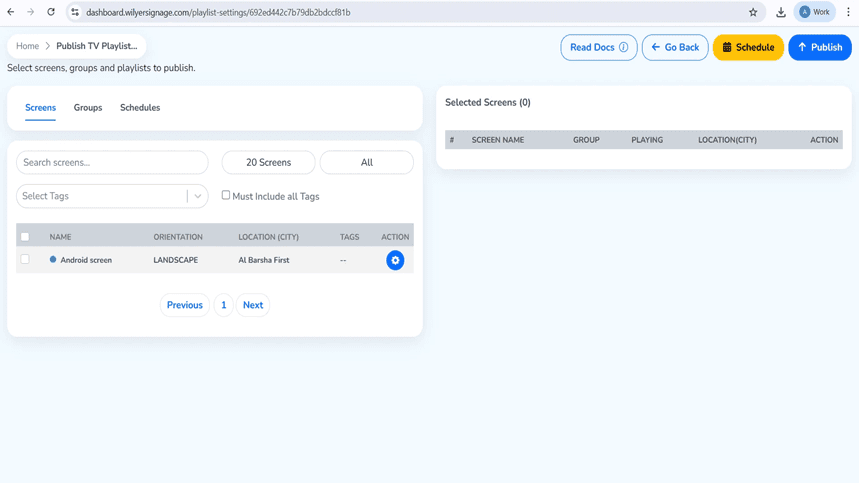
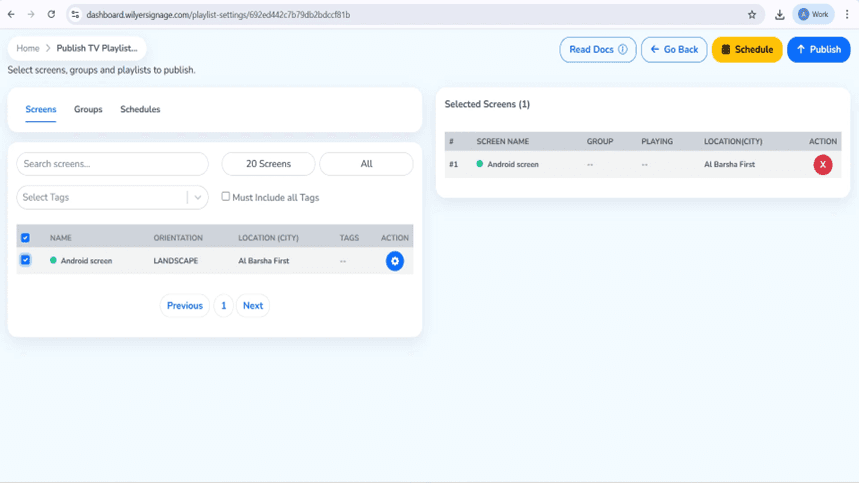
Step 18: Publish Playlist to Screen
When you are ready to publish your player’s playlist, go to the Publish TV Playlist page, select the target display (from the available list), and also select any screens as groups or use any applicable schedules if applicable. When you have selected your target display, click Publish for immediate publication or Schedule to set a time for playback of the playlist.
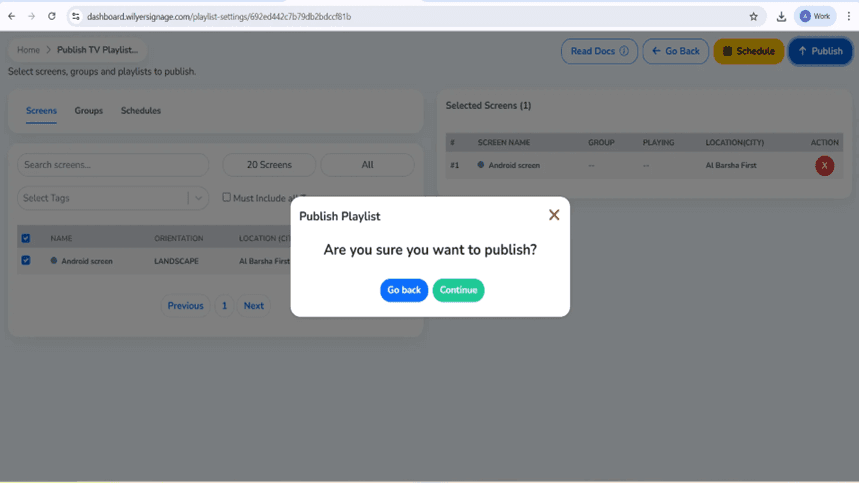
Step 19: Confirm Playlist Publishing
After clicking Publish, a dialog box opens to confirm the action. You must check that the information shown matches what you expect. If everything looks good, click Continue to confirm and publish the list of tracks to your selected registration; however, if you are not ready to proceed, click Go Back to make changes first.
Step 20: Playlist Delivery Status
Once a playlist is published, the Playlist Report can be used to track the progress of delivery by viewing the number of screens targeted, the amount of data transferred, and the total data transferred. If the Playlist Report indicates a Successful status, it means that all files were downloaded, that the entire transfer is 100% complete, and the screen has been marked as "online". If any of these conditions are not met, then the playlist was not successfully delivered and cannot be played back to the display.

Final Step: Playlist Live on Screen
Now, the playlist has been published, and it is now playing on your connected display. The playlist has been laid out according to the selected layout, timing, and media sequence, and the playlist is now showing on the screen without any errors. You should check that all visuals, orientations, and playback flows are in the manner that you intended to display to your audience.

Important Digital Signage Advantages.
Cost-Effective: Use current Android TVs to save up to 70% compared to a commercial display which is costly.
Cloud-Based Management: You can manage an unlimited number of screens wherever you are provided you have access to the internet through a single dashboard.
Live Feeds: Push content shall be updated automatically and in real-time on all screens.
Professional Design Tools: designs: Build gorgeous content using an in-built design editor and thousands of templates.
Scalable Solution: One screen can be expanded to hundreds of screens without any limits.
Conclusion
Transforming your Android TV to a professional digital signage system with Wilyer can be considered as one of the most efficient investments in technology at a very affordable cost. The entire setup process does not require more than 30 minutes and after that your digital signage network is self-operating with full cloud control.
Regardless of your size, modernizing customer communications as a small business or as a large enterprise standardizing customer messaging across various locations, Wilyer offers the flexibility, reliability, and scalability with which to be successful in the digital-first world today.

Multi-Platform Compatibility for Every Digital Signage Display
Run Wilyer’s digital signage software on your preferred operating system with zero hassle.
