Web Page Widget
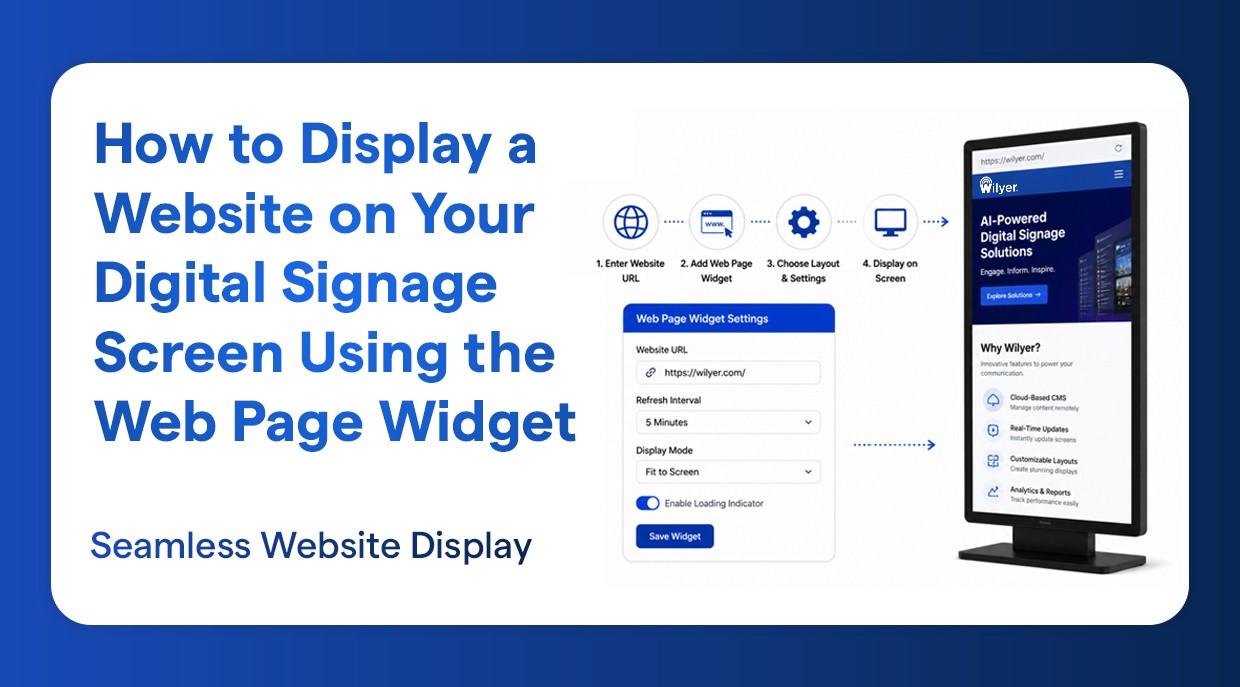
How to Display a Website on Your Digital Signage Screen Using the Web Page Widget
Show live websites directly on your screen without any manual updates.
Introduction
In today’s fast-paced digital world, digital signage is essential for businesses to deliver real-time updates, promote their brand, and attract audiences in lobbies, waiting rooms, offices, and retail areas. One of the most effective features of modern digital signage platforms is the ability to display live websites on your screens without additional equipment or complicated settings.
Enable your digital signage anywhere on the Web Page widget. Wilyer has made it extremely easy to incorporate any live URL on your digital signage display. You can demonstrate a live dashboard, a news feed, your company site, or a custom web app; either way, this guide will take you through it step-by-step, with screenshots.
It is a simple step-by-step tutorial that can get your site up and running on a TV screen or lobby screen in a few minutes.
Why Use the Web Page Widget for Digital Signage
There is a place for traditional digital signage material, such as static images, slideshows, and videos. However, there is no substitute for the energy of an active site on your signage screen. The reason why the web page widget is popular among businesses is:
Show real-time data, live prices, or a dashboard without being manually updated.
Embed your website itself - ideal brand strengthening.
Display live feeds, social media pages, or analytics boards within lobbies.
There is no necessity to replicate the content; one just has to point to the URL, and the job is done.
It is compatible with single-screen or multi-screen.
Prerequisites
You should have the following before you start:
An active Wilyer account with Dashboard access.
A display or a television that is attached to your Wilyer digital signage network.
The URL of the website you want to display.
A stable internet connection on your signage device.
Step-by-Step Guide: How to Load a Webpage on Your TV screen
Step 1: Open Your Wilyer Dashboard
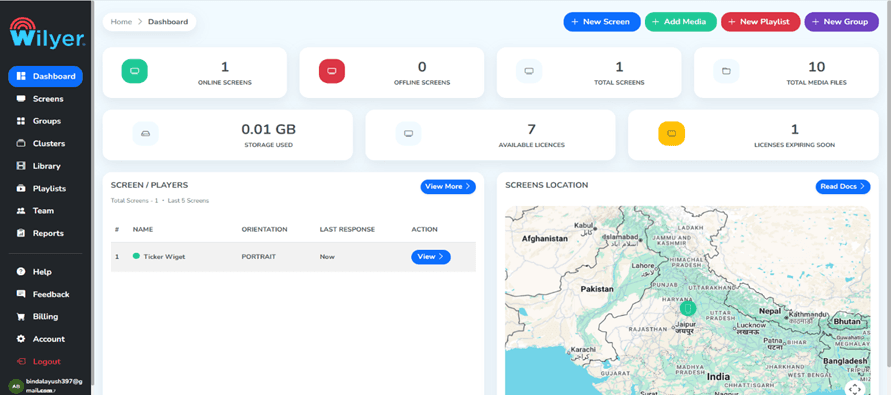
Begin by opening the Wilyer account and accessing the Dashboard. The Dashboard is the control center, and here you control playlists, widgets, and publishing to the screen. Upon logging in, you will have the main interface with navigation options on the left-hand side.
Step 2: Go to Playlist
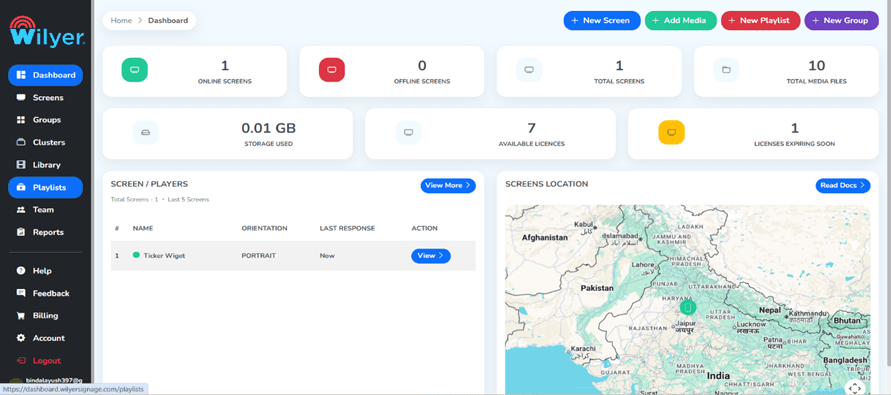
Go to the Playlist section in the main Dashboard. Playlists consist of a list of content (widgets, pictures, videos) that have to be scheduled and posted to your screens. In the left-hand navigation menu, the Playlist button should be clicked.
Step 3: Press the “+ Create Playlist” button to create Your Playlist
Click the Create New Playlist button to start creating a new playlist. This is the place where you will organize your content before publishing it to a signage screen. Nameless playlists should be renamed with a meaningful name, i.e., Lobby website display, to be easily found in the future.
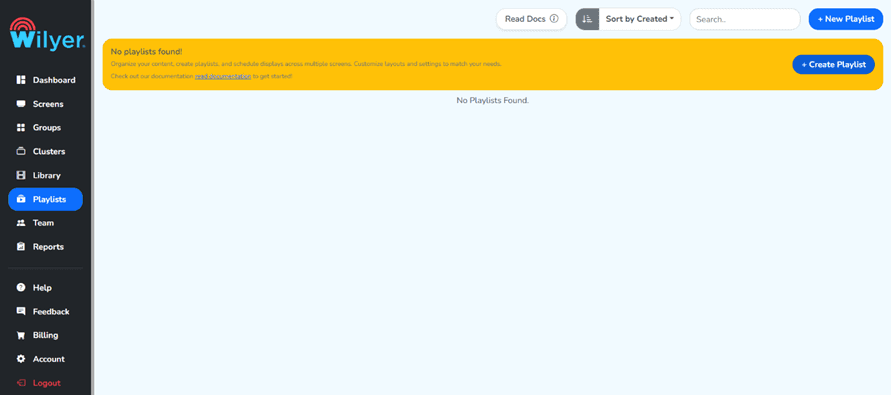
Step 4: Fill in the Credentials and Create the Playlist
There will be a form that will be requested of you to complete the details of the playlist. Fill in the necessary details, like the name of the playlists, orientation (landscape or portrait), and any other preferences like scheduling. After you fill in all the required credentials, click the “Create Playlist” button to save your new playlist.
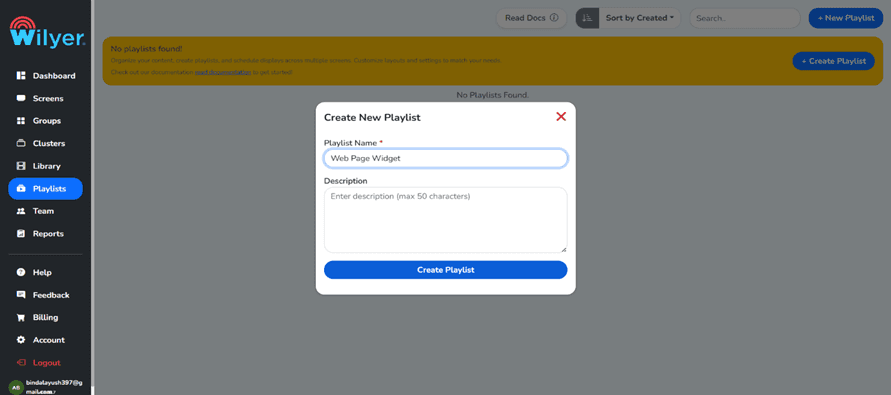
Step 5: Playlist Has been Created Successfully
A Confirmation message will be displayed to you that your playlist has been created. Your Playlist library will now have your new playlist. This is the container in which you’ll add your web page Widget next.
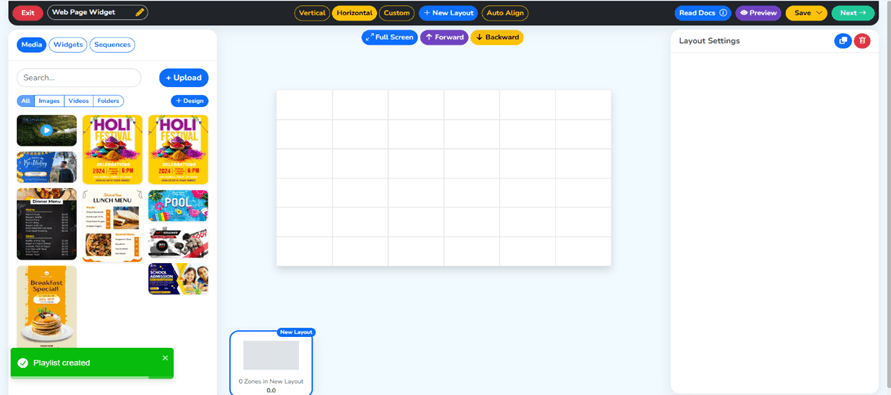
Step 6: Go to the Widget Section
Now, navigate to the Widget section from the left-hand menu. The digital signage content is composed of widgets. Wilyer offers a wide variety of widgets, such as clocks, weather, social feeds, and web pages, of course. Click on the widget to access the library of widgets.
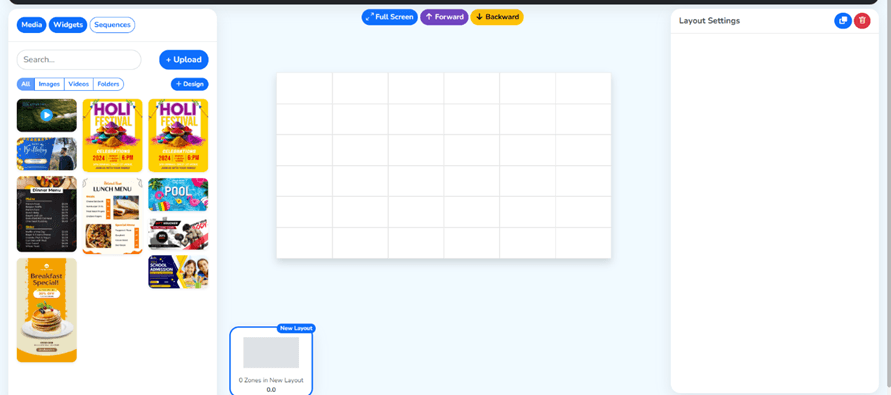
Step 7: Go to the Web Page Widget
Inside the widget section, locate and click on the “Web Page.” This is the specific widget that allows you to configure URL widget in signage software and display any live website on your TV or signage screen. It is among the most adaptable widgets that exist in the Wilyer CMS.
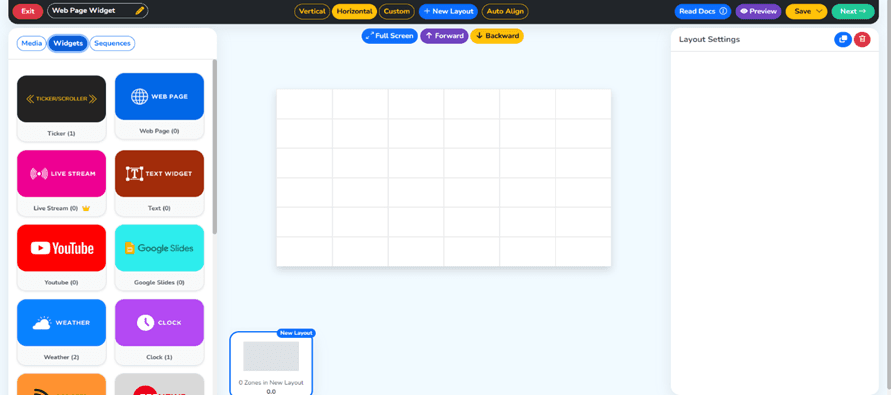
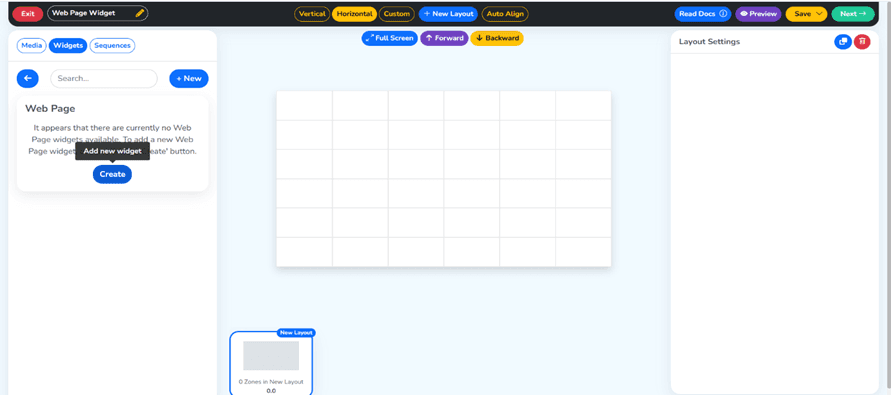
Step 8: Create a New Widget
Click on the “Create New Widget” button found in the Web Page widget section. This will open the widget configuration from where you’ll enter your website URL. You can create as many web page widgets as needed - one of each different URL you want to display.
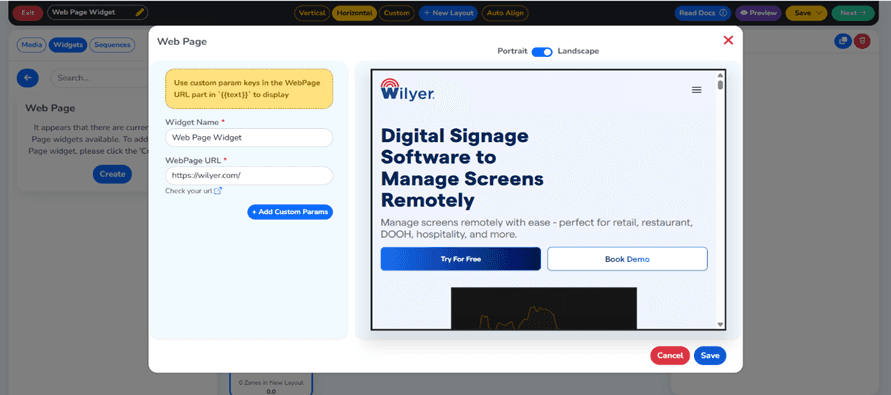
Step 9: Fill in your website link in the Web Page URL Section and Save
In the web page URL, enter the entire address of the website you would like to appear in. You might, as an example, enter your company's site, live analytics dashboard, news portal, or any other publicly available web page. Make sure that the URL is correct and begins with https. When this is complete, you can save to make your widget.
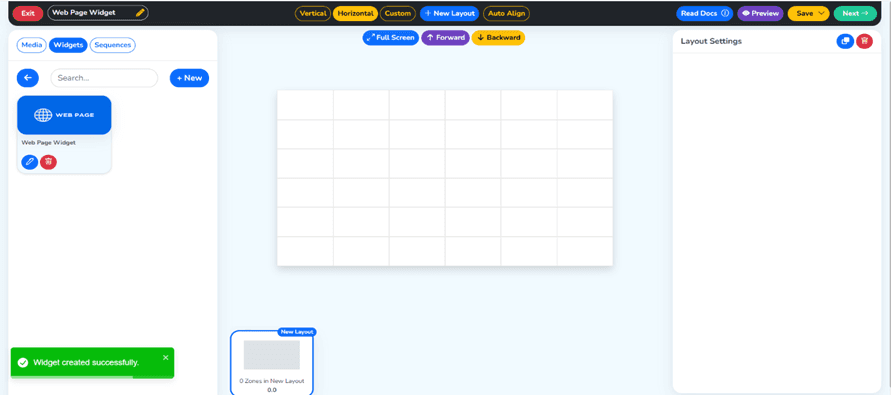
Step 10: Your Widget has been created successfully
Your web page Widget is created, and a success message will be sent. You just developed a widget that will now be present in the widget library to be added to your playlist. You have the option of making several widgets, each of a different URL.
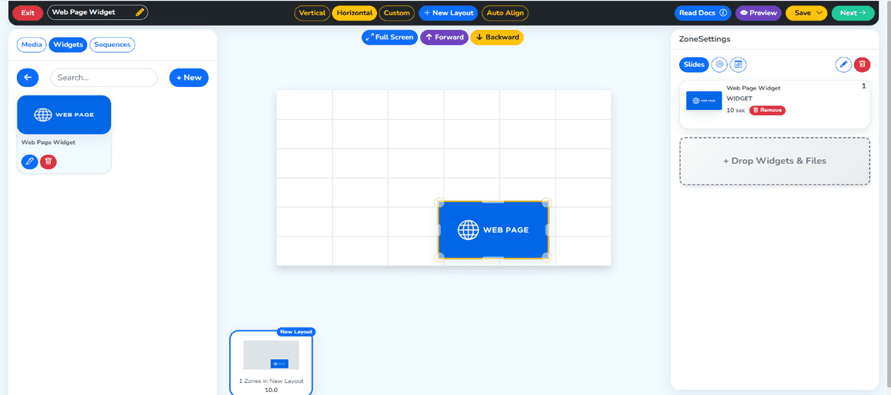
Step 11: Drag and Drop Widget to Playlist
Go back to your playlist and simply drag and drop the web page Widget into the playlist timeline. You can arrange it alongside other widgets or make it the sole piece of content in the playlist. Adjust the duration of how long the webpage should be displayed on screen if you are running a multi-content playlist.
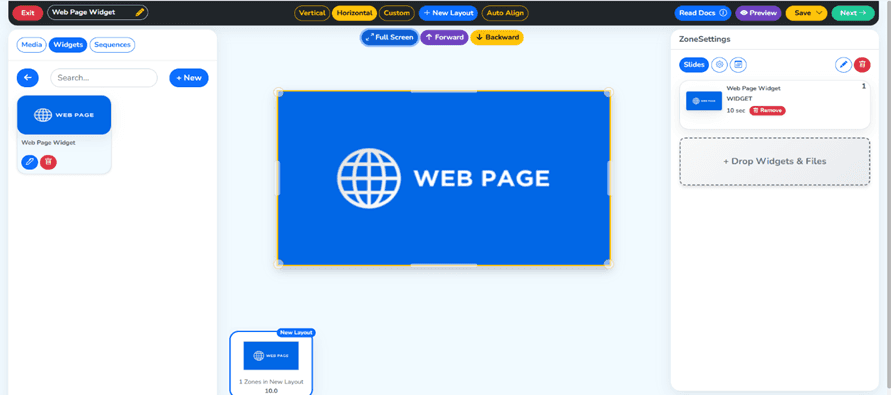
Step 12: Click Full screen and Proceed
Select the full-screen button to see the preview of how your website will appear on the screen. After which, press the Next button at the upper right of the interface and proceed to the publishing step. This brings you to the screen where the configuration is targeted and published.
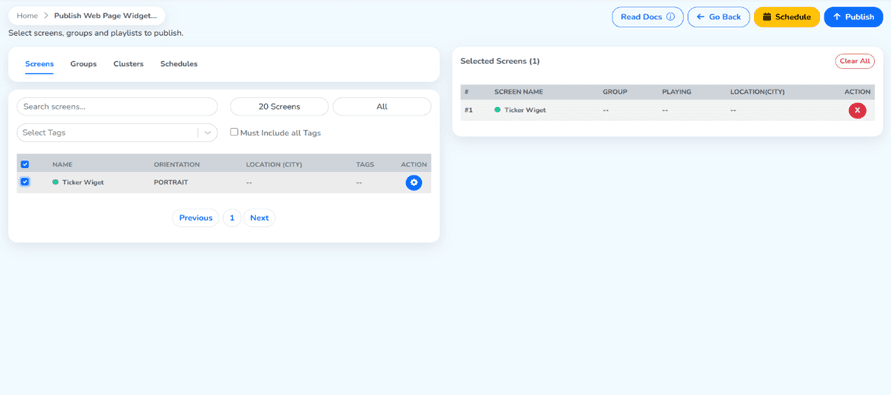
Step 13: Select Your Screen and Press the Publish Button
Select a signage screen to which you wish to publish this playlist. You may target it to only one single screen (such as lobby display) or push it to more than one at a time. After choosing your target screen, click the publish button at the upper-right of the interface.
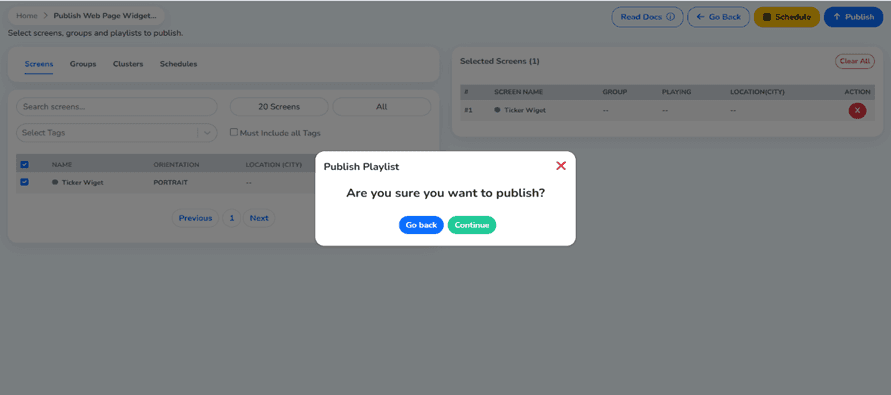
Step 14: Choose the Continue Button to Publish on the screen
The confirmation dialog will be shown, requesting you to confirm the action of publishing. Check the information, which consists of the screen name, playlist, and scheduling, and press the “Continue” button to move forward. This will take your Web Page Widget to the chosen screen.
Step 15: Your Widget Has been Published Successfully
Congratulations, the success message will be used to ensure that your widget has been published to the screen. The chosen signage display will now start presenting the live site that you have set up. You may always go back to the dashboard and update the URL, the schedule, or even switch the contents.
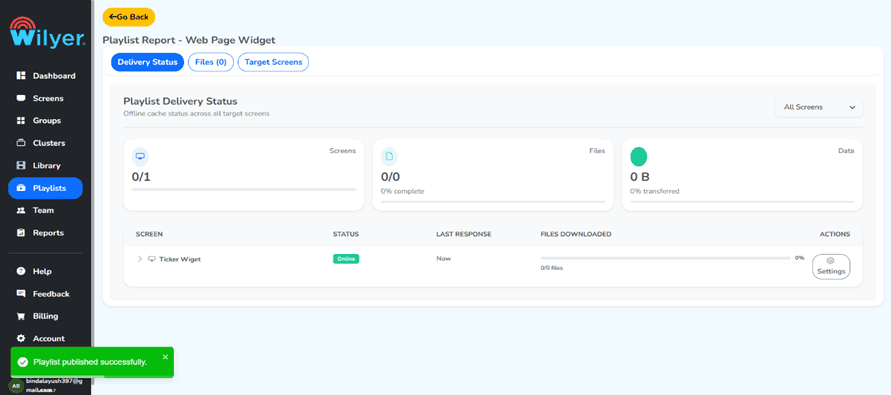
Final Step: Website Live on Your Signage Screen
Your site is now live, and it is displayed on the digital signage screen. The representation makes the live web page look as it would in a web browser, dynamically updating in real time. This is now beautifully presented on your screen, whether it is your company website, a live dashboard, or a news feed.
Common Use Cases: Where to Use the Web Page Widget
Here are some real-world scenarios where displaying a website on a digital signage screen adds tremendous value:
Lobby Screen: Display your company website or welcome page to greet visitors.
Retail Stores: Display live product catalogs, promotions, or online shopping pages.
Offices and Conference Rooms: Integrate live dashboard, KPIs, or in-house applications.
Healthcare Waiting Rooms: Display health information websites or appointment portals.
Restaurants & Cafes: Embed Live Menu, ordering pages, and review sites.
Conclusion
Displaying a website on your digital signage screen using the Wilyer web page widget is a fast, powerful, and code-free way to deliver dynamic content to any display. With this guide, you can create your own live website on your TV or lobby screen in just a few minutes by following the steps in this guide, starting with opening up your dashboard, all the way to publishing your widget.
Whether you're looking to show a URL on a signage screen step by step, embed a live website in your digital signage CMS, or simply configure a URL widget in your signage software, Wilyer's intuitive platform makes the entire process seamless.

Multi-Platform Compatibility for Every Digital Signage Display
Run Wilyer’s digital signage software on your preferred operating system with zero hassle.