
Tablet Digital Signage
How to turn any tablet into smart digital signage via PlayStore
A step by step guide to using Play Store apps for tablet digital signage
Introduction
Turning a tablet into a digital signage display is easier and more efficient than many people realize, especially when using Wilyer Digital Signage Software. If you already have a tablet that is no longer in regular use, you can avoid investing in costly commercial displays or additional hardware.
With the right digital signage software, a tablet can be converted into a professional, easy-to-manage screen for menus, promotions, announcements, videos, or branded content. It provides a flexible and budget-friendly solution for businesses, restaurants, offices, and even personal environments. In this guide, we will show you how a standard tablet can be transformed into a powerful digital display that you can manage and update remotely at any time.
This solution is particularly well suited for businesses seeking a cost-effective option without sacrificing quality. Tablets are compact, energy-efficient, and simple to mount on walls, counters, or stands. By installing a digital signage app, you can update content in real time, schedule playback, and lock the device in kiosk mode for reliable, uninterrupted operation. If you already own a tablet and are considering digital signage, this approach offers an easy setup, low cost, and maximum flexibility.
Why Download Wilyer Digital Signage from Google Play Store?
Safe and Secure Download
A download of apps through the official Google Play Store is a surety that you are being provided with the authentic, trusted version of Wilyer Digital Signage Player. Through Google Play Protect, malware and security threats are automatically checked on apps in order to provide you with the peace of mind that your data and tablet are secure.
Automatic Updates
Once you install Wilyer through the Play Store, you can always be assured of the latest features, bugs fixes and security updates. The app will also inform you about any updates available so that you can make sure your digital signage system keeps up to date with little effort.
Easy Installation Process
It is extremely easy to locate, download and install applications only by a couple of taps in the Play Store. There is no need to download APK files using your fingers, or to consider compatibility, the Play Store does all that automatically.
Authenticated Customer Reviews and Ratings.
Reviews can be read by other users who have downloaded Wilyer Digital Signage before the installation, and this will give you an idea of the features, performance, and user experience of the app. Such transparency helps to gain confidence with the choice of digital signage.
What is Wilyer Digital Signage Player?
Wilyer Digital Signage Player is a professional cloud-based digital signage application that is produced by Wilyer Private Limited. This is a powerful app that is free on the Google Play Store and it can turn any Android tablet into a full-fledged digital display that can be controlled remotely anywhere in the world.
Key Features:
Cloud based content management - Wilyer web dashboard will give you the ability to update your displays anywhere.
Remote screen control - control multiple screens by one account.
Content scheduling Schedule various content at various times of the day.
Boot Autostart - This enables the tablet to start automatically upon booting.
Lightweight application - 21 MB is only download size.
Shows pictures and videos, etc. - Accepts different types of content.
Monitoring in real time - Track the status of the connection and the device's health.
Pre-planning: What You Need.
Requirements to download and install Wilyer Digital Signage on the Play Store To install Wilyer Digital Signage successfully, you need:
An Android Tablet - Android tablet that has Android 5.0 or more (the majority of tablets in the past 8-10 years are compatible)
Good Wi-Fi Connection- This is necessary to download the app in the Play Store, and the digital signage to work.
Google Account - Required to enter the Google Play Store (you can obtain it (free of charge) in case you do not have one)
Basic Storage Space- 50 MB or more (the app is just 21 MB)
Power Supply - Make sure that you keep your tablet charged and preferably plugged in.
Step-by-Step Guide: Download Wilyer Digital Signage from Play Store
PART 1: Preparing Your Tablet and Connecting to Wi-Fi
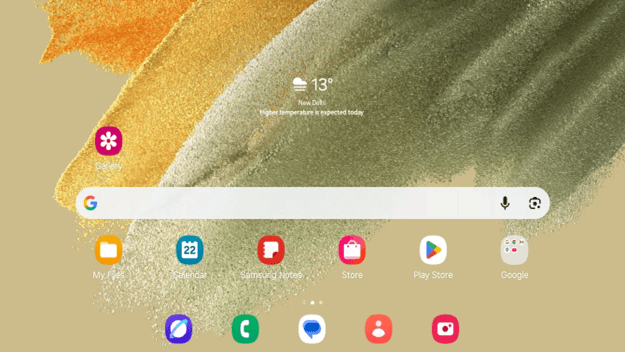
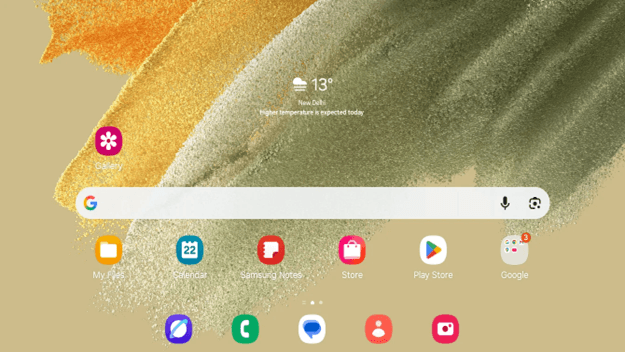
Step 1: Power On and Unlock Your Tablet
First of all, you need to turn on your Android tablet and unlock it to get to the home screen. Ensure that your tablet is completely charged or connected to the source of power to avoid inconveniences in the process of downloading and installing the required software.
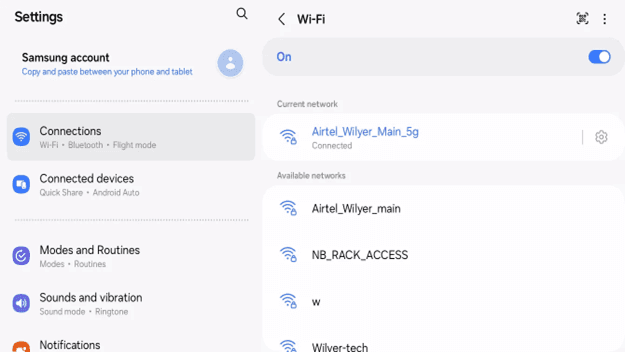
Step 2: Wi-Fi Connection of Your Tablet.
This is because a reliable internet connection is needed to download the apps in the Play Store and also have your digital signage working effectively. To connect to Wi-Fi follow the following steps:
Launch your settings app in your home screen or apps drawer.
Tap the connections (or sometimes it is called Network and Internet)
Select "Wi-Fi"
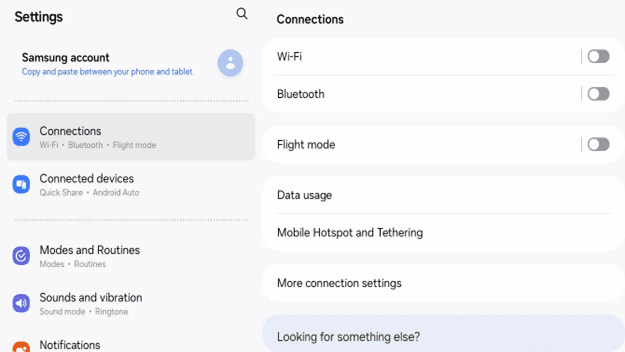
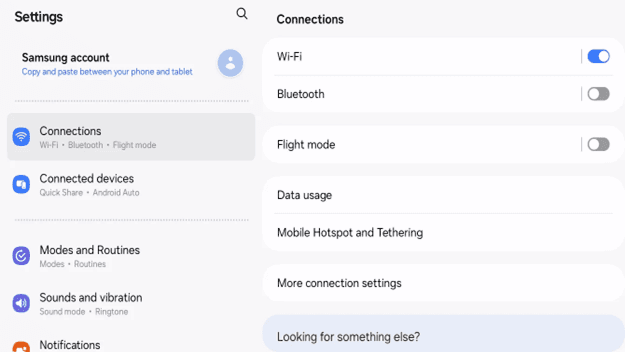
Switch on the Wi-Fi to the "On" position (it will change blue when it is on)
Give a little time until your tablet searches the available networks.
Enter Wi-Fi password where required.
Tap "Connect"
PART 2: Opening the Google play Store.
Step 3: Log in to Google Play Store App.
Your tablet is already connected to Wi-Fi, and you are now ready to go to the Play Store:
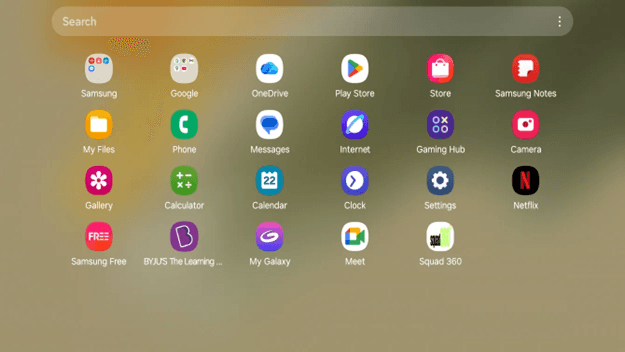
Return to your home screen
Finding the Google Play Store application (has a triangle play button icon in various colors)
Touch the icon of the Play Store to access it.
Step 4: Sign-in to your Google Account.
In case you are not signed in to the Play Store, you will have to add your Google account:
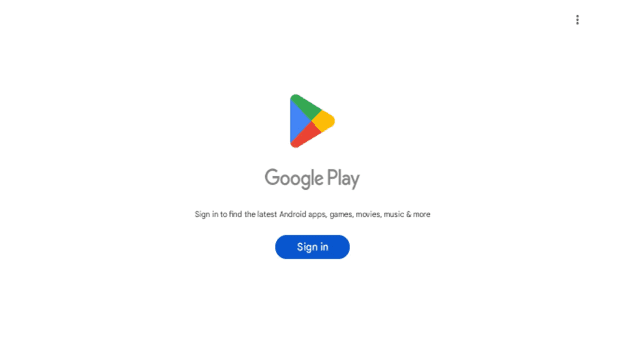
Once the Play Store is opened, you will see the Sign in button.
The sign-in screen of Google will come up.
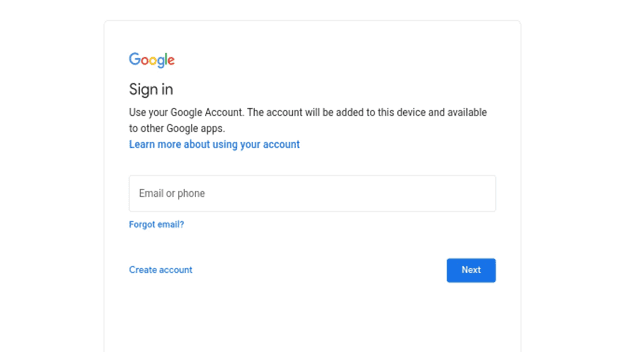
Type in your email address or phone number on your Google account.
Tap "Next"
The next screen has a password input.
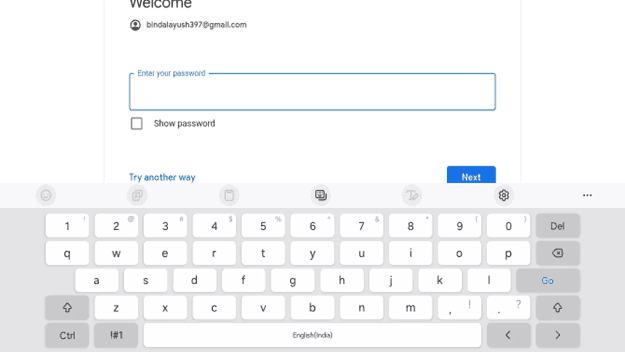
Tap "Next" or "Sign in"
Confirm Terms of Service and Privacy Policy of Google, when asked.
PART 3: Finding and Downloading Wilyer Digital Signage.
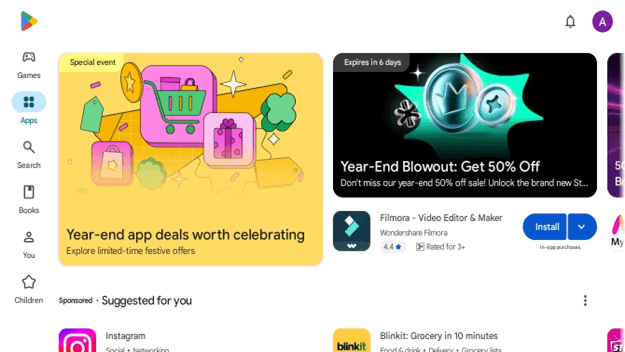
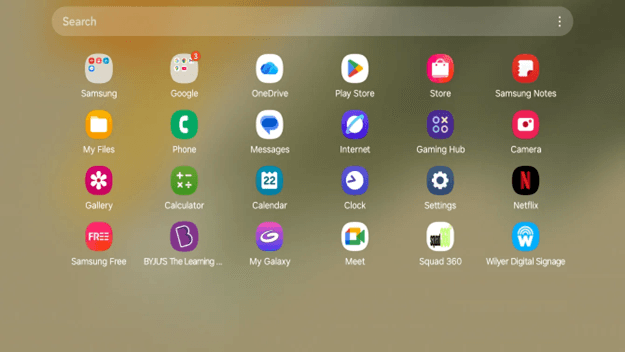
Step 5: Find your way into the Play store Home Screen.
Signing in, you will see the home page of Google Play Store with recommended applications, games, and popular apps.
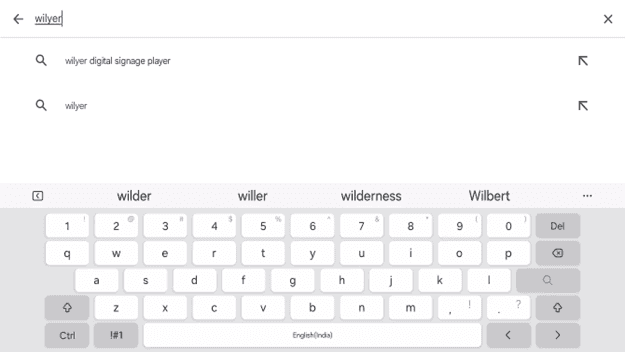
Step 6: Search for Wilyer Digital Signage Player
It is high time to locate the Wilyer Digital Signage app in the Play Store:
Find the search box at the top of the screen (it is "Search Apps and Games")
Tap on the search bar
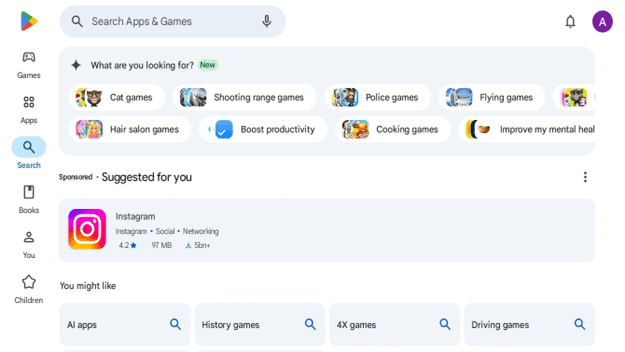
Type "wilyer digital signage player" or simply "wilyer"
The search will show suggestions as you type
Step 7: Find the Correct App on The List of Search Results.
The search will show the apps that are relevant to your search query. The genuine Wilyer Digital Signage Player app can be recognized by the following manner:
The following are some of the identifying features to look at:
Name of the application: Wilyer Digital Signage Player.
Developer: Wilyer Private Limited.
Classification: Video Players and Editors.
Application icon: blue and white Wilyer logo including Wi-Fi.
Size: 21 MB
After making sure that this is the right app, tap it to access the app details page.
Step 8: App Review and Download.
The page of the app will be displayed to you with the significant details before the download:
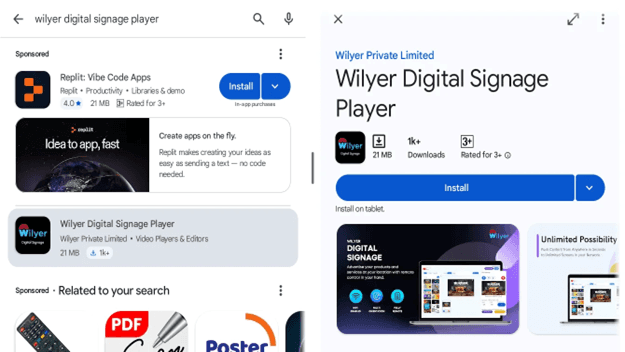
App screenshots - Overview of the application.
Count of downloads - displays 1k downloads and above.
Description of the app - Specification on features and functionality.
To Download the App:
Click the blue button on the right hand side that says install.
The button will download progress.
Wait until the download is finished (this should not take longer than a few minutes with a good Wi-Fi connection)
Upon downloading, the app will be installed automatically.
Step 9: App Successfully Installed
After the installation is done, the Install button will be replaced with the Open button and the app will have the badge Installed.

Congratulations, Wilyer Digital Signage Player has been downloaded and installed successfully in the Google Play Store. The application can now be used on your tablet.
You will also find a notification on your device to confirm the installation and the Wilyer icon will now be in your application drawer.
PART 4: Launching and Setting Up Wilyer Digital Signage
Step 10: Launch Wilyer Digital Signage Player
The app is installed, and it is time to open it:
Tap the Open button right on the Play Store application page.
Tap on the Wilyer Digital Signage icon (blue and having the Wilyer logo) in your home screen or application folder.
The app will be opened and the first pairing window will appear.
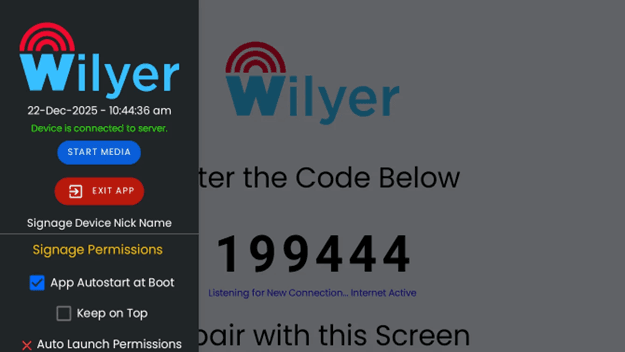
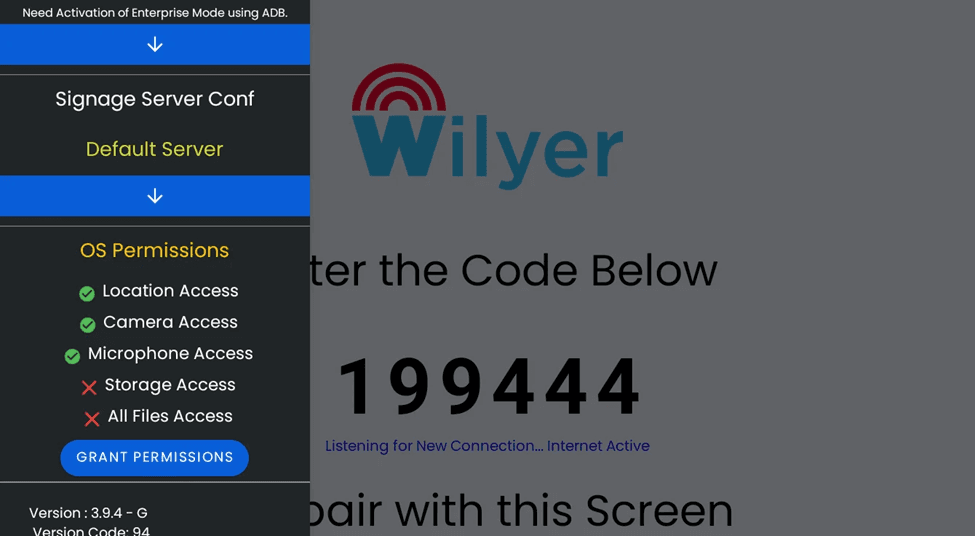
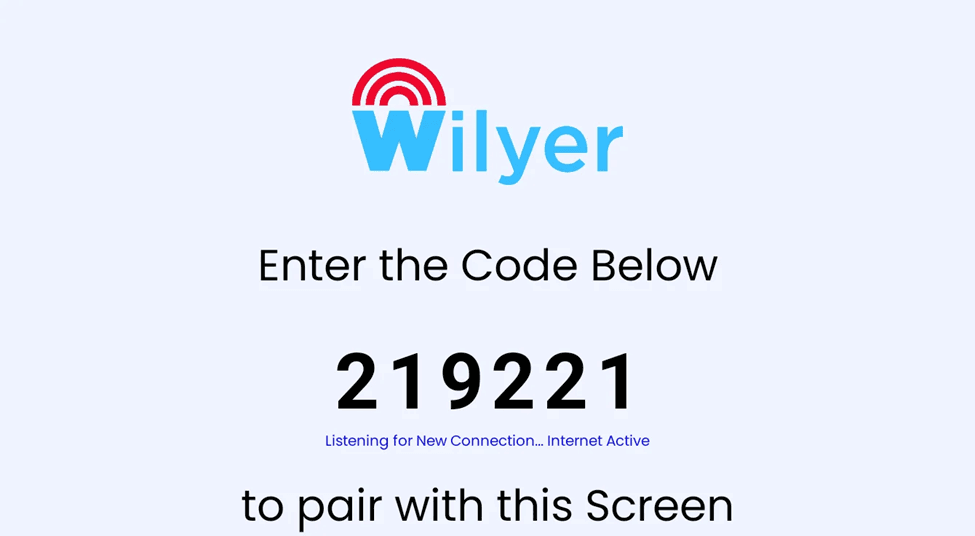
Step 11: Understanding the Pairing Screen
Upon opening Wilyer Digital Signage Player, the first screen will be the pairing screen. It is the main interface with the help of which you can connect your tablet with your Wilyer cloud account in order to manage it remotely.

Wilyer Logo - It is presented at the top with the unique red Wi-Fi icon.
6-digit Pairing Code - This is a special code (in this case: 199444) with which you will pair this tablet with your Wilyer cloud account.
Connection Status- Displays: Listening for New Connection. “Internet Active” written in blue text, and you know that your Wi-Fi is active.
Instructions - Asks you to enter the following Code in order to match this Screen.
Step 12: Set App permissions and settings.
Before you connect your tablet with the cloud, you are supposed to customize the app permissions to achieve maximum performance. The hamburger menu icon (three consecutive lines) at the left-hand side of the pairing screen can be tapped to open the settings menu.
Connection Status - Displays the current date/time and connection status (green- Device is connected to server)
START MEDIA -Click to start showing your content
Close the application EXIT APP - Close the application
Signage Device Nick Name - My Signage device a nickname to this screen.
Signage Permissions - Choose settings of the app behavior (marked with yellow)
To enable this permission:
1. Tap "ALLOW DRAW OVER OTHER APPS"
2. Android will redirect you to system settings
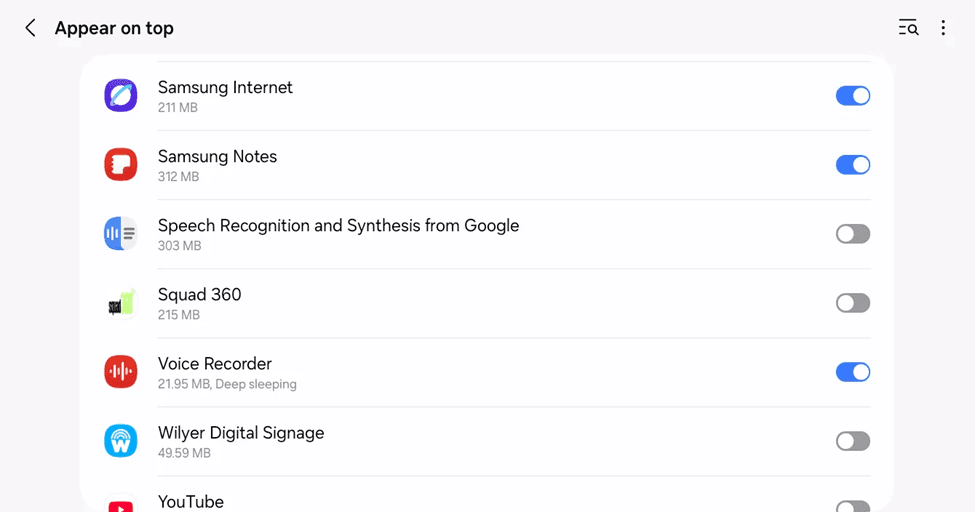
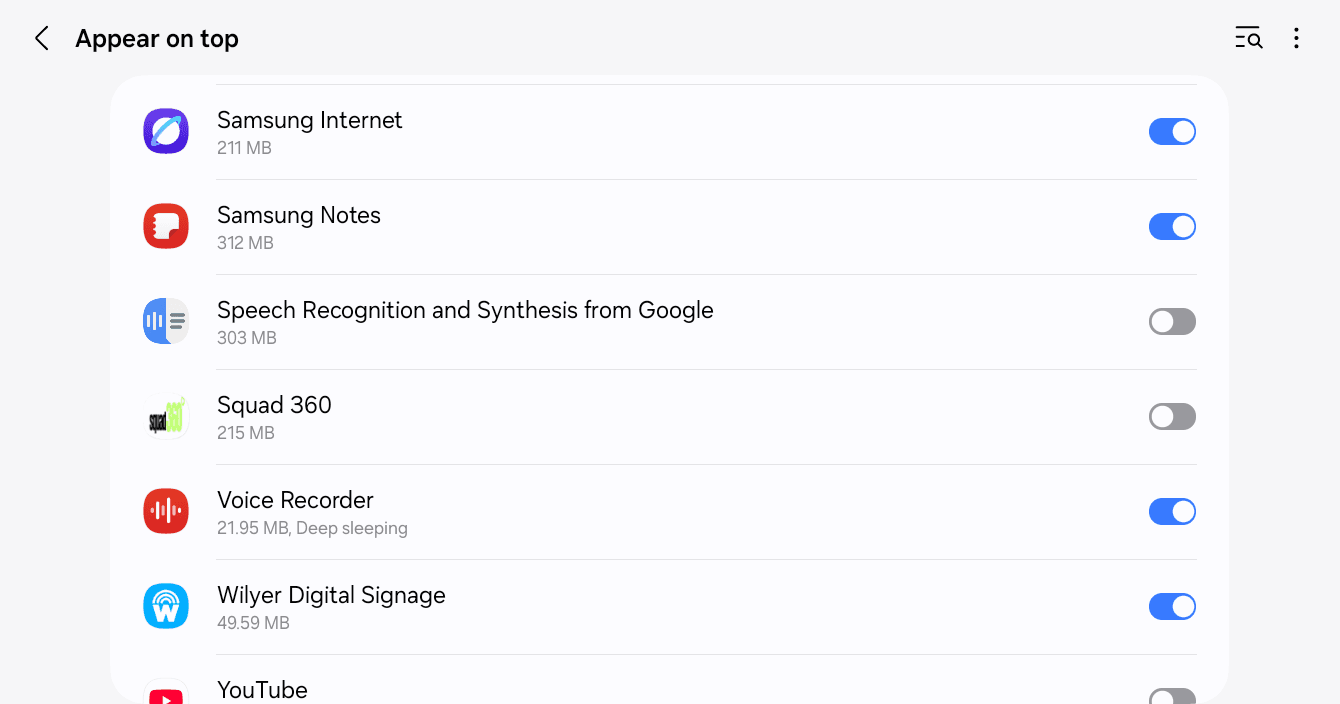
3. Navigate to: Settings → Apps → Special App Access → Display Over Other Apps
4. Find "Wilyer Digital Signage" in the list
5. Toggle the permission to "Allow"
6. Return to the Wilyer app
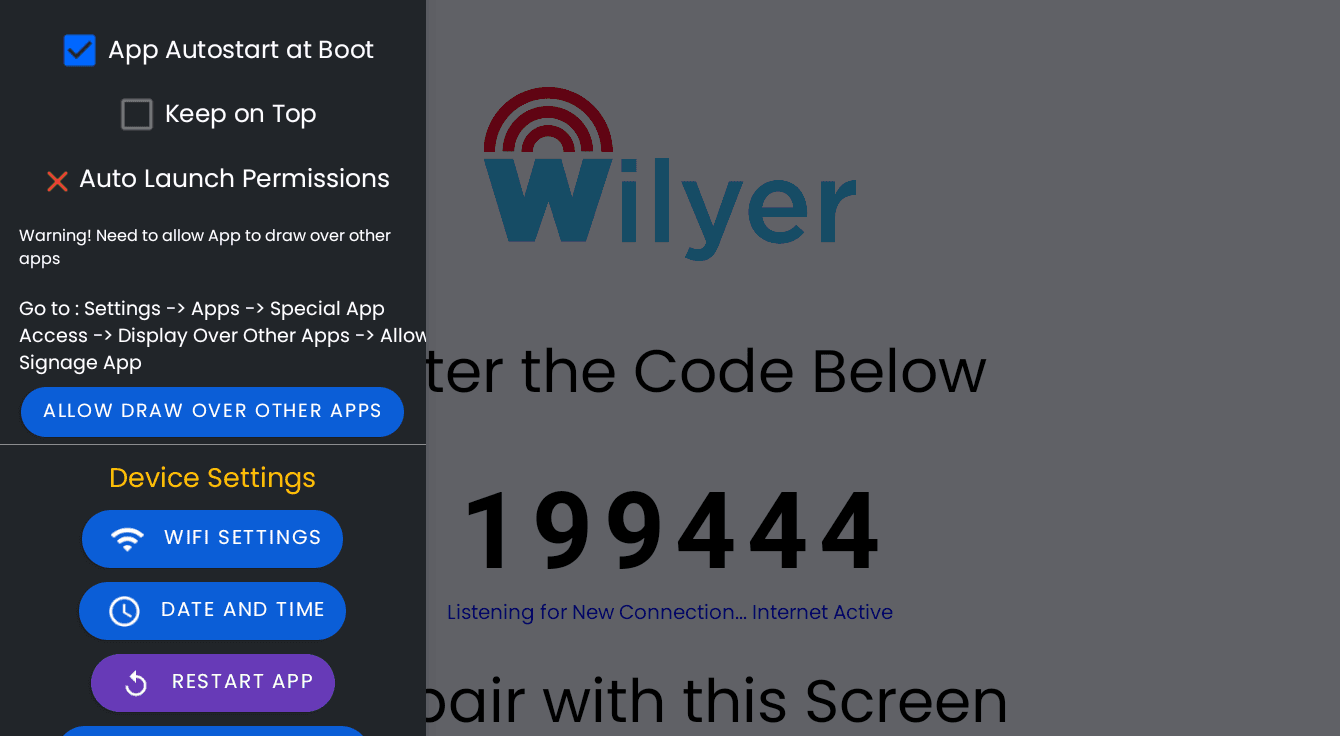
Setting Signage Permissions:
Tap Signage Permissions to enable important critical settings to operate professional digital signage:
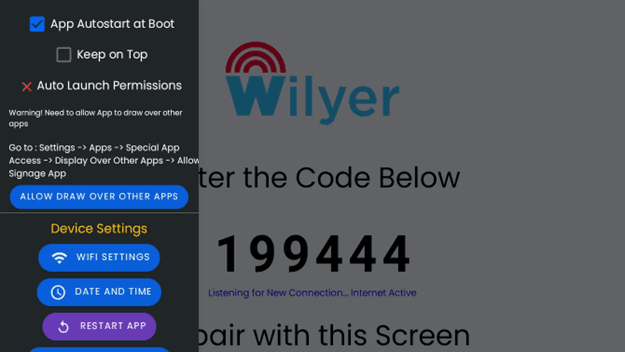
App Autostart at Boot - When the tablet is started up, or restarts, Wilyer is opened automatically. This will be needed in order to operate unattended.
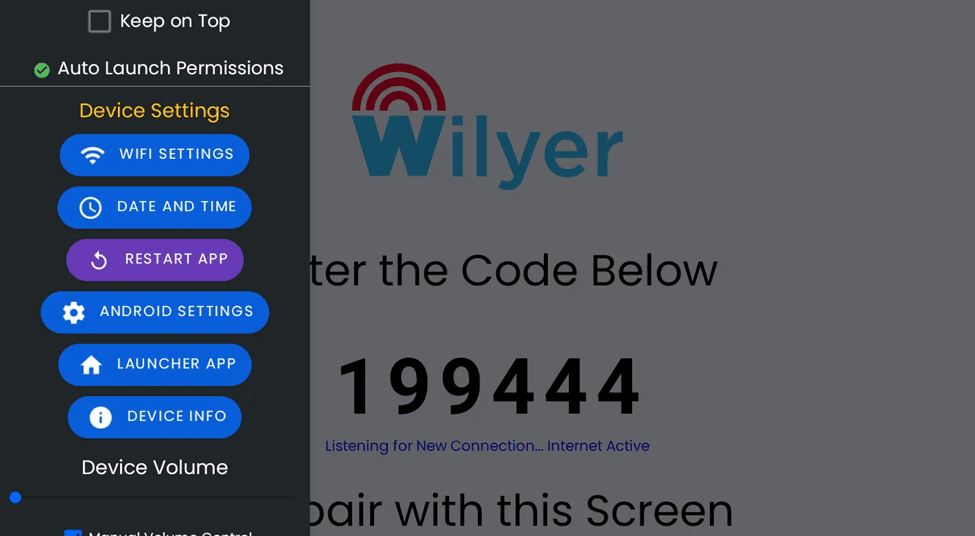
Keep on Top - Does not allow other applications to fill the signage display. Important in looking professional.
Auto Launch Permissions - This is a permission that the app can be started automatically. Necessary to work automatically.
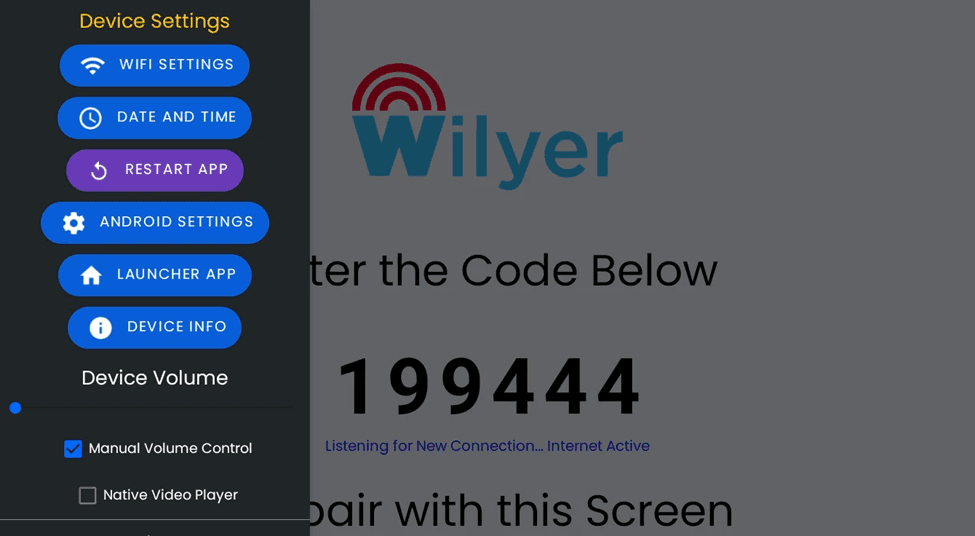
Device Settings:

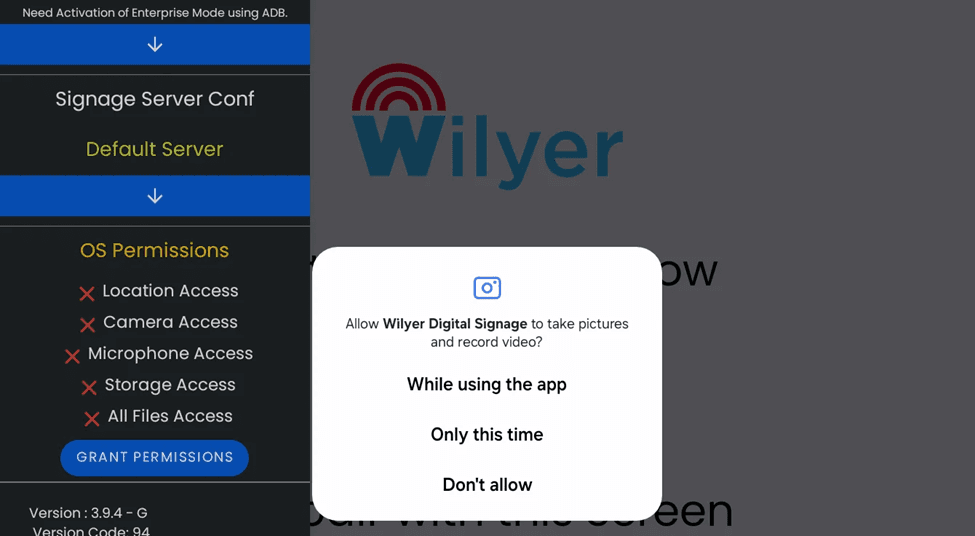
Step 5: Grant OS Permissions
Scroll to OS Permissions and tap Grant Permissions. When prompted:
Allow Camera Access (required for QR code or device pairing features)
Allow Microphone Access if requested
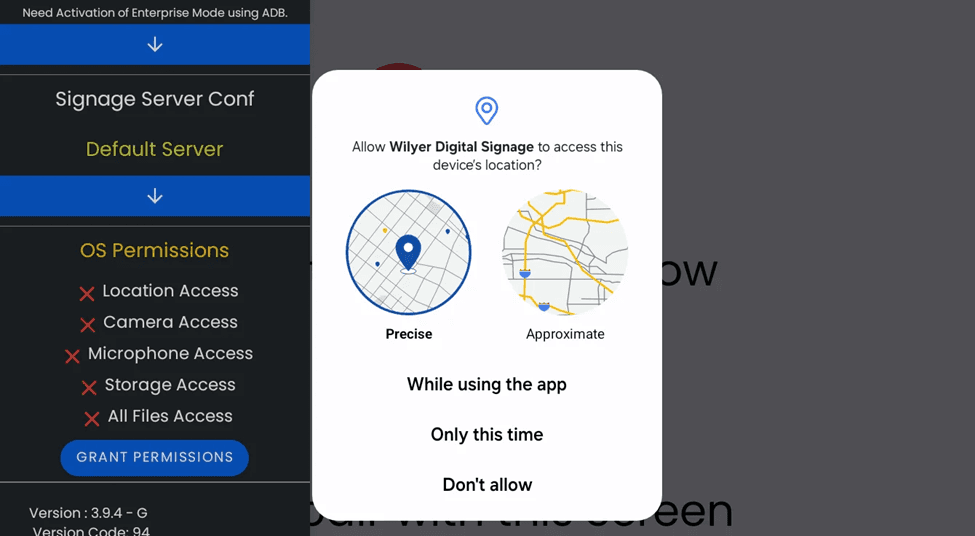
Grant Location Access by selecting While using the app
Allow storage and file access if prompted
Step 6: Verify Permission Status
After granting access, confirm that all required permissions show a green checkmark. Any remaining red indicators should be resolved by tapping Grant Permissions again.
Step 5: Check Auto Launch Status
Ensure Auto Launch Permissions are enabled. This allows the Wilyer app to start automatically and continue running without manual interaction.
Click the Restart App button to refresh the Wilyer Digital Signage application. This action applies all recent settings and permission changes, restarts the app cleanly, and ensures the device reconnects properly to the internet and Wilyer server. Once restarted, the app will continue running smoothly and display the pairing screen or assigned content without interruption.
Click the Restart App button to generate a new pairing code. Restarting the application refreshes the connection with the Wilyer server and creates a new, active code for screen pairing. Once the app restarts, a new code will appear on the screen, confirming that the device is online and ready to be paired with the Wilyer dashboard.
WIFI SETTINGS - Fast access to network switching.
DATE and TIME - Be sure of the correct scheduling of the contents.
RESTART APP - Restart the application in case it is necessary.
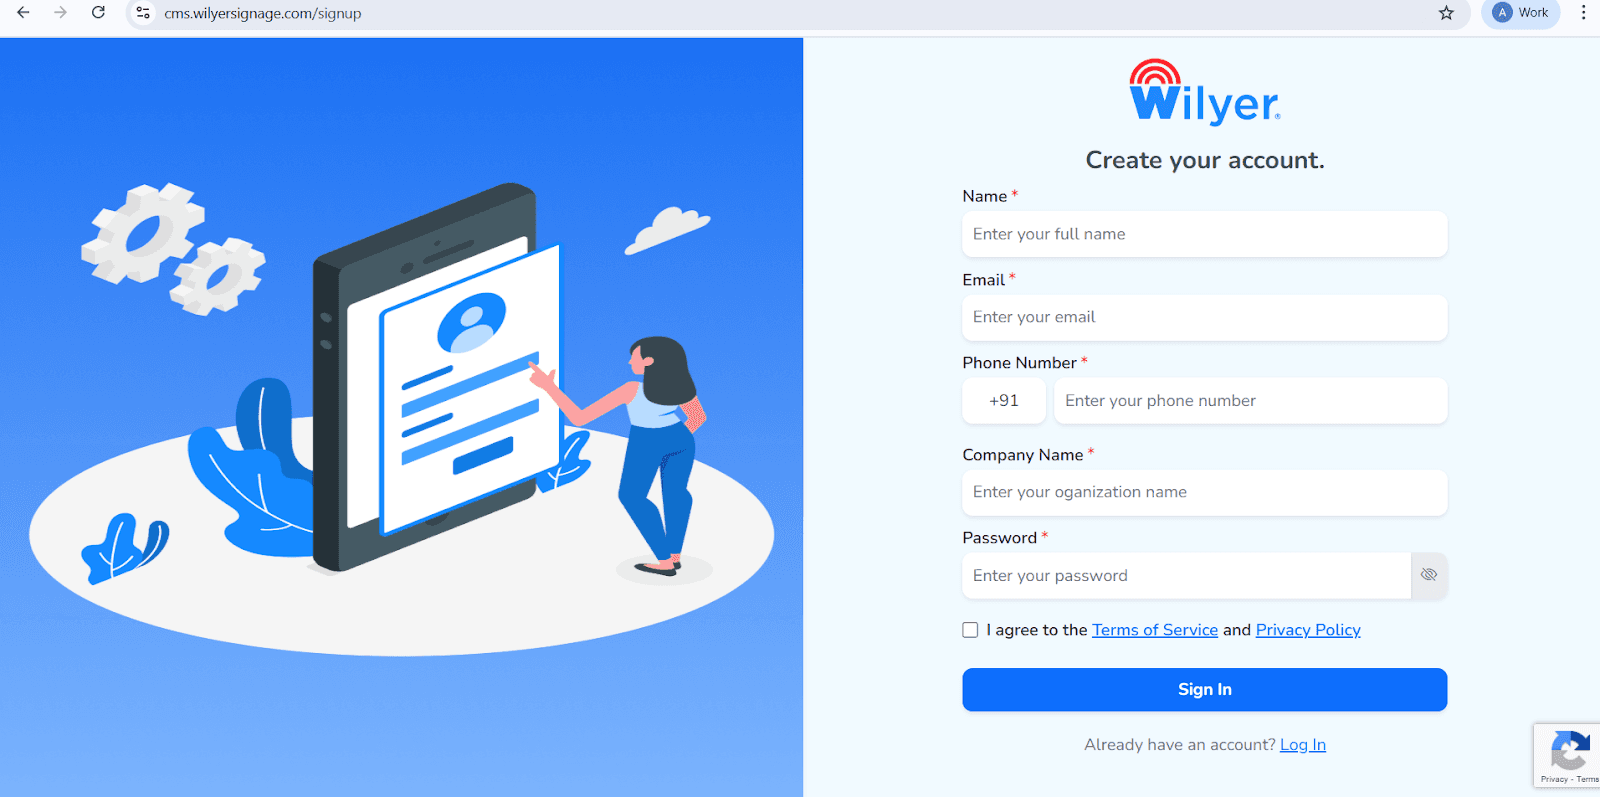
Open the Wilyer Registration Page
Access the official Wilyer Cloud CMS sign-up page to start creating your digital signage account.
Enter Your Full Name
Provide your complete legal name, which will be registered as the primary administrator of the signage dashboard.
Add Your Email Address
Enter a valid, active email address. This will be used for account login, verification, and official communications.
Provide Your Phone Number
Enter the mobile number linked to the account, including the correct international country code.
Enter Your Company Name
Specify your business or organization name to create a professional presence within the Wilyer platform.
Create a Strong Password
Choose a secure password to protect your Wilyer account and data.
Accept Terms and Privacy Policy
Review and agree to the Wilyer Terms of Service and Privacy Policy by selecting the checkbox.
Complete Registration
Click the blue “Sign In” button to finalize the registration and access the Wilyer dashboard.
Step 13: Pair Your Tablet with Wilyer Cloud Dashboard
It is now time to integrate your tablet with Wilyer cloud account so that you will be able to manage your content remotely:
Record the 6-digit pairing code that is shown on your tablet (e.g. 199444).
Go to the Wilyer site on your computer or phone and log in to your account (or create a free account in case you do not have one)
You will find the option of adding a device or pair screen in your dashboard.
Insert the 6-digit code of your tablet.
Name your screen (e.g. "Reception Display" or "Menu board 1" or "Conference room screen")
Click "Pair" or "Connect"
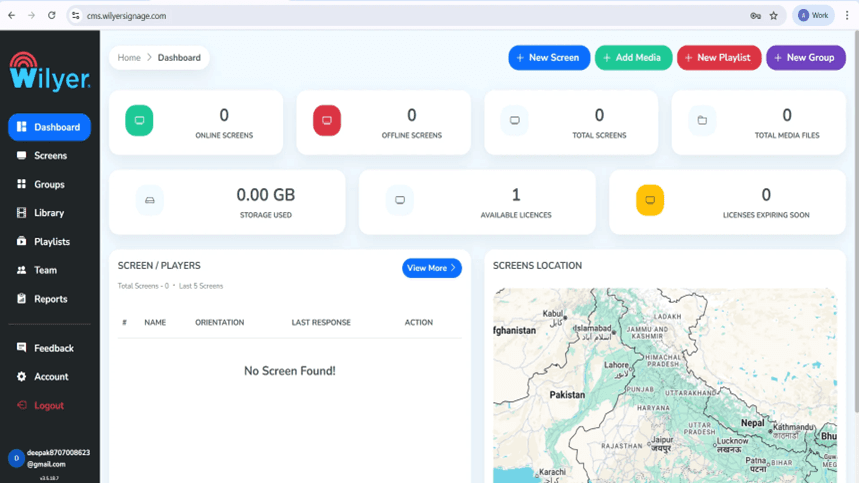
Step 14:Wilyer Dashboard Log In.
Once logged in, you will be redirected to the Wilyer Dashboard which is the main management interface of your digital signage network. The dashboard will give a full view of online and offline displays, total registered screens, media assets uploaded, storage in use and available licenses. It is through this interface that you are able to monitor and manage your entire signage environment easily.
Step 15: Pair Your Android Tablet
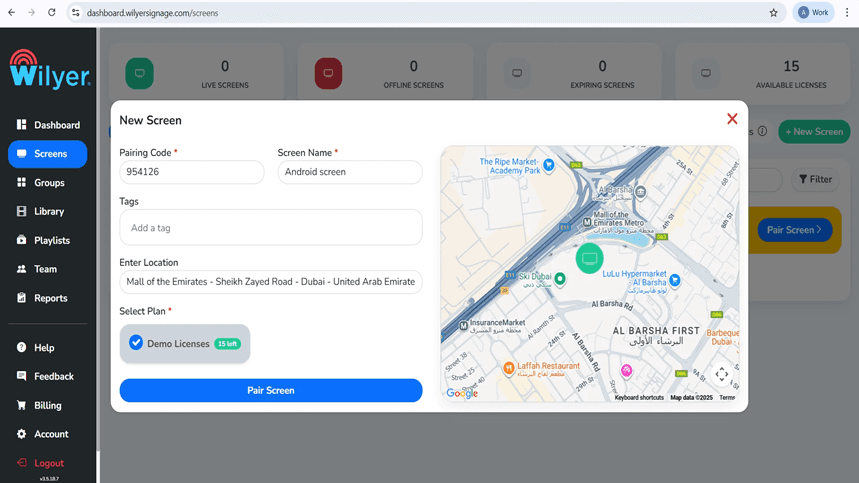
In order to add a new display, choose + New Screen or Add Screen on the dashboard. Enter the 6 digit pin used on your Android Tablet. Enter a clear and descriptive screen name, add descriptive tags, specify the location of installation and also choose a suitable license plan. Click Pair Screen and then the pairing process is complete.
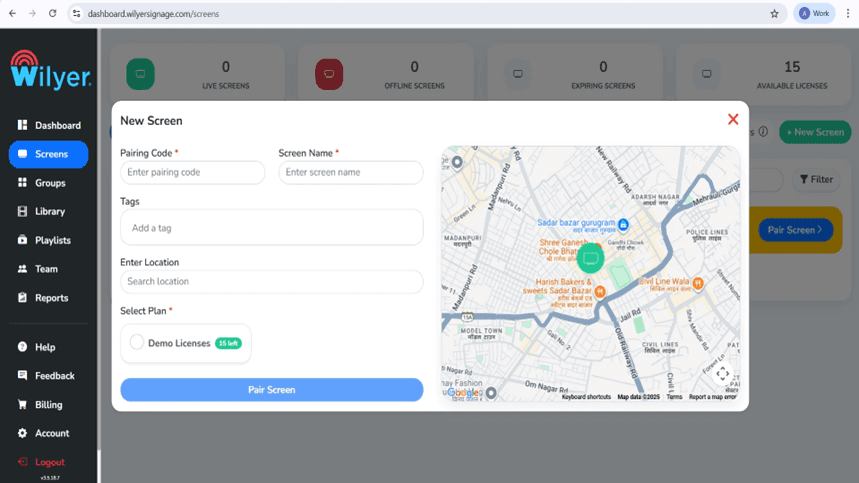
Step 16: Finish Screen Pairing through Dashboard.
In the Wilyer web dashboard, go to the Screens, and then, click on Pair Screen. Insert the pairing code you see on the Tablet, verify the screen name, insert tags, and choose the place of installation. Choose a license plan that is available and press Pair Screen to set up and to be connected to the display.
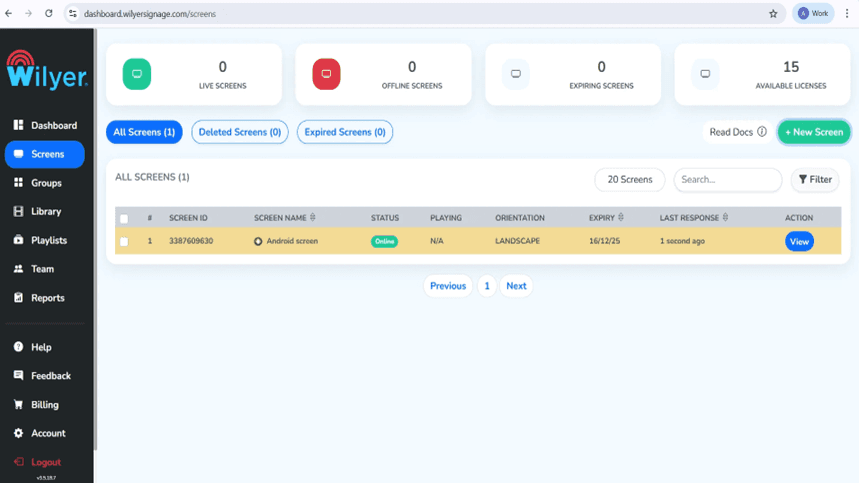
Step 17: Successful Pairing Screening.
After the pairing is done, the display will show in the Screens section and have an Online status which will indicate a successful connection. The most important information (Screen ID, orientation, license expiration date, and last response time) can also be viewed. The screen is now available for playlist assignment, configuration and real-time display of performance.
Producing Your Digital Signage Business.
Step 18: Upload Media Files
In the Library section, there is an Upload Media button which is used to add pictures, videos and other media files. The site allows various formats, such as JPG, PNG, and MP4. The media library is the base of the development of the visually appealing digital signage playlists.

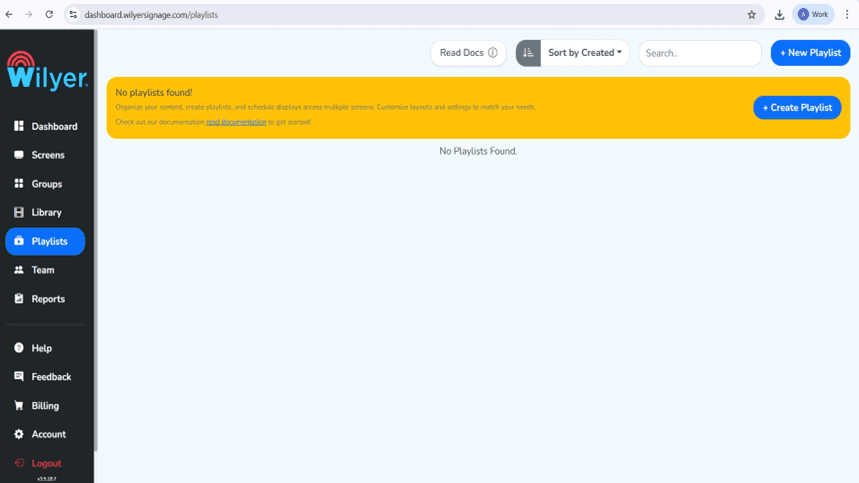
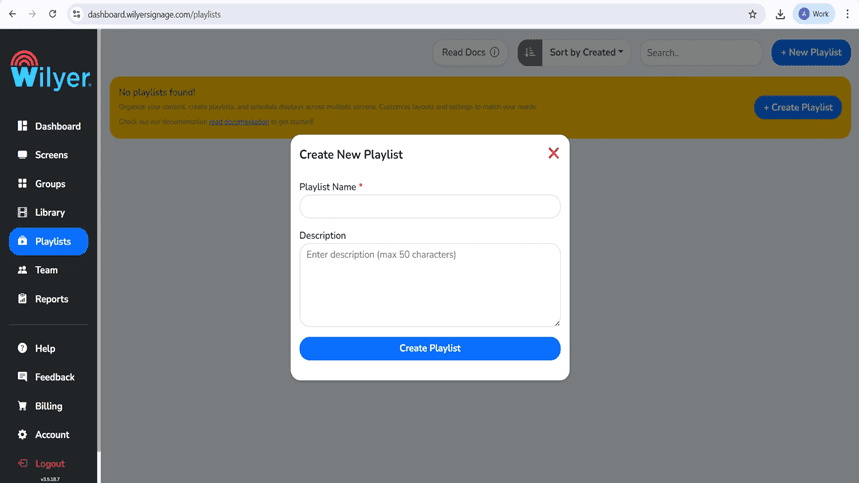
Step 19: Make Your First Playlist.
Go to the section, Playlists and either use + New Playlist or Create Playlist. Offer a descriptive name and option description of playlist. This playlist will be utilized in arranging and presenting the material on your connected screens.
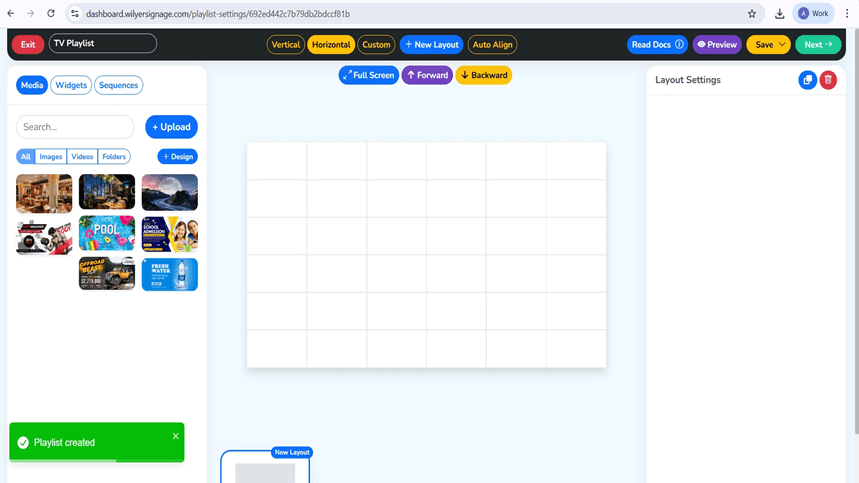
Step 20: Choose and make up the Playlist Layout.
Arrange the content of your playlist using the playlist editor by choosing Vertical, Horizontal or Custom layouts. Drag and drop media files in the library to the canvas, set the durations of slides and effects of transitions. There is a preview feature that is in real time that lets you see the layout as you design.
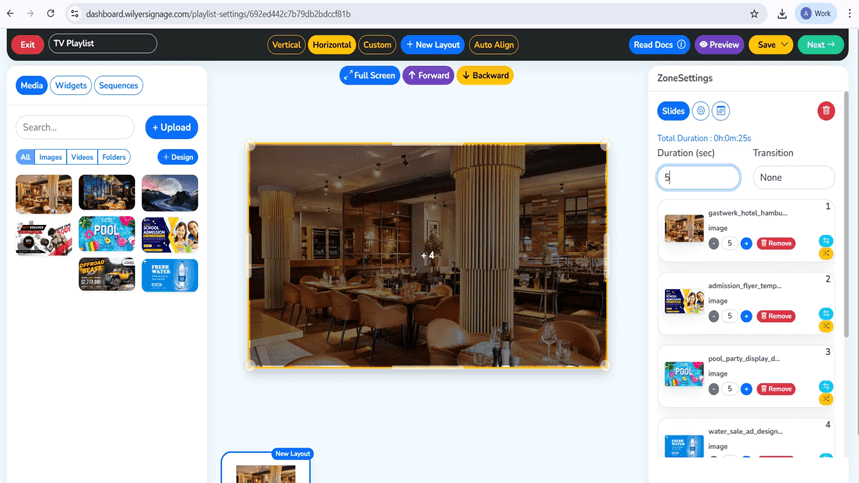
Step 21: Media and Playback Settings.
Insert photos or videos on the specific areas of layouts. Each media file is converted into a slide in the playlist, with the ability to play it in any order, with changing display time and effects. The overall duration of the playlist is automatically updated when music is added and removed. Preview Mode allows you to preview your play list and then save and make it available.
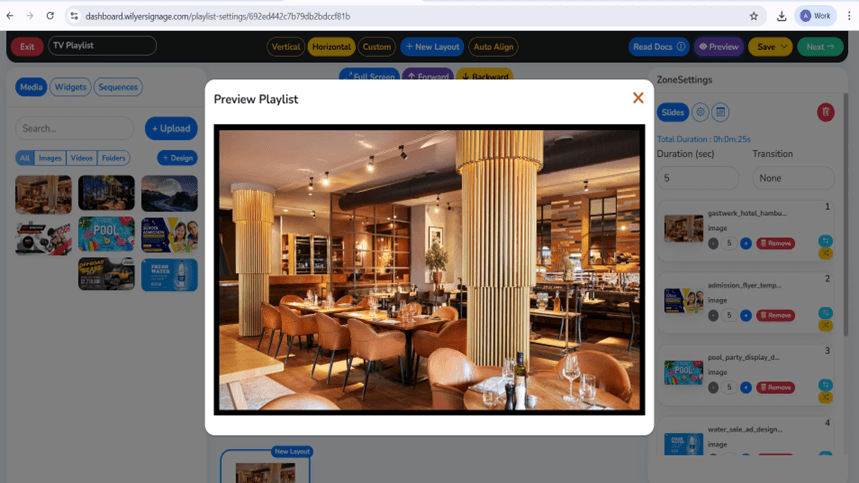
Step 22: Preview Your Playlist
Click Preview to see the way your playlist will be on the display. The layout alignment, media sequence, timing, and transitions are displayed in the preview. Check and revise every slide to be accurate and have a visual consistency, and then move on to publication.
Step 23: Publish Content to Screens.
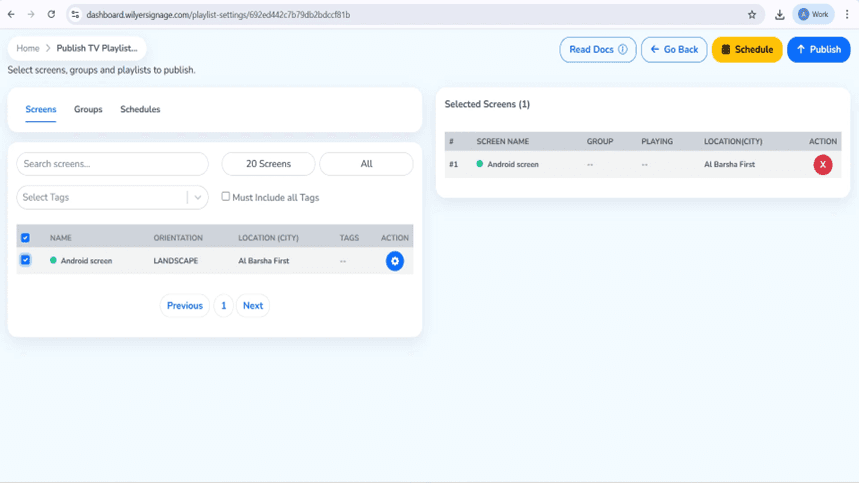
After adding your final choice of playlist to the playlist, click Next and Publish. Choose the target screens or screen groups on which the content to be shown has to be. Note: Ensure that you have selected the correct playlist to be deployed regarding the displays.
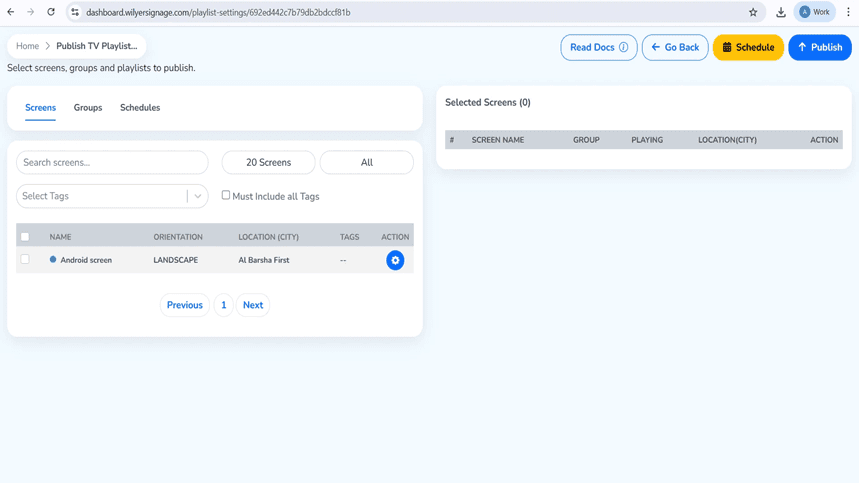
Step 24: Publish/ Schedule the Playlist.
Select target display or display group on the Publish Tablet Playlist page. You can either decide to play the playlist at the moment or set it to be played on a given date and time. Choose Publish or Schedule according to your deployment needs.
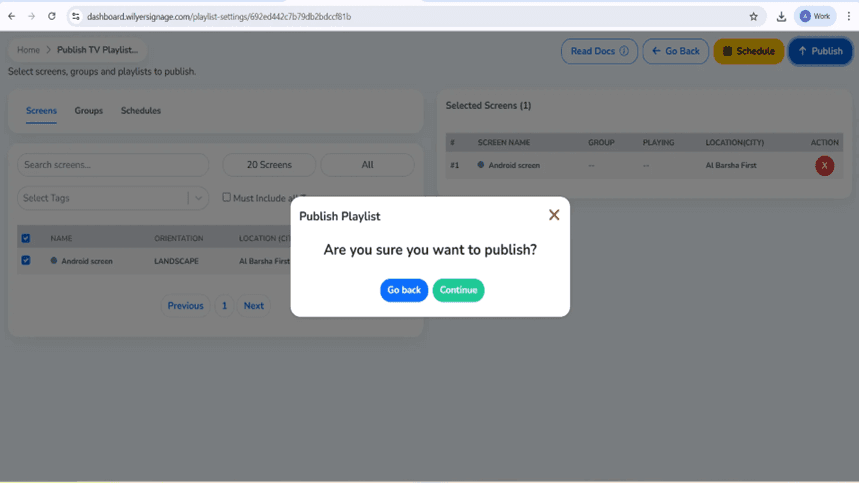
Step 25: Content confirmation Publishing.
A confirmation dialogue will come before the deployment. Go through the specifics. When everything is right, then you need to continue to be sure of publishing. In case of need to change it, choose Go Back to edit the playlist or screen selection.
Step 26: Track Playlist delivery report.
Once the publication is made, track the progress of delivery with the help of the Playlist Report. The report shows specific screens, status of data transfer and percentage of completion. A Successful status indicates that all the files were delivered and the screen is online. The playback will commence after all the delivery requirements have been achieved.

Final Step: Onscreen Playlist: Playlist Live.
Your playlist is now published and it is playing on the attached display. The content is displayed in relation to the chosen layout, playback order, and time, which are useful in ensuring flawless and smooth functionality. Check visuals, positioning, and transitions to ensure that you have a professional, good appearance to your audience.

Benefits of Downloading Wilyer from Play Store vs. Other Methods
Authoritative Source = Maximum Security.
The official version of Wilyer Digital Signage available in Google Play Store is the certified version by Wilyer Private Limited. The Play Store applications pass through the security checks of Google in contrast to the APK files that are downloaded on third party websites and they are shielded by the Play Protect that constantly searches for malware and malicious practices.
Seamless Updates
Play Store users are automatically updated when Wilyer releases new features, bug fixes or security patches. You do not have to manually download the updates and fear that you are using old software. All you need to do is in your Play Store settings, make auto-updates on and your digital signage will get the latest improvements.
Compatibility Assurance
The Play Store will automatically verify whether Wilyer is compatible with your particular model of tablet and with which version of Android it is allowed to install. This will avoid compatibility problems with the software and it will most likely be able to run on your device.
Conclusion
Downloading Wilyer Digital Signage Player from the Google Play Store is the fastest, safest, and most reliable way to transform your Android tablet into a professional digital display system. In just a few simple steps, connecting to Wi-Fi, signing into the Play Store, searching for Wilyer, and tapping Install, you can have a fully functional cloud-managed digital signage solution up and running in minutes.
The Play Store version gives you peace of mind with verified software, automatic updates, and easy management. Whether you're running a restaurant, retail store, office, healthcare facility, or any other business, this free app turns any tablet into a powerful communication tool that you can update remotely from anywhere in the world.
Don't let that old tablet sit unused—head to the Google Play Store today, download Wilyer Digital Signage Player, and start engaging your audience with dynamic, professional digital content.

Multi-Platform Compatibility for Every Digital Signage Display
Run Wilyer’s digital signage software on your preferred operating system with zero hassle.
