Introducción
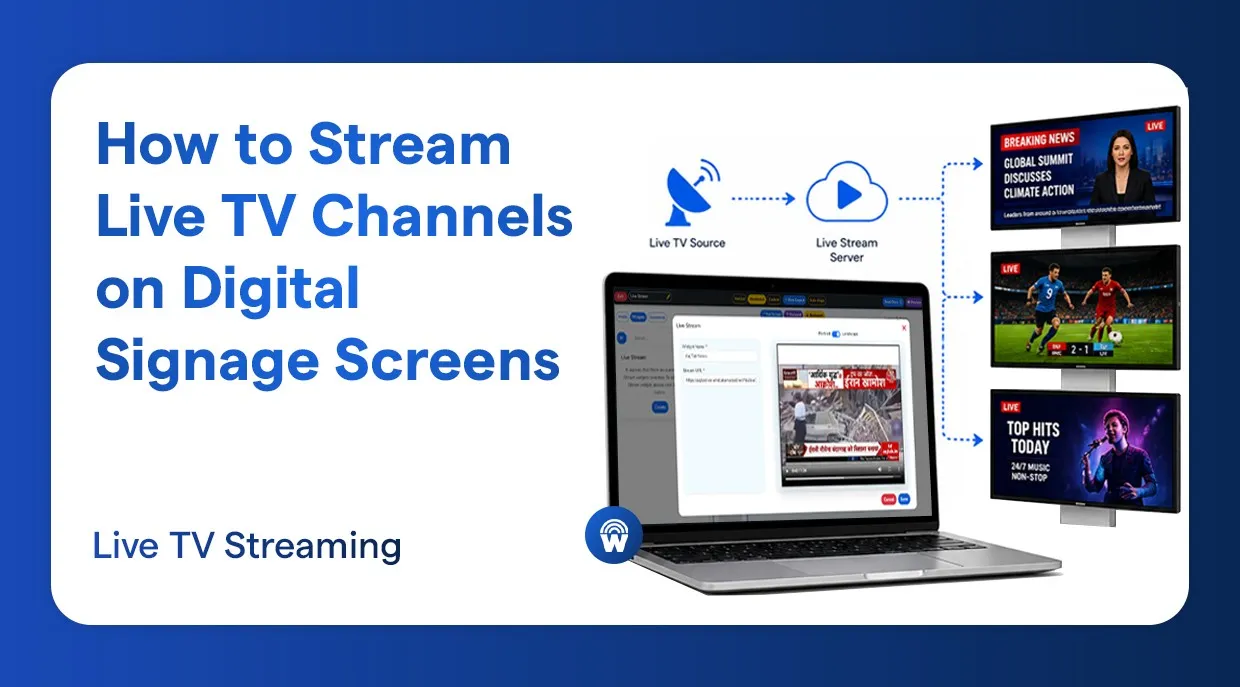
La señalización digital ha transformado la forma en que los negocios se comunican con su público, desde tiendas minoristas y aeropuertos hasta vestíbulos corporativos y restaurantes. Poder transmitir canales de televisión en vivo en tus pantallas y en tiempo real es una de las funciones más potentes de un CMS de señalización digital moderno.
Ya sea que quieras mostrar un canal de noticias en vivo, un evento deportivo o cualquier otro canal IPTV en tu pantalla de señalización, este tutorial te lleva paso a paso por el procedimiento exacto usando la plataforma de señalización digital de Wilyer.
Al terminar esta guía no solo sabrás cómo configurar una transmisión de TV en vivo en cualquiera de tus pantallas de señalización digital, sino también cómo armar tu lista de reproducción, crear un widget de transmisión en vivo y publicarlo en la pantalla que elijas.
Qué necesitas antes de empezar
Estas son algunas de las cosas que debes tener antes de entrar en la configuración paso a paso de canales en vivo en señalización digital:
- Una cuenta activa de señalización digital de Wilyer
- Una pantalla de señalización digital conectada a tu CMS.
- Una URL de transmisión válida (se recomienda el formato HLS/m3u8)
- Conectividad a internet constante en la pantalla y en el servidor.
Paso a paso: cómo transmitir TV en vivo a una pantalla
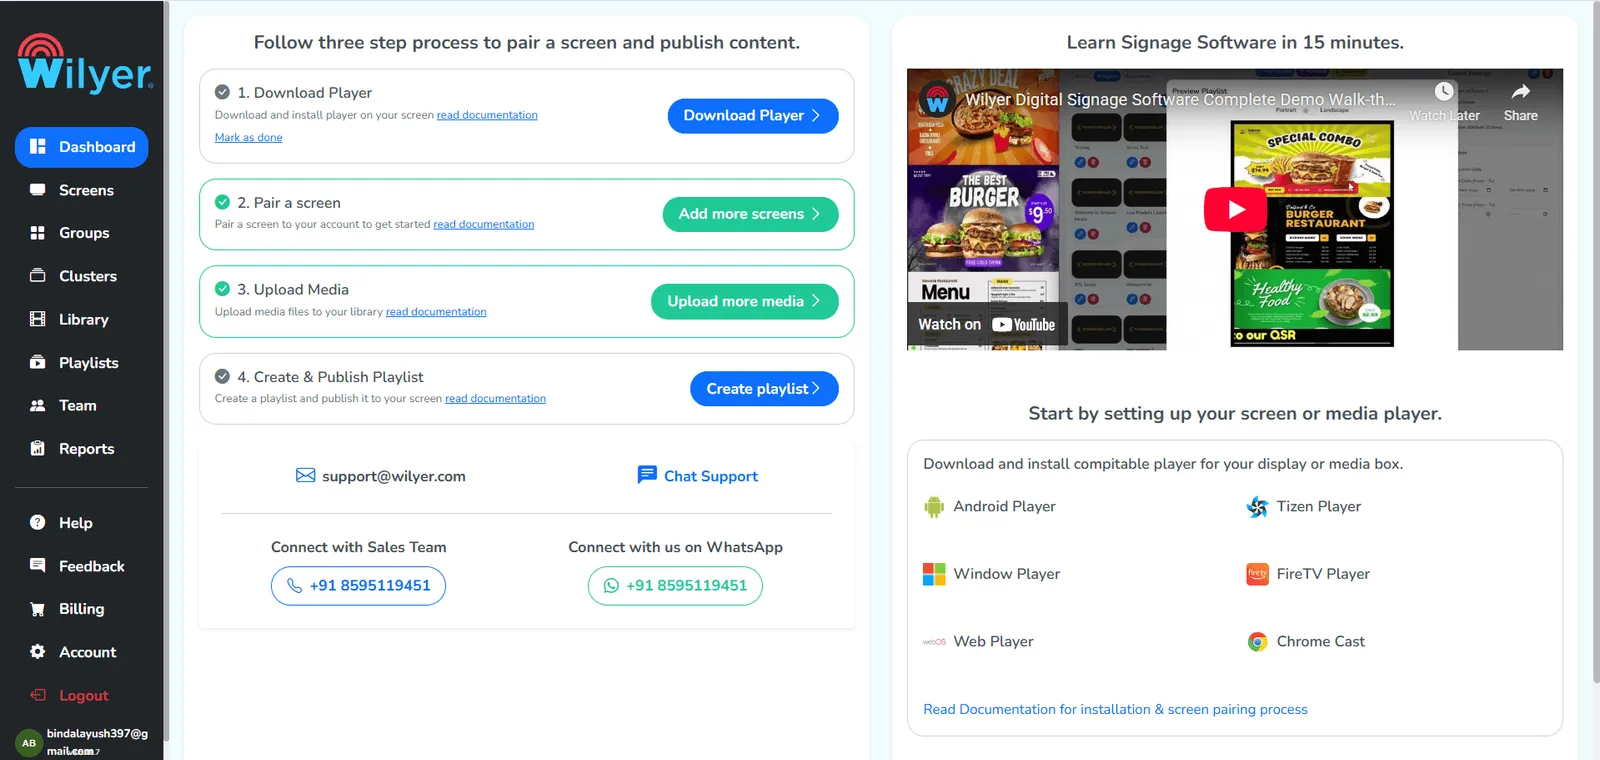
Paso 1: entra al panel de control de Wilyer
Empieza por iniciar sesión en tu cuenta de señalización digital de Wilyer. Una vez dentro, llegarás al panel de control principal, que es tu centro de mando: desde ahí administras en un solo lugar todas tus pantallas de señalización digital, tus listas de reproducción y todos tus widgets.
Paso 2: ve a la sección de listas de reproducción
Haz clic en la sección de listas de reproducción en el menú de navegación del lado izquierdo del panel. Ahí guardas todo tu contenido, lo administras y lo programas para que se muestre en las pantallas de señalización digital que tienes conectadas.
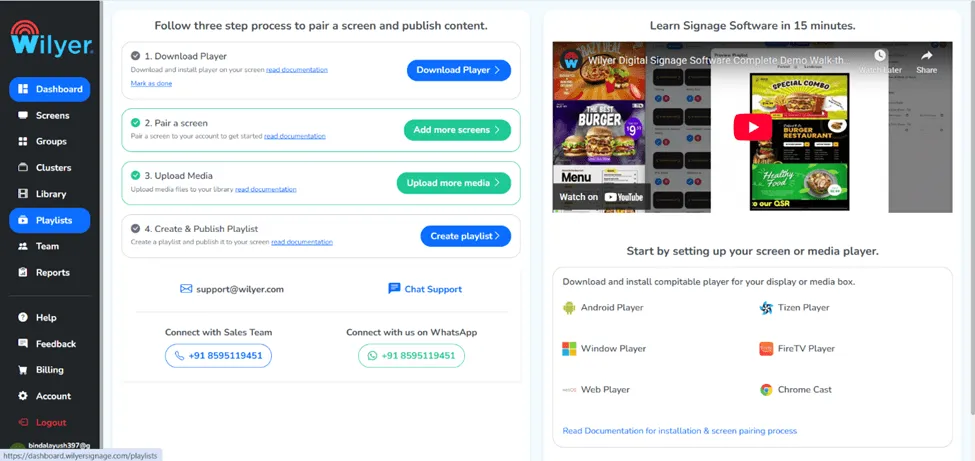
Paso 3: crea tu nueva lista de reproducción
Entra a la sección de listas de reproducción y pulsa el botón «+ Create Playlist» (Crear lista de reproducción). Una lista de reproducción es un contenedor de contenido que incluye tus widgets, imágenes, videos y transmisiones en vivo. Puedes usarla en una sola pantalla o en varias.
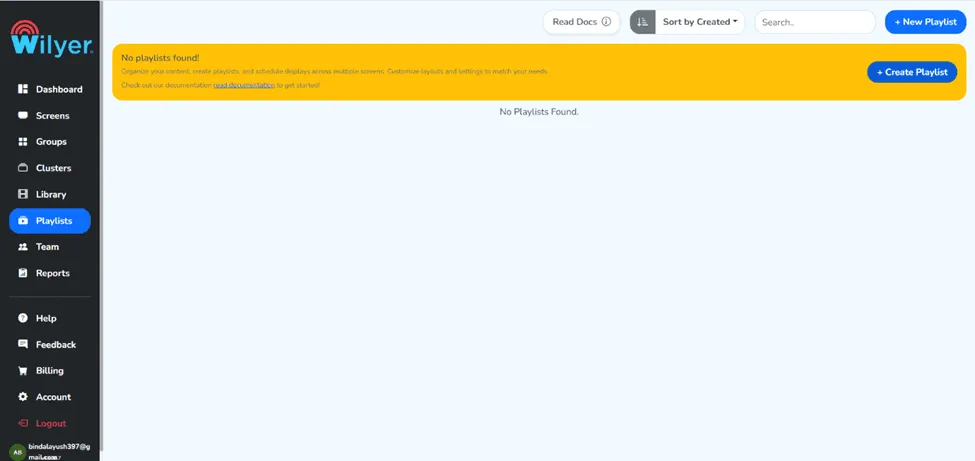
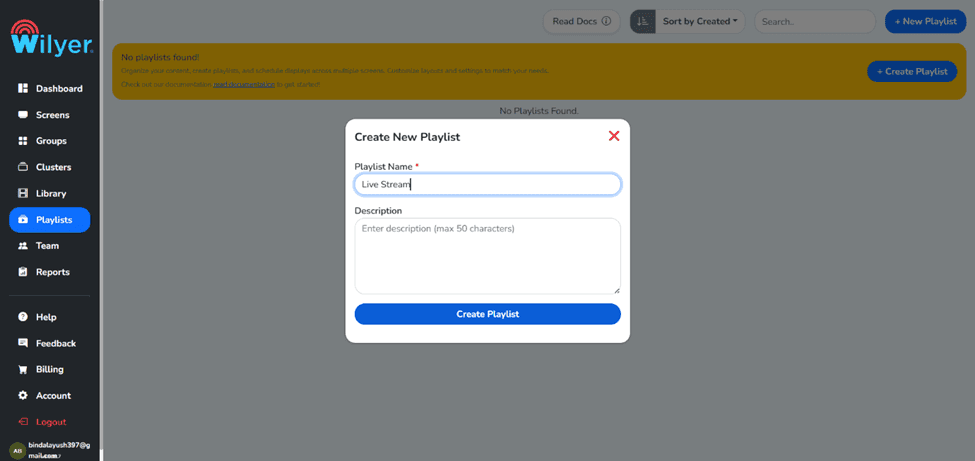
Paso 4: completa los datos y pulsa el botón «Create Playlist»
Ponle a tu nueva lista de reproducción un nombre descriptivo y con sentido, y completa los campos necesarios. Cuando todo esté lleno correctamente, haz clic en el botón «Create Playlist» (Crear lista de reproducción) para guardarla. A partir de ahí ya puedes agregarle contenido de transmisión en vivo.
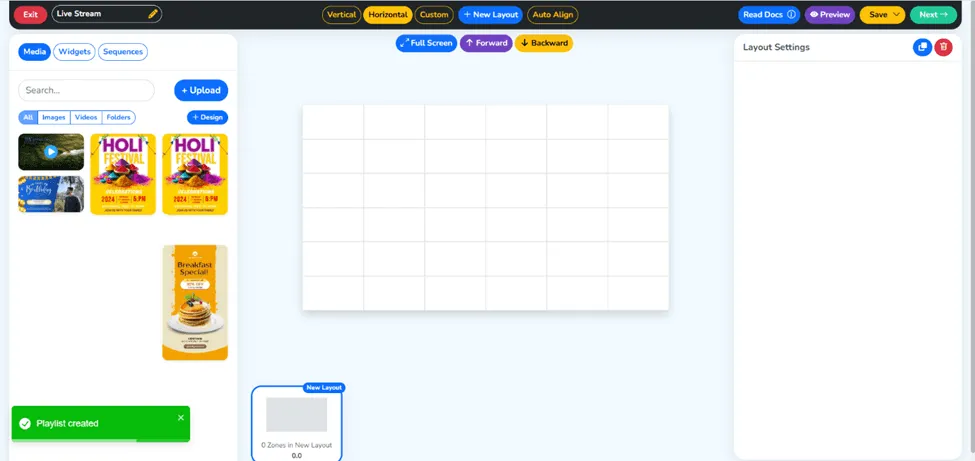
Paso 5: tu lista de reproducción ha sido creada
Aparecerá un mensaje de éxito en pantalla que indica que tu nueva lista de reproducción se creó correctamente. Ya puedes verla en tu biblioteca de listas, configurada y lista para empezar a agregar widgets de transmisión en vivo y otro contenido.
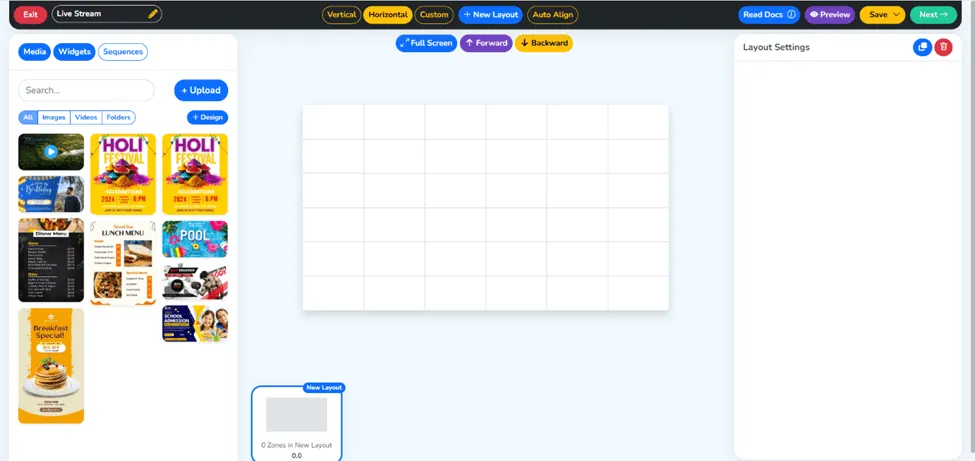
Paso 6: ve a la sección de widgets
Entra a la sección de widgets en el menú principal. Los widgets son los elementos que componen el contenido de tu señalización digital. Wilyer ofrece una amplia variedad de tipos de widget, como relojes, clima, feeds RSS, páginas web y transmisiones en vivo.
Paso 7: entra a Live Stream
Dentro de la sección de widgets, ubica y pulsa el widget Live Stream (Transmisión en vivo). Este widget está diseñado específicamente para conectarse a una URL de IPTV o HLS, de modo que puedas transmitir cualquier canal de televisión en vivo a tu pantalla de señalización digital.
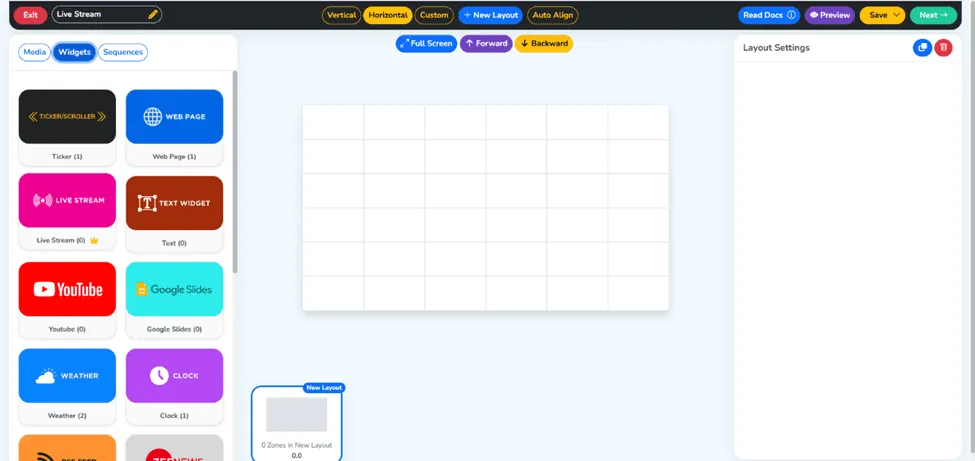
Paso 8: haz clic en el botón «Create» para crear un widget nuevo
Para empezar a configurar tu widget de transmisión en vivo, haz clic en el botón «Create New Widget» (Crear widget nuevo). Se abrirá un formulario de configuración que te pedirá el nombre del widget y la URL de la transmisión en vivo que quieres mostrar en tu pantalla de señalización.
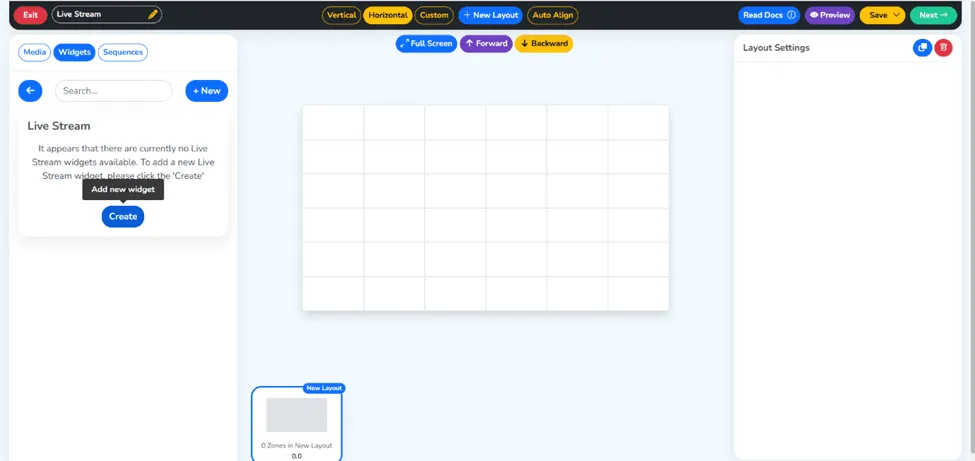
Paso 9: agrega el nombre del widget y la URL de la transmisión
Ponle a tu widget un nombre que puedas identificar fácilmente más adelante. Después, escribe la URL de tu transmisión en vivo en formato HLS en el campo Stream URL. Esa URL es el enlace directo al canal en vivo que quieres mostrar.
URL de transmisión de ejemplo: aajtaklive-amd.akamaized.net/hls/live/2014416/aajtak/aajtaklive/live_720p/chunks.m3u8
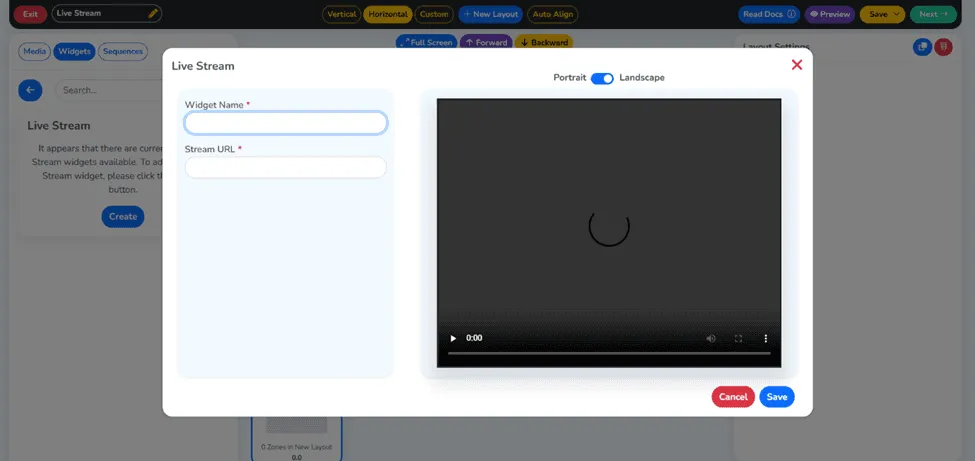
Paso 10: haz clic en el botón Save
Una vez que hayas escrito el nombre del widget y la URL de transmisión correcta, usa el botón «Save» (Guardar) para guardar tu configuración de transmisión en vivo como widget. Antes de guardar, revisa dos veces que la URL sea válida y esté funcionando, para que se reproduzca sin interrupciones en tu pantalla.
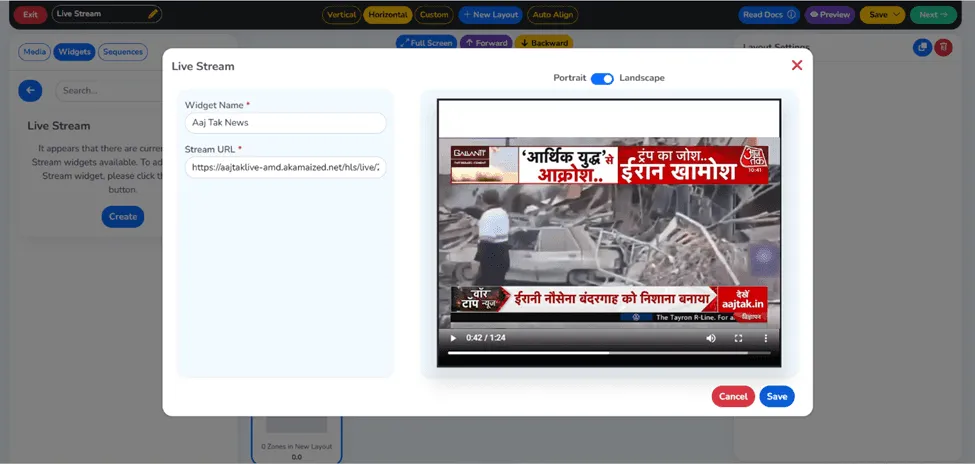
Paso 11: el widget se creó correctamente
Tu widget de transmisión en vivo quedará creado y recibirás una notificación de éxito. Ya está guardado en tu biblioteca de widgets y disponible para agregarlo a cualquier lista de reproducción. Puedes reutilizar el widget en otras listas y pantallas cuando quieras.
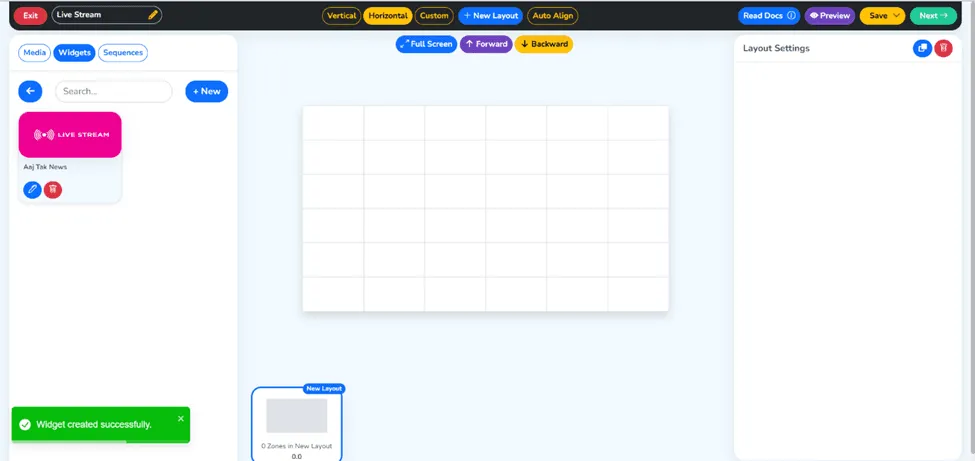
Paso 12: arrastra y suelta el widget de transmisión en vivo
Vuelve al editor de tu lista de reproducción y arrastra el widget de transmisión en vivo recién creado desde la biblioteca de widgets hacia tu lista. Al agregarlo, la transmisión en vivo pasa a ser un elemento de contenido activo que se ejecutará en tu pantalla de señalización.
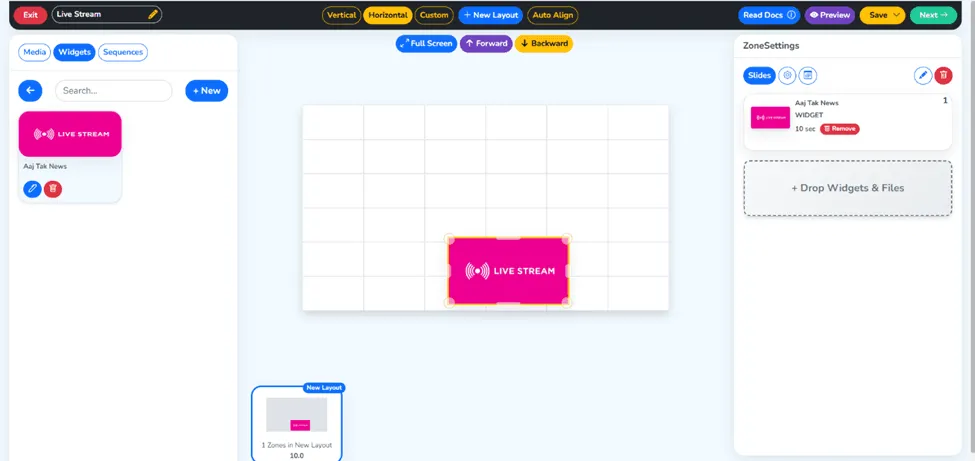
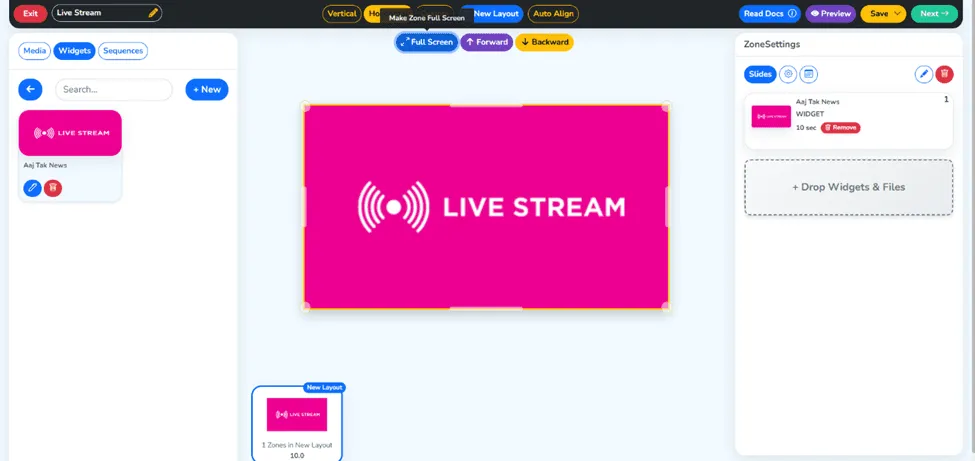
Paso 13: haz clic en Pantalla completa
Para que la transmisión en vivo ocupe toda la pantalla, selecciona la opción «Full screen» (Pantalla completa) en el editor de la lista de reproducción. Esto elimina los bordes o márgenes en blanco y le ofrece a tu público una experiencia de transmisión en vivo limpia e inmersiva a pantalla completa.
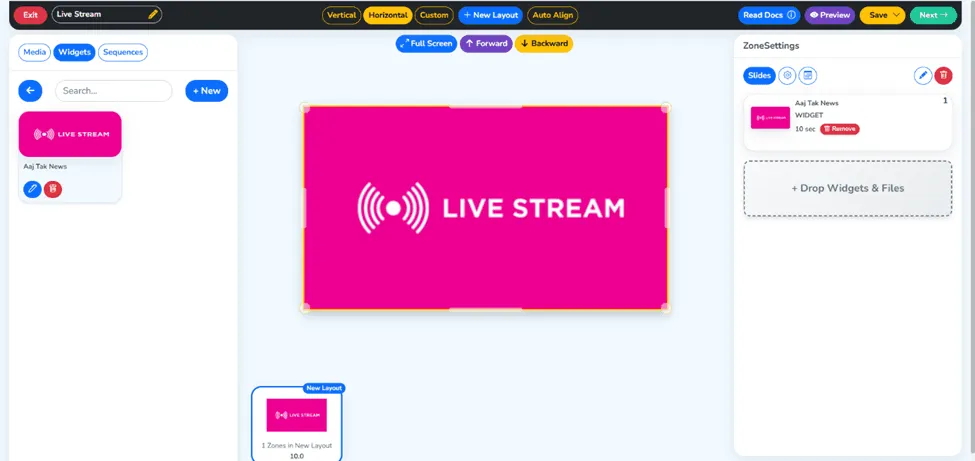
Paso 14: haz clic en el botón «Next» en la parte superior derecha
Después de armar el diseño de tu lista de reproducción y dejar el widget de transmisión en vivo a pantalla completa, pulsa el botón «Next» (Siguiente) en la esquina superior derecha del editor. Eso te lleva al paso de selección de pantallas y publicación.
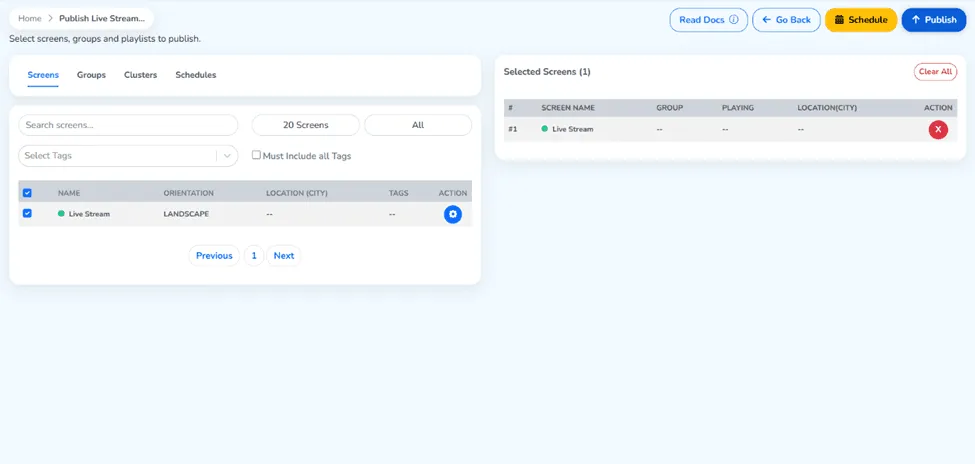
Paso 15: elige tu pantalla y haz clic en el botón «Publish»
Elige la pantalla o las pantallas de señalización digital donde quieres que aparezca el canal de televisión en vivo. Una vez seleccionada la pantalla de destino, haz clic en el botón «Publish» (Publicar) y la lista de reproducción con la transmisión en vivo se enviará al dispositivo elegido.
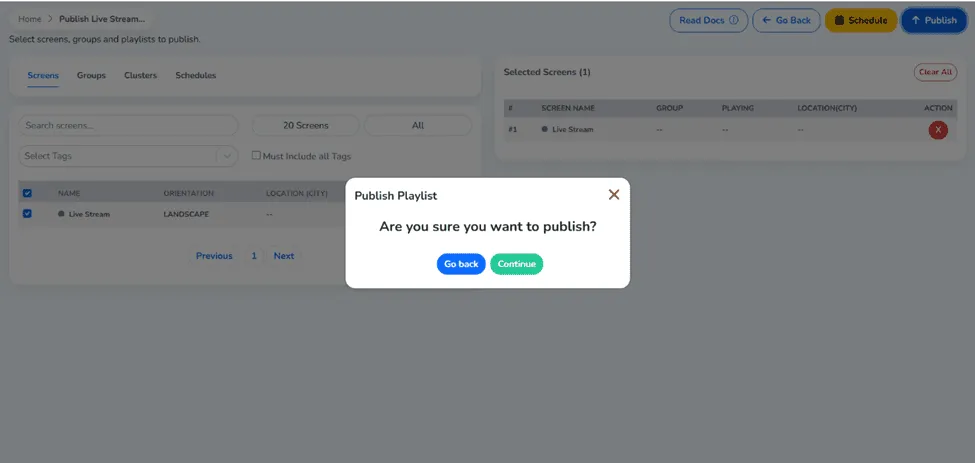
Paso 16: haz clic en «Continue» para publicar
Se abrirá un cuadro de información que confirma lo que estás por publicar. Revisa los detalles para asegurarte de que nada quedó mal. Después continúa con la publicación para terminar de vincular tu contenido en vivo con la pantalla de señalización digital elegida.
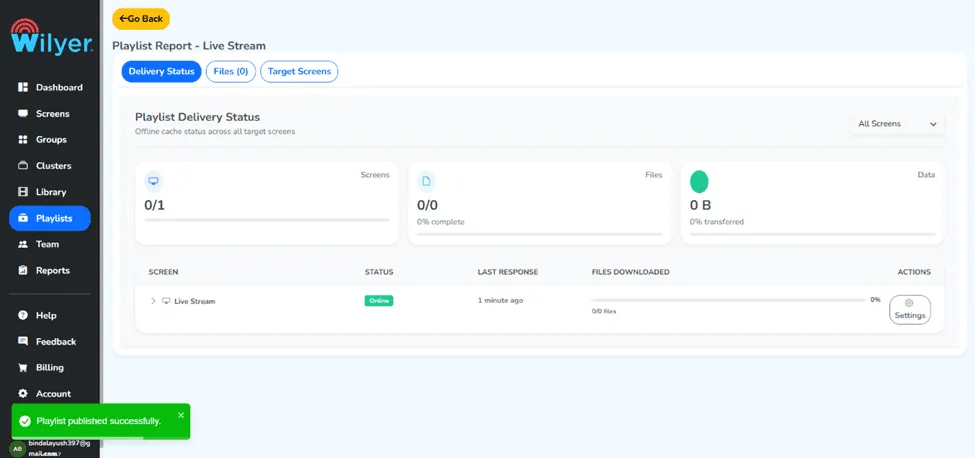
Paso 17: tu lista de reproducción en vivo se publicó correctamente
Verás un mensaje final de éxito que indica que tu lista de reproducción con transmisión en vivo se publicó correctamente. La pantalla de señalización digital arrancará automáticamente y mostrará el canal de TV en vivo en tiempo real, llegando a tu público al instante y sin demoras.
Paso final: la transmisión en vivo se reproduce en tu pantalla de señalización digital
Este es el resultado final de tu configuración. La pantalla de señalización digital ya está transmitiendo tu canal IPTV en vivo tal como lo configuraste. La transmisión está disponible en tiempo real y se ve directamente en tu pantalla, sin hardware adicional.

Por qué transmitir TV en vivo en señalización digital
Mostrar canales de televisión en vivo en pantallas de señalización digital tiene varias ventajas concretas:
- Mantén a tu público enganchado: las noticias, los deportes y el entretenimiento en vivo resultan mucho más interesantes que las imágenes estáticas.
- Actualizaciones en tiempo real: la transmisión en vivo garantiza que tu contenido siempre sea pertinente
- Apariencia profesional: una transmisión en vivo en pantalla mejora el aspecto de cualquier sala de espera, vestíbulo o área pública.
- Casos de uso versátiles: restaurantes, gimnasios, aeropuertos, hospitales, oficinas… la TV en vivo cabe en cualquier lugar.
Conclusión
Transmitir un canal de TV en vivo en tu pantalla de señalización digital no es tan difícil como parece. Con el CMS de señalización digital de Wilyer, todo el procedimiento - desde crear una lista de reproducción hasta llegar a una transmisión IPTV en vivo - toma unos pocos minutos.
Con este tutorial paso a paso de canales en vivo en señalización digital, ya puedes transmitir cualquier televisión en vivo en cualquiera de las pantallas de tu red. Sea un noticiero, un evento deportivo o un feed IPTV tradicional, ahora todas tus pantallas de señalización son capaces de mostrar contenido en vivo.