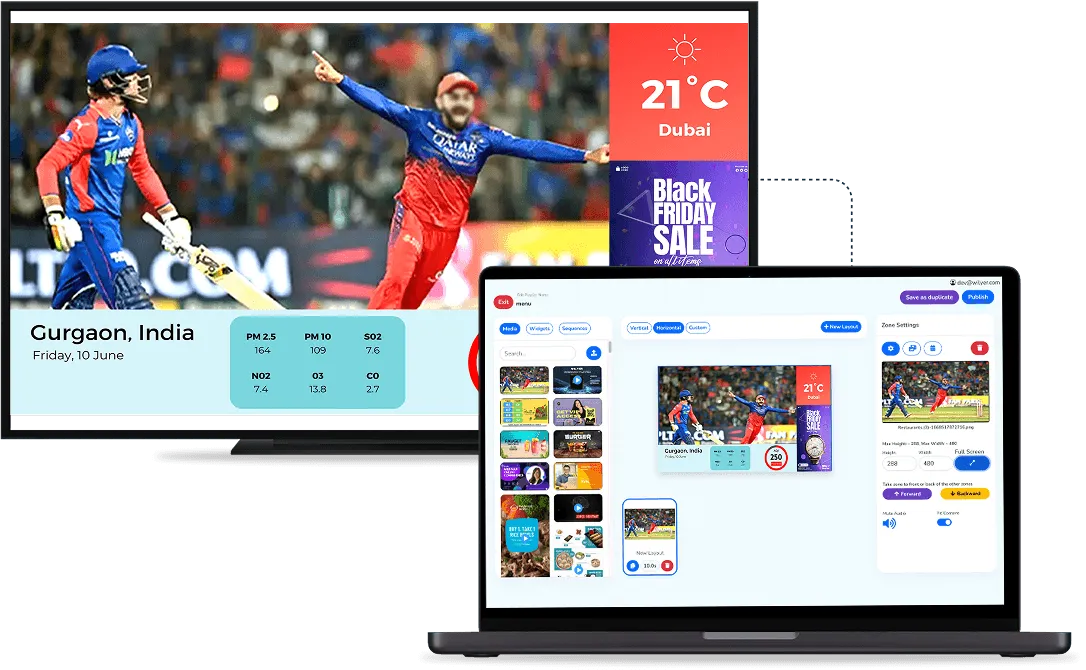
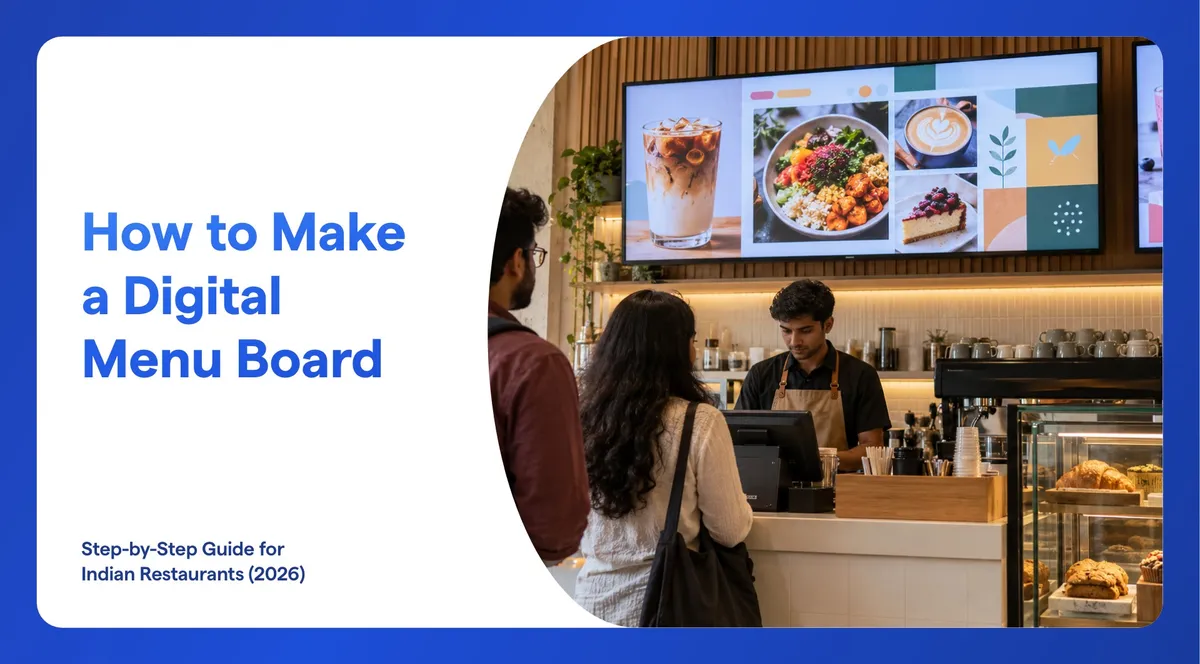
To make a digital menu board, plan 8 to 10 items per screen and pick landscape or portrait for your counter. Design the menu from a template, size the prices so they read from the queue and add veg marks and ₹ prices. Then build the screen layout with a menu zone and an offer zone, give each meal its own hours and check the board from where customers stand. This guide does each step in Wilyer, with screenshots.
What Does a Good Digital Menu Board Show?
Categories, dish names, prices, one strong photo per section and a small zone for today's offer. A good balance is about two-thirds text and one-third pictures (Yodeck). Keep each screen to 8 to 10 items and rotate categories rather than squeezing in more (Petpooja). A customer should find the category, the dish and its price in about three seconds.
Step 1: Plan Your Items and Categories
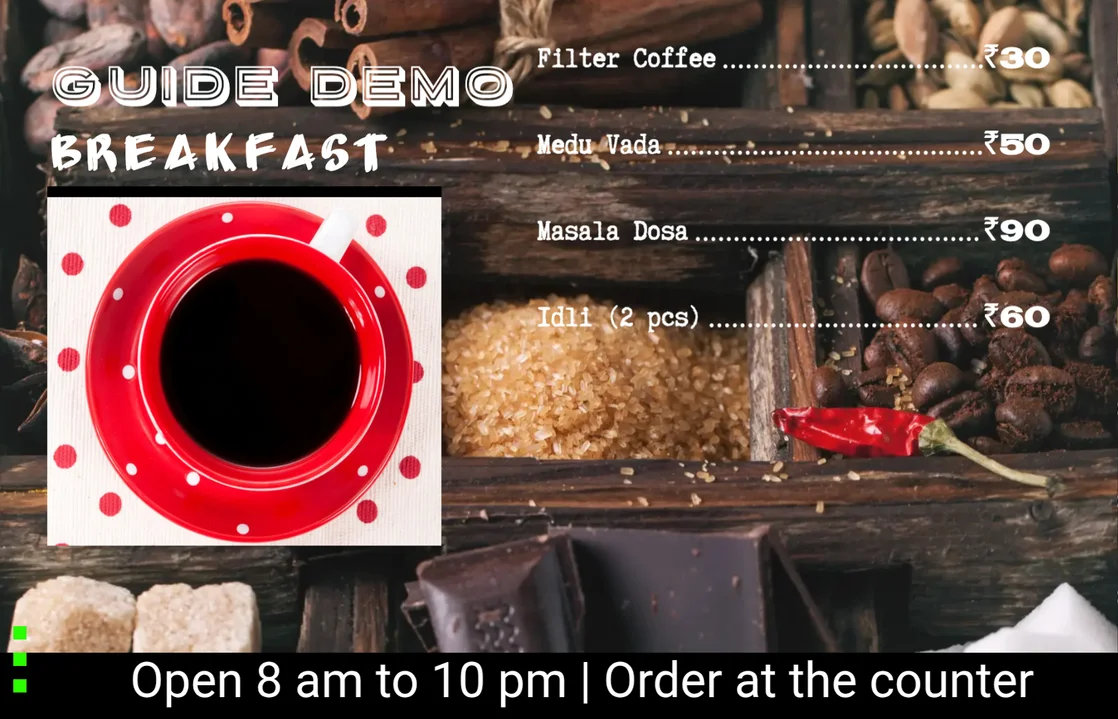
Cut the list before you design anything. Take an Indian café as an example: breakfast is South Indian (filter coffee, medu vada, masala dosa, idli), lunch is thalis and combos, and the evening is chai and snacks. That is three menus of 6 to 10 items each, not one screen with 30 dishes. Put your best sellers and highest-margin dishes first in each category, and give each meal one hero photo.
Step 2: Choose Landscape or Portrait
Use landscape for a wide counter or a row of screens side by side. Use portrait for a narrow wall, an entrance or a drinks menu. One caution: hanging a home TV in portrait can affect its warranty, so check before you buy or use a commercial display (smart TV or commercial display). Rotating the screen itself is covered in our vertical menu board guide.
Step 3: Design the Menu From a Template
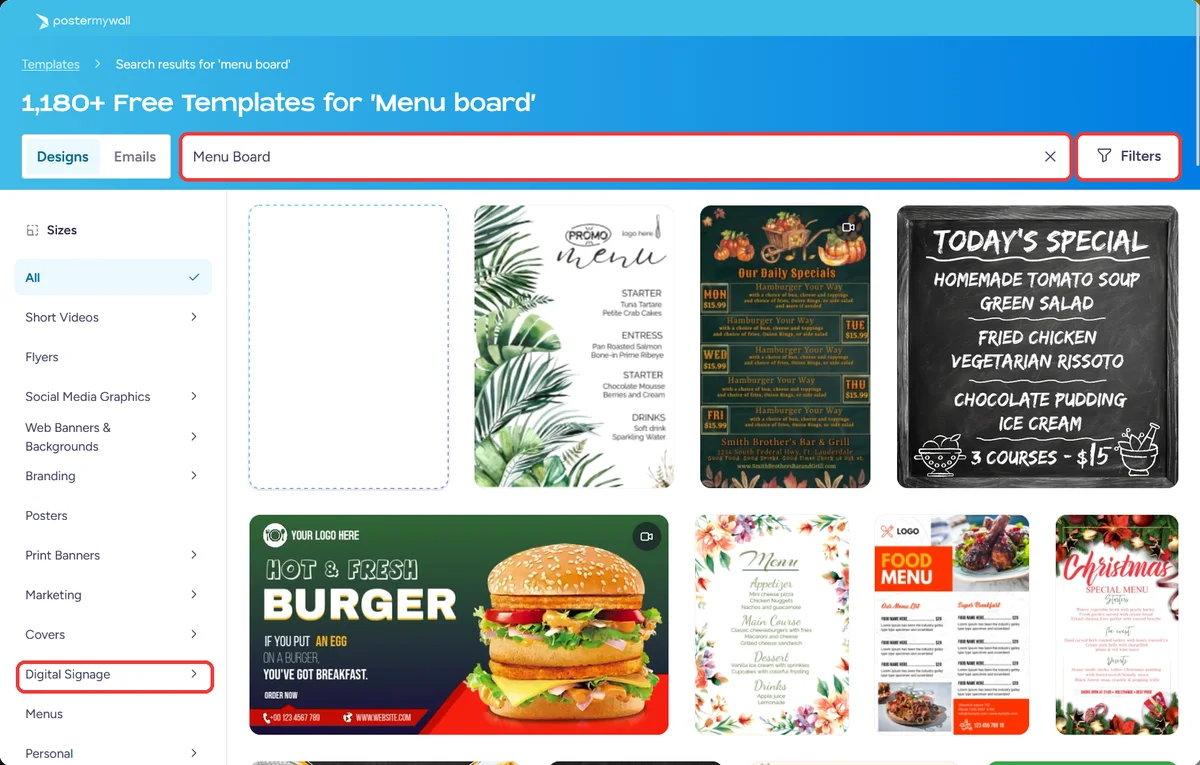
Wilyer has a design editor built in, powered by PosterMyWall, with ready menu templates. Go to Library, click + Create Design and search for "menu board". Under Filters, choose Images as the type (so you get a still design) and Digital Signage as the size, then Digital Display (16:9) for a landscape TV.
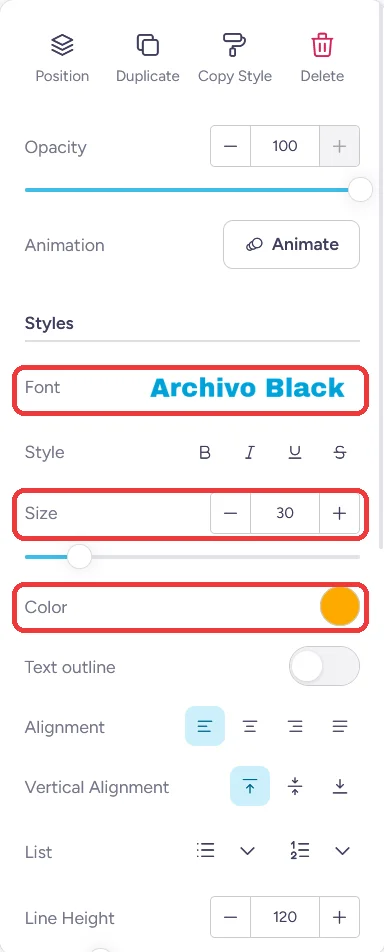
Many menu templates use a ready menu block. Double-click it, choose Update Menu, then + Add item and type the name, price and a short description. You can type the ₹ sign straight into the price. In the Selection tab, tick the items this board should show and drag them into order, because new items are added at the top. To change how the text looks, select it and set the font, size and colour in the panel on the right.
When the design is ready, click Export. Export is how you save: it puts the design into your Wilyer library. Rename it there so you can find it later (Library, list view, the pencil icon).
Step 4: Size the Text So It Reads From the Queue
Allow about 2.5 cm of letter height for every 3 metres between the screen and the customer. That is Yodeck's rule of one inch per ten feet, converted. Make prices as large as dish names, use no more than two fonts, and keep the contrast between text and background at 4.5:1 or more (WCAG). Light text on a dark, plain background works better than mid-grey text over a photo.
| Distance to the screen | Capital letter height | On a 43-inch 1920 × 1080 screen |
|---|---|---|
| 2 metres (a small café counter) | About 1.7 cm | About 34 pixels tall |
| 3 metres (a typical queue) | About 2.5 cm | About 50 pixels tall |
| 4.5 metres (a large hall) | About 3.8 cm | About 76 pixels tall |
The pixel column is our own conversion for a 43-inch screen, whose picture is about 53.5 cm tall. On a bigger screen you need fewer pixels for the same letter height.
Step 5: Add ₹ Prices and the FSSAI Marks
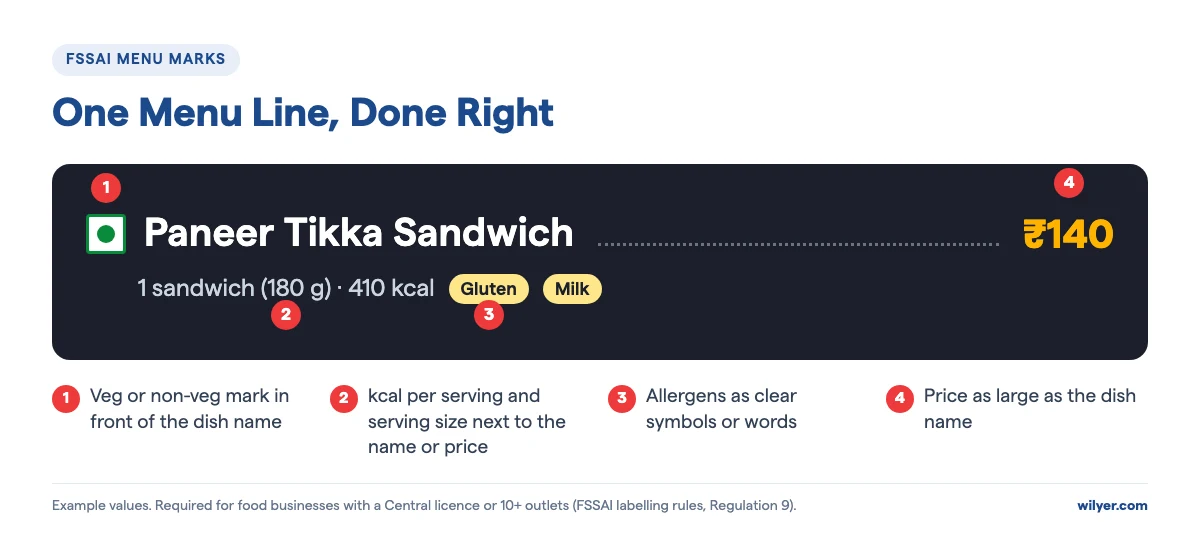
Write prices as plain numbers with the ₹ sign, and check that your font has the ₹ glyph. Each menu line should carry the veg or non-veg mark in front of the dish name. If your business has a Central licence or 10 or more outlets, FSSAI's labelling rules also require the kcal per serving and the serving size next to the name or price, plus allergen information. They also require a line such as "An average active adult requires 2,000 kcal energy per day, however, calorie needs may vary" (FSSAI guidance note). A ticker along the bottom is a good home for that line. Our menu board cost guide explains who the rule covers.
Do not show a service charge as compulsory on the board. Since 2022, central consumer guidelines say a service charge cannot be added by default.
Step 6: Build the Screen Layout With a Menu Zone and an Offer Zone
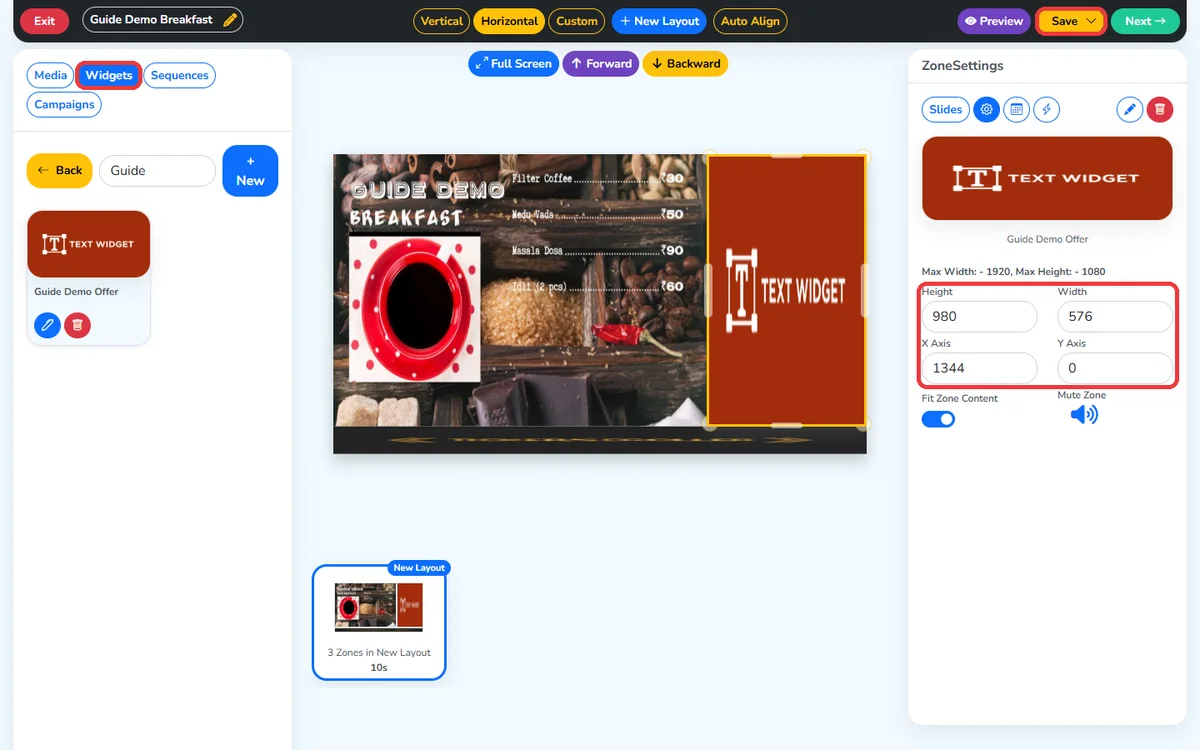
Go to Playlists, click + New Playlist and name it after the meal, for example Breakfast. It opens straight into the layout editor at 1920 × 1080. Drag your menu design onto the empty canvas to create the first zone, then set its exact size in Zone Settings (the gear icon): Width, Height and the X and Y position. Turn on Fit Zone Content so the design fills the zone.
A layout that works on most counters: the menu takes about 70% of the screen (1344 × 980 at X 0, Y 0) and today's offer sits on the right (576 × 980 at X 1344). A ticker runs along the bottom (1920 × 100 at Y 980). Make the offer under Widgets, Text, + New, and the ticker under Widgets, Ticker, + New, then drag each one onto an empty part of the canvas.
Step 7: Add a Second Language (optional)
Wilyer can show your menu in more than one language. Put Hindi or your state's language above the English name, use a font that includes the script, and check the result on the real screen, because some fonts drop letters in Indian scripts.
Step 8: Schedule Breakfast, Lunch and Dinner
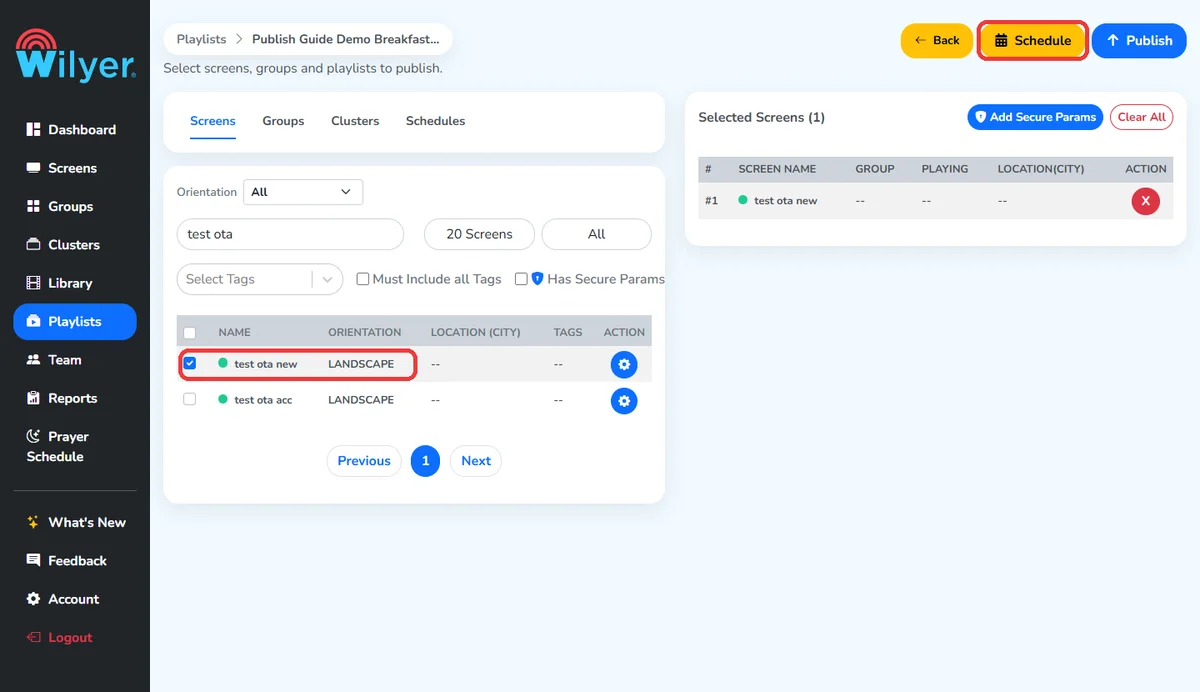
Make one playlist for each meal, each with its own menu design. You give each one its hours when you publish it. Click Next in the layout editor, select the screen, and click Schedule.
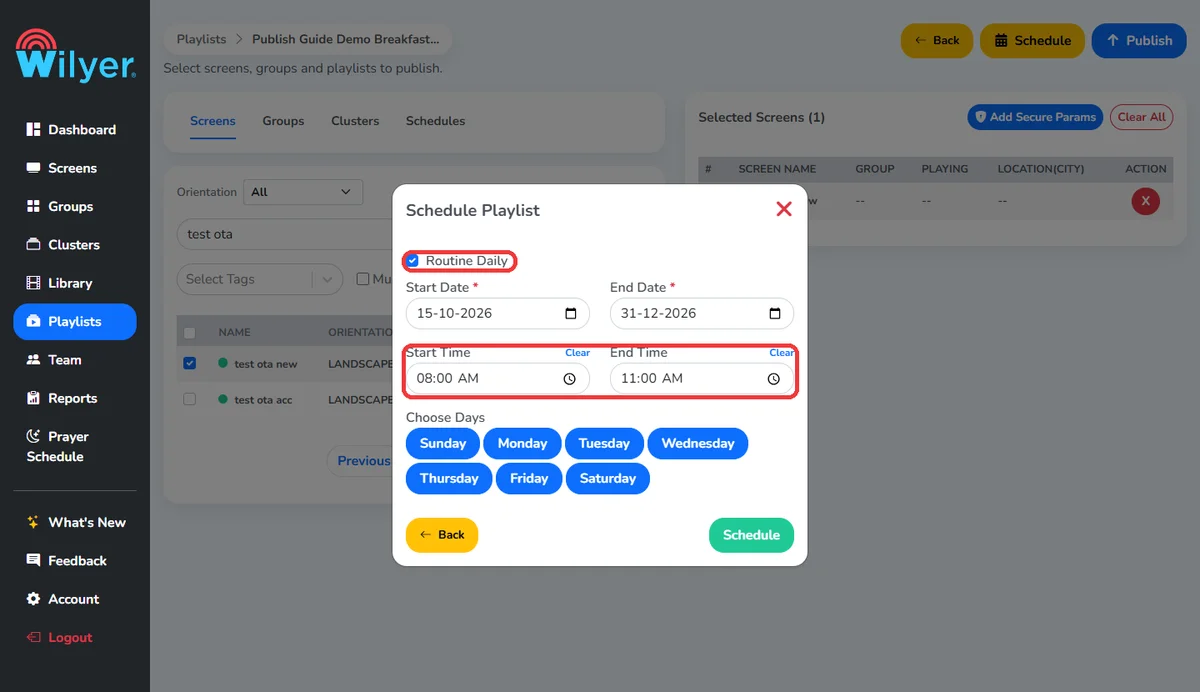
Tick Routine Daily, set the start and end dates, and set the hours, for example 8:00 to 11:00 for breakfast, 11:00 to 15:00 for lunch and 15:00 to closing for the evening menu. Choose the days, click Schedule, then Publish. Repeat for each meal on the same screen. For a festival menu, set an end date so it stops on its own: see our Diwali menu ideas.
Step 9: Publish and Test From the Queue
Stand where your customers stand and run the three-second test: can you find the category, the dish and the price in about three seconds? Check that nothing is cut off, that photos are not stretched and that the offer and ticker read clearly. Publish to one outlet first, then to a group of outlets once it looks right.
The Wilyer app keeps playing your menu from the screen's own storage if the internet drops, and it starts again by itself when the power comes back. The cost guide covers what to budget for power cuts.
Common Mistakes to Avoid
- Too many items: more than 10 on one screen, so nothing can be read.
- Small prices: prices smaller than dish names, or tucked into a corner.
- Grey text over photos: it fails the 4.5:1 contrast check on a bright screen.
- Stretched images: design at 16:9 for landscape and turn on Fit Zone Content.
- Dropping onto an existing zone: it adds a slide to that zone instead of making a new one, so drop new items onto empty canvas.
- No end date on festival offers: the Diwali combo is still showing in January.
Frequently Asked Questions
How Long Does It Take to Make a Digital Menu Board?
About 30 minutes for the first screen once the TV is paired, in our experience: most of that is choosing a template and typing your dishes and prices. Each extra meal's menu takes a few minutes more.
Can I Make a Digital Menu Board for Free?
You can design one for free in Canva or PowerPoint and play it from a USB stick, but every price change then means a new file and a trip to the TV. Switching menus by time of day and updating screens remotely need signage software. Wilyer's free trial covers 15 screens for 14 days with no card.
What Size Should a Digital Menu Board Be in Pixels?
1920 × 1080 pixels for a landscape Full HD screen, or 1080 × 1920 for portrait. Wilyer's layout editor starts at 1920 × 1080 and has a Vertical preset for portrait screens.
Can the Menu Change by Time of Day Automatically?
Yes. Make one playlist for each meal and give each its own daily time window when you publish it to the screen, for example 8:00 to 11:00 for breakfast. The screen switches menus on its own.
Do I Need a Special TV?
No. A smart TV with the Wilyer app works, and a TV that is not smart needs a small media player. If the screen will run 16 hours or more a day or hang in portrait, a commercial display is the safer choice.
Do I Have to Show Calories on My Menu Board?
Only if your food business has a Central licence or 10 or more outlets. FSSAI's labelling rules then require kcal per serving and serving size, a 2,000 kcal statement, allergen information and the veg or non-veg mark. FSSAI's guidance treats smaller outlets with a state licence as exempt.
Getting Started
Start with one screen and one meal, test it from the queue, then add the rest. Watch our two-minute menu board video to see it in action, read more about Wilyer digital menu board software, start a free trial with 15 screens for 14 days, or book a demo. Running your menu on a Fire TV Stick? See the Fire TV menu board guide.